Do you remember a night where you were looking up at the sky and saw all the twinkling stars above? Maybe you even saw a shooting star once – that magical moment when a bright streak of light dances across the darkness, making you close your eyes and whisper a secret wish. Has that beautiful sight ever inspired you to draw a shooting star in your notebook, journal, or sketch pad, but then you realized you weren’t sure how to make it look cute and magical?
I absolutely love drawing celestial objects, especially shooting stars! There’s something so enchanting about capturing that moment of wonder and magic on paper. Whether you spotted a real shooting star during a camping trip or you’re dreaming of magical night skies, this step-by-step tutorial will teach you how to draw the most adorable shooting star that’s bursting with personality and charm.
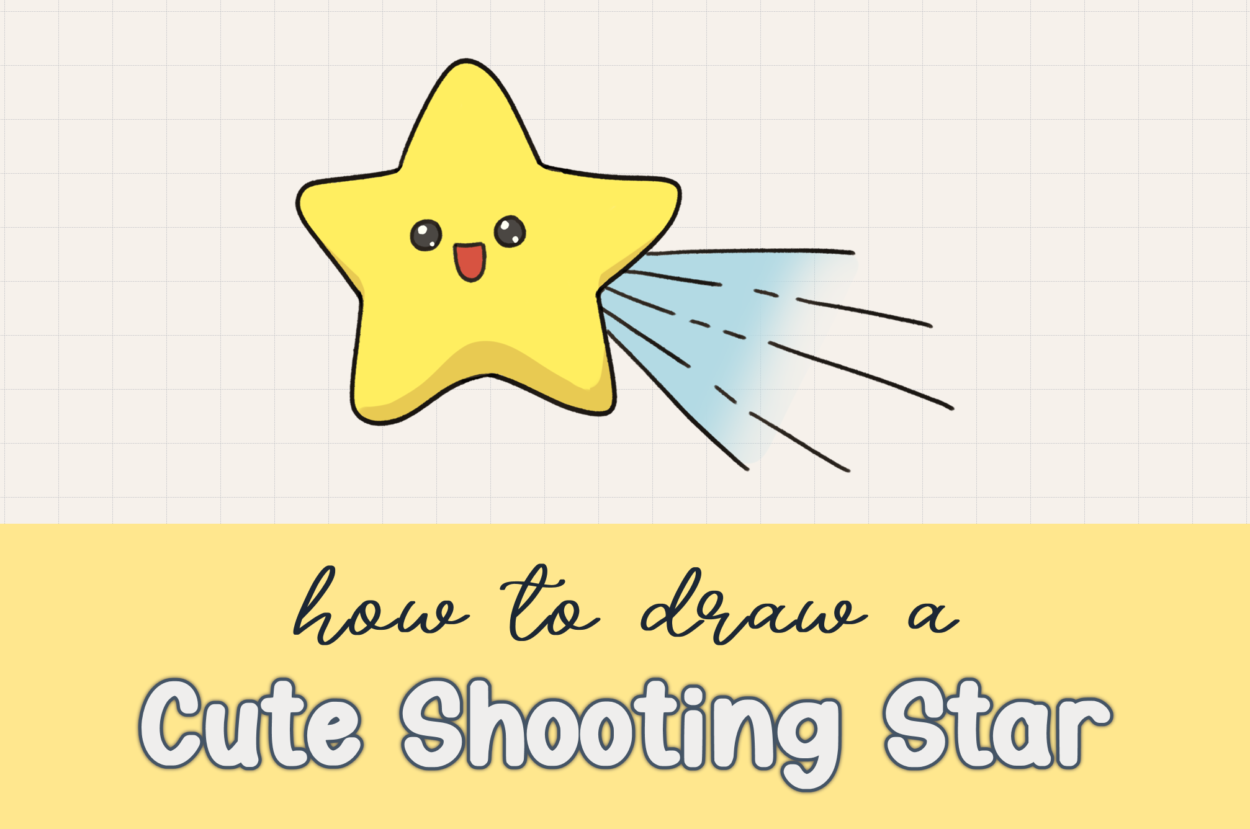
In this beginner-friendly draw-along tutorial, I’ll show you how to transform simple geometric shapes into a cute shooting star complete with a happy face and a beautiful trailing effect. The best part? You don’t need to be an experienced artist – just bring your enthusiasm and let’s create some magic together!
What You’ll Learn in This Shooting Star Tutorial
- How to use basic geometric shapes to create perfect star proportions
- Step-by-step techniques for drawing symmetrical stars without stress
- Adding personality with expressive kawaii-style facial features
- Creating dynamic motion effects with star trails
- Professional coloring techniques including fading, highlights, and shadows
- How to make your drawings come alive with depth and dimension
Why Draw a Cute Shooting Star?
Shooting stars represent hope, dreams, and magical moments – perfect subjects for spreading joy through art! Learning to draw a cute shooting star teaches you:
- Geometric shape mastery that applies to countless other drawings
- Symmetry techniques essential for character design
- Motion illustration that brings static drawings to life
- Color blending basics for creating beautiful effects
- Kawaii style fundamentals for making anything adorable
Plus, shooting stars are incredibly versatile! You can use them in night scene illustrations, greeting cards, stickers, or as decorative elements in your art journal.
Materials You’ll Need for Your Shooting Star
For Digital Drawing:
- Drawing tablet (iPad with Apple Pencil works wonderfully)
- Procreate, Adobe Fresco, or similar drawing app
- Basic round brush for outlining
- Soft airbrush for the trailing effect
For Traditional Drawing:
- Pencil for initial sketching
- Black fine-tip marker or pen for clean lines
- Colored pencils, crayons, or markers (yellow, black, red, light blue, white)
- Good eraser for cleanup and special effects
- Optional: blending stump for smooth color transitions
The beauty of this tutorial is that it works with any materials you have at home – from basic school supplies to professional art tools!
Step-by-Step Guide: How to Draw a Cute Shooting Star
Step 1: Understand the Star Foundation
Before we start drawing, let’s break down what makes a star shape work. The secret to drawing a beautiful, symmetrical star is to think of it as a pentagon with rounded triangles on each side. This approach takes all the guesswork out of star drawing and ensures your star looks balanced and professional.
Many people struggle with drawing stars because they try to create the pointed shape freehand, which often results in uneven or lopsided stars. By using our pentagon foundation method, you’ll get perfect proportions every time!
Step 2: Draw Your Pentagon Foundation
Start by drawing a pentagon (a five-sided shape) in the center of your paper. Don’t worry about making it absolutely perfect – a slightly imperfect pentagon will actually make your final star look more natural and charming.
Think of this pentagon as the “body” of your star. All the star points will extend outward from these five sides, so make your pentagon a comfortable size that leaves room for the points to extend.
Pro tip: If you’re struggling with the pentagon shape, you can lightly sketch a circle first and mark five evenly spaced points around it, then connect those points to form your pentagon.
Step 3: Add the Star Points (Rounded Triangles)
Now comes the fun part! On each side of your pentagon, we’re going to add rounded triangles that will become our star points.
Instead of drawing sharp, pointed triangles, we’ll round out the tips to give our star a softer, more approachable appearance. This is what transforms a standard geometric star into a cute, kawaii-style character!
For each triangle:
- Start from one corner of a pentagon side
- Draw a curved line outward and up
- Draw another curved line back down to the next corner
- The tip should be rounded, not sharp
Repeat this process for all five sides of your pentagon.
Step 4: Clean Up Your Star Shape
Once you have all five rounded triangles attached to your pentagon, it’s time to erase the pentagon lines to reveal your beautiful star shape.
Carefully erase the original pentagon lines, leaving only the outer star shape visible. If you need to clean up some of your lines or adjust the curves, feel free to do so – but remember that you don’t need perfect lines to make a good drawing! Small imperfections actually add character and charm to hand-drawn artwork.
Step 5: Add a Cute Face
This is where our shooting star transforms from a simple shape into an adorable character! We’re going to add a kawaii-style face that will make your star absolutely irresistible.
Drawing the eyes:
- Draw two large circles in the upper-middle area of your star
- Make them fairly big – large eyes are a key element of cute character design
- Space them evenly apart, leaving room for other facial features
Adding the smile:
- Draw a simple curved line underneath the eyes to create a happy, smiling mouth
- Make it a gentle curve that conveys warmth and friendliness
- The smile should be proportional to the eyes – not too big or too small
The facial expression you choose sets the entire mood of your shooting star. A gentle, happy face makes the star feel welcoming and magical!
Step 6: Create the Star Trail (The Magic!)
No shooting star is complete without its signature trailing effect! This is what gives our star the sense of movement and magic as it streaks across the sky.
Drawing the trail:
- Choose one of the star points (usually works best from a corner or side point)
- Draw several curved lines extending outward from that point
- Make the lines flow in the same direction, as if the star is moving through space
- Vary the length of the lines – some longer, some shorter for a more natural look
The trail should look like it’s flowing behind the star as it moves. Think of how a comet’s tail streams behind it, or how a sparkler leaves trails of light in the air.
Step 7: Bring Your Star to Life with Color
Coloring is where the real magic happens! We’ll use colors and shading techniques that make your shooting star glow with life and dimension.
Coloring the star body:
- Fill the entire star shape with a bright, cheerful yellow
- Yellow represents light, happiness, and celestial magic
- Make sure to color evenly within your lines
Adding the facial features:
- Color the eyes with solid black
- Fill the mouth with a warm red color
- These contrasting colors make the facial features pop against the yellow
Creating the magical trail:
- Color the trail lines with a light, soft blue
- Blue suggests the night sky and creates a beautiful contrast with the warm yellow star
Step 8: Advanced Coloring Techniques
Now let’s add some professional touches that will make your shooting star truly spectacular!
Creating the fading trail effect: This technique makes the trail look like it’s dissolving into the night sky:
- As you color toward the end of each trail line, lighten your pressure gradually
- If using traditional materials, press lighter with your crayon or marker
- For an even smoother effect, you can lightly erase the ends after coloring
- The goal is to make the trail appear to fade from solid color to nothing
Adding eye highlights:
- Use white (white colored pencil, correction pen, or leave white spaces)
- Add one larger white dot and one smaller white dot in each eye
- Position them in the same place in both eyes for consistency
- This makes the eyes look shiny and brings your character to life!
Creating depth with shadows:
- Use a darker yellow (or mix yellow with a tiny bit of brown/orange)
- Add shadows at the bottom of your star and under the left and right points
- These shadows give your star dimension and make it appear to be floating in space
- Keep shadows soft and subtle – we want depth, not harsh contrast
Color Variations to Try
While yellow is the classic shooting star color, feel free to experiment with these magical alternatives:
- Silver and white for an elegant, moonlight effect
- Pink and purple for a dreamy, fantasy feel
- Gold and orange for a warm, sunset-inspired look
- Blue and white for an icy, winter star
- Rainbow gradient for ultimate magical fun!
For the trail, consider these complementary colors:
- Purple trail with yellow star (beautiful contrast)
- Pink trail with blue star (cotton candy vibes)
- Orange trail with purple star (sunset magic)
Troubleshooting Common Issues
Problem: My star points look uneven
Solution: Remember that slight imperfections add character! If it really bothers you, lightly sketch guidelines or use the pentagon method more carefully.
Problem: The pentagon still shows through my star
Solution: Make sure you’ve erased all the construction lines. If some are stubborn, try using a kneaded eraser or gently going over them with your background color.
Problem: My trail doesn’t look like it’s moving
Solution: Make sure all trail lines flow in the same direction and vary their lengths. The lines should feel dynamic, not static.
Problem: The fading effect isn’t working
Solution: Practice the pressure technique on scrap paper first. Start with normal pressure and gradually lighten as you move toward the end of each line.
The Magic Behind Shooting Star Wishes
Did you know that the tradition of making wishes on shooting stars dates back thousands of years? Ancient cultures believed that shooting stars were messages from the gods or souls traveling to the afterlife. Today, we still feel that sense of magic when we see a streak of light across the night sky!
What makes shooting stars (or meteors) even more amazing is that they’re actually tiny pieces of space rock burning up in our atmosphere – turning a scientific phenomenon into something that feels purely magical.
Creative Ways to Use Your Shooting Star Drawing
Once you’ve mastered this cute shooting star, here are some fun ways to use your new skill:
- Night sky scenes with multiple shooting stars
- Greeting cards for birthdays or encouragement
- Sticker designs for planners and journals
- Children’s book illustrations about dreams and wishes
- Digital avatars or profile pictures
- Embroidery patterns for fabric crafts
- T-shirt designs with inspirational messages
Frequently Asked Questions
Q: Can I make my shooting star bigger or smaller?
A: Absolutely! Just scale the pentagon foundation up or down. All the other proportions will scale naturally with it.
Q: What if I want to draw multiple shooting stars?
A: Great idea! Vary their sizes and have their trails going in different directions for a dynamic night sky scene.
Q: Can I add more details to my shooting star?
A: Of course! Try adding sparkles around it, a starry background, or even tiny hearts floating around for extra cuteness.
Q: How do I make the star look more three-dimensional?
A: Focus on the shadow placement and consider adding highlights on the upper parts of each star point.
Q: Is this suitable for young children?
A: Yes! The pentagon method makes it very accessible for kids, though they might need help with the more detailed coloring techniques.
Take Your Celestial Drawing Skills Further
Now that you’ve mastered the cute shooting star, explore these related tutorials:
- How to draw Christmas Mochi
https://drawcartoonstyle.com/how-to-draw-mochi-nomnomkawaii/ - How to draw a Christmas Tree with Lights
https://drawcartoonstyle.com/how-to-draw-a-christmas-tree-with-lights/ - How to draw a Unicorn with Wings https://drawcartoonstyle.com/how-to-draw-a-unicorn-with-wings/
Share Your Shooting Star Magic!
I’d absolutely love to see your shooting star creations! What wish would you make if you saw a real shooting star streaking across the night sky?
There’s something so special about drawing objects that represent hope and dreams. Every time you look at your cute shooting star drawing, let it remind you to keep believing in magic and never stop making wishes on the stars.
Remember, just like real shooting stars, your artwork has the power to inspire wonder and bring joy to others. Keep practicing, keep dreaming, and keep creating magical moments through your art!
More Magical Drawing Adventures
If you enjoyed learning how to draw this cute shooting star, visit DrawCartoonstyle.com for more enchanting drawing tutorials that will spark your creativity and help you bring your artistic dreams to life!
Keep reaching for the stars! 🌟✨
This post includes affiliate links. If you choose to purchase something, I may make a small commission at no extra cost to you. For more information, please read my Privacy Policy.
Leave a Comment