In the hustle and bustle of our daily lives, we often forget to give ourselves a moment to pause and celebrate all of our wins within that day. We rush from task to task, accomplishment to accomplishment, without taking the time to acknowledge our progress, pat ourselves on the back, or simply say “Good job!” Whether it’s finishing a project at work, cooking a delicious meal, helping a friend, learning something new, or even just getting through a challenging day – every achievement deserves recognition, no matter how big or small.
But what if we had a fun, creative way to remember and honor our accomplishments? What if we could create our own little cheerleader to celebrate with us whenever we achieve something meaningful?
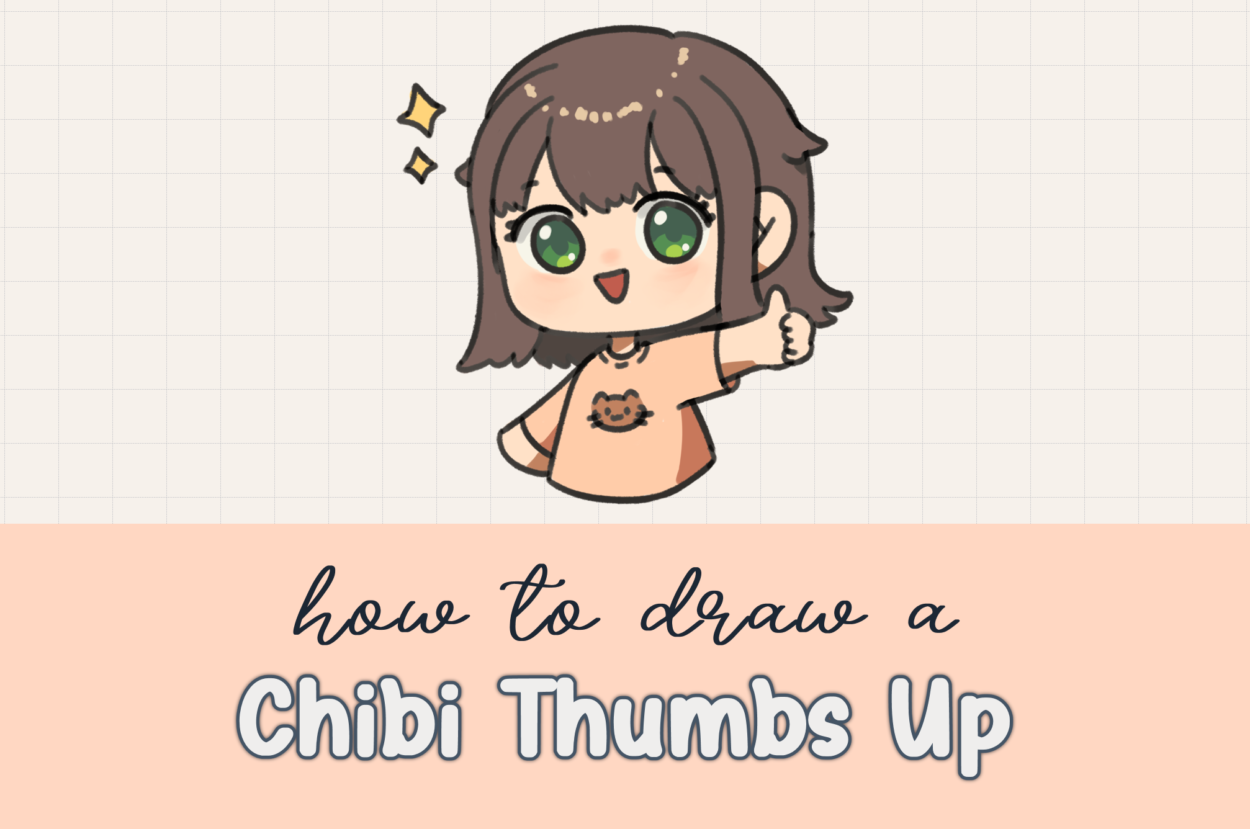
That’s exactly what inspired me to create this special tutorial – a chibi character giving an enthusiastic thumbs up! This adorable little drawing is designed to be your personal celebration companion. When you learn how to draw it, you can sketch it every time you accomplish something, giving yourself that precious moment to pause, smile, and celebrate your wins. It’s like having a tiny, encouraging friend who’s always ready to cheer you on and remind you that you’re doing great!
Table of Contents
What You’ll Learn in This Celebratory Drawing Tutorial
- How to break down chibi characters into simple, manageable shapes
- Step-by-step techniques for creating expressive, encouraging characters
- Methods for drawing the perfect thumbs-up gesture that radiates positivity
- Personalization options to make your chibi uniquely yours
- Professional coloring techniques with gradients, shadows, and highlights
- The art of creating characters that embody positive emotions
- How to use art as a tool for self-recognition and motivation
The Power of Visual Celebration
There’s something incredibly powerful about visual symbols of success and achievement. When we create art to celebrate our wins, we’re doing several important things:
- Making accomplishments tangible – drawing creates a physical record of our success
- Slowing down to appreciate – the act of drawing forces us to pause and reflect
- Building positive associations – we connect creativity with achievement
- Creating lasting reminders – our drawings become visual proof of our capabilities
- Practicing gratitude – celebrating small wins helps us appreciate our journey
Your chibi thumbs up drawing becomes more than just art – it’s a practice of self-care and positive reinforcement!
Understanding Chibi Character Design
Chibi is a Japanese term meaning “short” or “small,” and chibi art style is characterized by:
- Oversized heads (typically 1/3 to 1/2 of the total body height)
- Large, expressive eyes that convey emotion easily
- Simplified body proportions that emphasize cuteness
- Exaggerated expressions that communicate feelings clearly
- Playful, non-realistic anatomy that prioritizes charm over accuracy
These characteristics make chibi characters perfect for expressing positive emotions like celebration, encouragement, and joy!
Materials You’ll Need for Your Celebration Chibi
For Digital Drawing:
- Drawing tablet (iPad with Apple Pencil or similar)
- Procreate, Adobe Fresco, or your preferred drawing app
- Basic round brush for construction lines
- Fine-tip brush for details and final lines
For Traditional Drawing:
- Pencils (2H for light construction, 2B for final details)
- Fine-tip black markers or pens
- Colored pencils, markers, or crayons in these colors:
- Peach or pale pink (skin tone)
- Green (eyes, but choose your favorite!)
- Light brown (hair)
- Red (mouth)
- Peach (shirt)
- Dark orange (decorative elements)
- Yellow (sparkles and highlights)
- White (eye highlights and sparkles)
- Dark brown and light pink (shadows and blush)
- Good eraser for clean construction lines
This tutorial is designed to work beautifully with any art supplies you have available!
Step-by-Step Guide: How to Draw a Chibi Thumbs Up
Step 1: Break Down Your Chibi into Foundation Shapes
Chibis might look complex, but they’re actually built from very simple geometric shapes. Understanding this foundation makes drawing them much easier and more approachable!
The basic chibi blueprint:
- Head: Circle (the largest component)
- Ear: Half circle
- Neck: Short cylinder
- Body: Trapezoid (wider at shoulders, narrower at waist)
- Arms and hands: Cylinders of varying sizes
This shape-based approach works for drawing any chibi character – it’s your universal chibi construction method!
Step 2: Start with the Facial Foundation
Drawing the face guidelines:
- Begin with light construction lines to map out the face
- These don’t need to be perfect – they’re just to help you place features consistently
- Think of them as your helpful roadmap for facial feature placement
Adding the ear:
- Draw a simple ear shape on the side of the head
- Add a small “Y” shape in the middle to suggest the inner ear structure
- Keep it simple and proportional to the head size
Step 3: Create Expressive, Encouraging Eyes
The eyes are the heart of your chibi’s encouraging expression!
Basic eye structure:
- Draw two gentle curves in the middle of the face for the upper eyelids
- Below each curve, draw large circles for the eye shapes
- Make them quite big – large eyes are essential for that encouraging, friendly expression
Eye placement tip: Position the eyes so there’s about one eye-width of space between them. This creates a balanced, appealing face structure.
Step 4: Add the Smile and Eyebrows
Creating the encouraging smile:
- Draw a small, happy curved line below and between the eyes
- Keep it gentle and warm – we want a confident, encouraging expression
- The smile should suggest pride and satisfaction
Drawing supportive eyebrows:
- Add small eyebrow lines above each eye
- Position them to enhance the positive expression
- Slightly raised eyebrows can suggest enthusiasm and encouragement
Step 5: Construct the Celebratory Body
Building the neck:
- Draw two parallel lines extending down from the head
- Keep the neck short and proportional to the chibi style
- This connects the head to the body naturally
Creating the body shape:
- Draw a bell-like or trapezoid shape below the neck
- Make it wider at the shoulders and narrower toward the waist
- Keep it compact and cute – chibis have simplified, adorable proportions
Step 6: Draw the Star of the Show – The Thumbs Up!
This is the most important part of our drawing – the gesture that embodies celebration and achievement!
Drawing the left arm:
- Extend the left arm out from the body
- Keep it simple and proportional to the chibi’s small stature
Creating the perfect thumbs up:
- Draw the hand with the thumb pointing upward
- Make the thumb clearly visible and prominent
- The gesture should be unmistakable and enthusiastic
- This is your character’s way of saying “Great job!” or “You did it!”
Completing with the right arm:
- Add the right arm in a natural, relaxed position
- This balances the composition and makes the pose look natural
Clean up construction lines:
- Erase any overlapping or excess construction lines
- Clean lines help your encouraging message come through clearly
Step 7: Personalize Your Celebration Character
Now comes the fun part – making this chibi uniquely yours! Here are some ideas, or feel free to create your own personal style.
Hair styling options:
- Short and fluffy with bangs (like my example) for a youthful, energetic feel
- Long and flowing for elegance and grace
- Curly and bouncy for playful personality
- Ponytails or pigtails for sporty, active vibes
- Unique colors that represent your personality
Adding eyelashes:
- Small eyelashes can add charm and personality
- Keep them simple and proportional
- They can make your chibi look more polished and expressive
Shirt design and decoration:
- Add detail lines to show shirt structure
- Create a cute design on the shirt – I’m using a little cat face, but you could try:
- Your favorite animal
- A heart or star
- Your initials
- A symbol that represents something you love
- Inspirational words or symbols
Magical finishing touches:
- Add sparkles around your chibi for extra celebration magic
- These suggest the excitement and joy of achievement
- Vary the sizes for visual interest
Bringing Your Chibi to Life with Celebratory Colors
Coloring your chibi is where the personality and encouragement really shine through!
Base Colors for Warmth and Friendliness
Skin tone:
- Use peach or pale pink for the face, neck, and hands
- These warm tones suggest health, happiness, and approachability
- Apply evenly for a smooth, professional appearance
Eye whites:
- Fill in the basic eye shapes with white or very light gray
- This creates the foundation for adding the colorful irises later
Choosing Colors That Radiate Positivity
Eye color:
- I’m using green for a fresh, encouraging look
- Other great options:
- Blue: Trustworthy and calming
- Brown: Warm and reliable
- Purple: Creative and inspiring
- Amber: Energetic and confident
- Choose a color that feels encouraging and positive to you!
Hair color:
- Light brown creates a natural, approachable feel
- Consider colors that represent your personality or mood
- Fantasy colors are totally welcome for extra fun!
Clothing colors:
- Peach for the shirt creates harmony with the skin tone
- Choose colors that feel celebratory and happy to you
- Bright, clear colors often work well for encouraging characters
Decorative elements:
- Dark orange for the cat design (or whatever decoration you chose)
- Yellow for sparkles – yellow naturally suggests sunshine and happiness
Advanced Coloring: Adding Depth and Dimension
Creating gradient eyes:
- Add a darker color in the middle and top half of each eye
- Fill the bottom with a lighter version of your eye color
- This gradient effect makes eyes look dimensional and lively
Strategic shadow placement:
- Add shadows under the eyes for depth
- Shadow the skin around the neck and arms where natural shadows would fall
- Add shadows under the head area in the hair
- Place shadows on the shirt where fabric would naturally fold
Highlight magic:
- Add white highlights in the eyes for that sparkly, alive appearance
- Use light brown highlights in the hair for shine and dimension
- These small touches make a huge difference in the final appearance
The finishing glow:
- Add a light shade of pink on the cheeks and nose
- This creates a healthy, happy glow that suggests excitement and joy
- It’s the perfect finishing touch for a celebratory character
Creative Variations for Different Achievements
Once you’ve mastered the basic chibi thumbs up, customize it for different types of celebrations:
Academic achievements:
- Add graduation cap or books
- Include pencils or school supplies
- Use blue and gold colors for academic pride
Work accomplishments:
- Add a tiny briefcase or computer
- Include professional attire
- Use confident, business-appropriate colors
Creative victories:
- Add art supplies, musical notes, or writing tools
- Include rainbow colors or artistic splashes
- Show your chibi holding a paintbrush or instrument
Personal growth moments:
- Add symbols of self-care like hearts or flowers
- Use soft, nurturing colors
- Include elements that represent your personal journey
Fitness and health goals:
- Add sporty elements like water bottles or sneakers
- Use energetic, vibrant colors
- Show your chibi in athletic wear
Using Your Chibi for Daily Celebration
Weekly win journal:
- Draw your chibi thumbs up next to accomplishments in your planner
- Create a visual celebration log
- Watch your confidence grow as you see all your achievements
Digital celebrations:
- Use your chibi as a profile picture when you’ve achieved something
- Share it on social media to celebrate with friends
- Create digital stickers for your devices
Gift and card applications:
- Draw your chibi on congratulations cards for others
- Use it to celebrate friends’ and family’s achievements
- Spread the encouragement and positive energy
The Psychology of Self-Celebration
Research shows that celebrating small wins has powerful psychological benefits:
- Increased motivation to continue working toward goals
- Improved self-confidence and self-efficacy
- Better stress management through positive reinforcement
- Enhanced resilience when facing challenges
- Stronger positive associations with effort and achievement
Your chibi thumbs up drawing becomes a tool for building these positive mental patterns!
Troubleshooting Common Issues
Problem: My chibi doesn’t look encouraging enough
Solution: Focus on the eyes and smile. Make sure the eyes are large and bright, and the smile is warm and genuine.
Problem: The thumbs up gesture doesn’t look right
Solution: Make sure the thumb is clearly pointing upward and is prominent enough to be the focal point of the pose.
Problem: The proportions seem off
Solution: Remember that chibi style exaggerates head size. The head should be quite large compared to the body.
Problem: My colors look dull
Solution: Choose brighter, clearer colors and make sure to add those important highlights and shadows for dimension.
Problem: The character doesn’t feel personal enough
Solution: Add custom details like favorite colors, personal symbols, or elements that represent your interests and personality.
Frequently Asked Questions
Q: Can I draw this chibi in different poses?
A: Absolutely! Once you understand the basic structure, you can adapt it for pointing, waving, holding objects, or any celebratory gesture.
Q: How often should I draw my celebration chibi?
A: Whenever you accomplish something worth celebrating! This could be daily for small wins or for major milestones.
Q: Can I make this chibi represent someone else?
A: Yes! Adjust the hair, clothing, and colors to represent friends or family members you want to celebrate.
Q: What if I’m not good at drawing yet?
A: This tutorial is designed for beginners! The simple shapes make it accessible, and remember – every drawing is practice and every practice is an accomplishment worth celebrating.
Q: Can I use this chibi commercially or for my business?
A: The technique is yours to use! If you’re planning commercial use, make sure to create your own unique character design.
Take Your Celebration Art Further
Now that you’ve mastered the chibi thumbs up, explore these related tutorials:
- How to draw a Gift Box
https://drawcartoonstyle.com/how-to-draw-a-gift-box/ - How to draw a Cute Valentine Frog https://drawcartoonstyle.com/how-to-draw-a-cute-valentine-frog/
- How to draw Cute Valentine Cat
https://drawcartoonstyle.com/how-to-draw-a-cute-valentine-cat/ - How to draw a Christmas Tree with Presents
https://drawcartoonstyle.com/how-to-draw-a-christmas-tree-with-presents/
Share Your Celebration!
I’d love to see your chibi thumbs up creations! What accomplishment inspired you to draw this character? Have you started using it to celebrate your daily wins?
Remember, you’ve just completed this entire drawing tutorial – that’s definitely worth celebrating with a thumbs up! Take a moment to appreciate what you’ve learned, the progress you’ve made, and the new skill you’ve developed.
Your chibi thumbs up isn’t just a drawing – it’s a reminder that you’re capable of achieving wonderful things, both big and small. Every time you see it, let it remind you to pause, appreciate your efforts, and give yourself the recognition you deserve.
Now it’s time to draw it again to remember this accomplishment of learning something new! Because learning to draw a celebration chibi is definitely worth celebrating.
More Encouraging Art Adventures
If you enjoyed learning how to draw this uplifting chibi thumbs up, visit DrawCartoonstyle.com for more tutorials that celebrate creativity, personal growth, and the joy of artistic expression. There’s always something new to learn and another reason to celebrate!
Well done, and keep celebrating your amazing journey! 👍✨
This post includes affiliate links. If you choose to purchase something, I may make a small commission at no extra cost to you. For more information, please read my Privacy Policy.
Leave a Comment