I have this incredibly cute rabbit plush sitting on my desk, and honestly, whenever I look at it, it never fails to make me happy and put the biggest smile on my face! There’s something so magical about rabbits – their soft, fluffy appearance, their gentle nature, and those impossibly adorable big eyes that seem to radiate pure sweetness. Whether it’s beloved characters like the White Rabbit from Alice in Wonderland, Thumper from Bambi, or the Energizer Bunny, there are so many rabbit characters in stories and media that give us that same wonderful, warm feeling of joy and comfort.
That got me thinking – wouldn’t it be amazing if we could capture that same happiness-inducing cuteness in our own artwork? Imagine being able to draw your very own fluffy rabbit that brings that same smile to your face every time you see it!
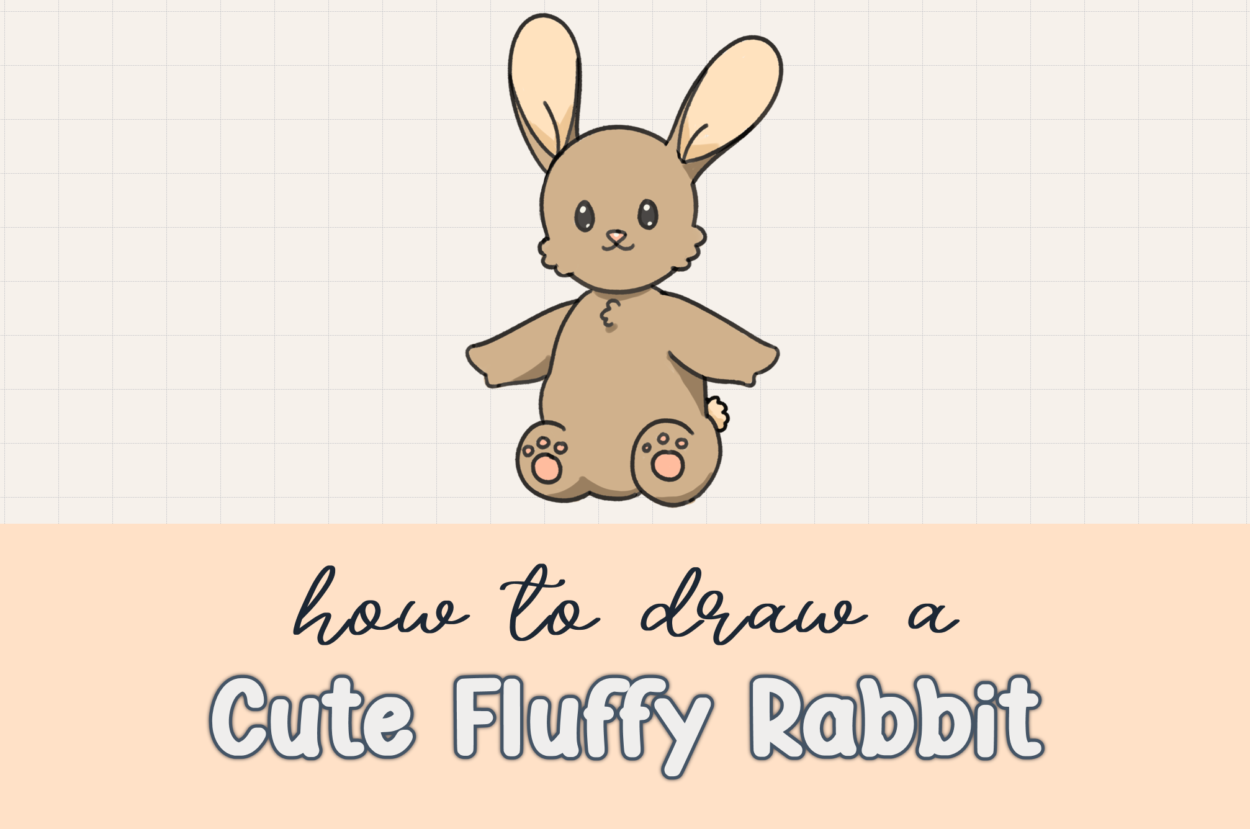
In this delightfully fun tutorial, I’m going to guide you through creating the most adorable fluffy rabbit drawing that’s guaranteed to put a smile on your face (and anyone else who sees it!). We’ll use simple shapes and easy techniques that make this tutorial perfect for beginners, while still creating something so cute and charming that you’ll want to draw rabbits everywhere – in your sketchbook, on greeting cards, or just for the pure joy of creating something that radiates happiness.
Table of Contents
What You’ll Learn in This Fluffy Rabbit Tutorial
- How to use circles as the foundation for creating cute, appealing characters
- Step-by-step techniques for drawing irresistibly fluffy features
- Methods for creating expressive, emotion-filled eyes that sparkle with life
- Professional tips for adding dimension and depth to simple drawings
- Color techniques that enhance cuteness and bring characters to life
- How to use strategic erasing to create 3D effects
- The art of making characters that evoke immediate emotional connection
The Science of Cuteness in Art
Ever wonder why certain drawings make us go “aww” instantly? There’s actually science behind what makes things appear cute! Researchers have identified key features that trigger our “cute response”:
- Large eyes relative to the head size
- Round, soft shapes rather than angular ones
- Chubby, plump features that suggest youth and innocence
- Small size or compact proportions
- Soft textures like fluffiness or fuzziness
Our fluffy rabbit drawing will incorporate all these elements, making it scientifically irresistible! Understanding these principles helps you create characters that people can’t help but love.
Materials You’ll Need for Your Fluffy Rabbit
For Digital Drawing:
- Drawing tablet (iPad with Apple Pencil or similar)
- Procreate, Adobe Fresco, or your favorite drawing app
- Soft round brush for fluffy textures
- Fine-tip brush for detailed features
For Traditional Drawing:
- Pencils (2H for light sketching, 2B for final details)
- Fine-tip black markers or pens
- Colored pencils, markers, or crayons in these colors:
- Brown (main rabbit color, but feel free to choose white, gray, or spotted!)
- Peach or light pink (ears, nose, paws, tail accents)
- Black (eyes)
- Pink (nose and paw details)
- White (highlights and sparkle effects)
- Darker brown or gray (shadows)
- Good eraser for creating 3D effects
- Optional: blending tools for smooth color transitions
The wonderful thing about this tutorial is that it works beautifully with any art supplies you have available!
Why Rabbits Make Perfect Drawing Subjects
Rabbits are fantastic subjects for developing your drawing skills because they offer:
- Simple, approachable shapes that build confidence
- Instant appeal that makes practice feel rewarding
- Versatile expressions from sleepy to excited
- Cultural universality – everyone loves a cute bunny!
- Seasonal flexibility – perfect for spring, Easter, or any time you need some cuteness
Plus, once you master drawing cute rabbits, you can apply the same principles to other fluffy animals like cats, dogs, hamsters, and more!
Step-by-Step Guide: How to Draw a Cute Fluffy Rabbit
Step 1: Foundation with the Magic Circle
The secret to drawing any adorable character starts with circles! Circles are naturally appealing to our eyes because they suggest softness, safety, and cuteness. Our entire fluffy rabbit will be built from circle foundations.
Drawing the head circle:
- Start with a nice, round circle for the head
- Don’t worry about making it perfectly round – slight imperfections add charm
- This circle will be the anchor point for all our rabbit’s adorable features
Step 2: Add Irresistible Fluffy Cheeks
Nothing says “cute rabbit” like those pouffy, fluffy cheeks that make you want to gently squeeze them!
Creating the cheek fluff:
- Draw soft curves on each side of your head circle
- These curves should extend outward, suggesting plump, fluffy cheeks
- Make them rounded and gentle – no sharp angles in cuteness land!
Clean up for clarity:
- Erase any overlapping lines where the cheeks meet the head circle
- This creates a smooth, unified fluffy head shape
- Clean lines help the cuteness shine through clearly
Step 3: Draw Those Iconic Big Round Ears
Rabbit ears are one of their most distinctive and adorable features. We want to make them prominent and expressive!
Creating the ear shapes:
- Draw two large, oval-shaped ears on top of the head
- Make them bigger than you might think – oversized ears enhance the cute factor
- Position them slightly angled outward for a natural, alert look
Adding ear details:
- Draw gentle lines inside each ear to show the inner ear structure
- These lines should follow the natural curve of the ear shape
- Keep the details simple but enough to make the ears look realistic
Step 4: Build the Adorably Chubby Body
Our rabbit needs a soft, cuddly body that matches the sweetness of its face.
Drawing the body shape:
- Create a chubby “U” shape below the head for the body
- Make it plump and rounded – we want a well-fed, happy bunny!
- The body should be slightly wider than the head for that cute, compact look
Adding the legs and feet:
- Draw the legs using soft, rounded curves
- Keep them short and stubby for maximum cuteness
- Add rounded feet that look soft and pillowy
Step 5: Create Gentle, Huggable Arms
Drawing the arms:
- Extend the arms out from the body using soft curves
- Add tiny “nubby thumbs” on one side for that realistic touch
- Keep the arms proportional – not too long or too short
Creating 3D depth:
- Here’s a professional trick: erase the lines where the arm and ear overlap on the right side
- This immediately creates the illusion that these body parts are in front of others
- Strategic erasing is one of the most powerful tools for adding dimension!
Step 6: Design the Most Expressive Eyes
Eyes are the windows to the soul, and our rabbit’s eyes need to be absolutely irresistible!
Drawing the eye shapes:
- Create two large circles in the center of the face
- Make them bigger than realistic proportions – big eyes = maximum cuteness
- Position them evenly spaced with room for the nose between them
Eye placement tip: The eyes should take up a significant portion of the face. In cute character design, we often exaggerate eye size for emotional impact.
Step 7: Add the Sweetest Facial Features
The nose:
- Draw a rounded triangle in the center, between the eyes
- This upside-down triangle shape is classic rabbit nose design
- Keep it small and delicate
The smile:
- Add a gentle curved line below the nose for a sweet smile
- Keep it subtle – we want peaceful contentment, not a big grin
- The smile should suggest quiet happiness
Step 8: Add Extra Fluffiness Details
Chest fluff:
- Add a small fluffy area on the chest
- This extra fluffiness makes our rabbit look even more cuddly and soft
- Use gentle curved lines to suggest the texture
Paw details:
- Add small paw markings on the feet
- These tiny details make the rabbit look more realistic and finished
Ear interior lines:
- Add a few more subtle lines inside the ears for depth
- Keep these light and natural-looking
Step 9: The Finishing Touch – The Puffy Tail
No rabbit is complete without that iconic fluffy tail!
Drawing the tail:
- Add a small, round, puffy circle behind the rabbit
- Position it where you’d naturally expect a rabbit’s tail to be
- Make it proportional – cute but not overwhelming
Bringing Your Fluffy Rabbit to Life with Color
Coloring is where your rabbit truly becomes a character with personality and charm!
Choosing Your Rabbit’s Color Personality
Classic brown rabbit (my example):
- Warm, earth-toned, and natural-looking
- Suggests a cozy, friendly personality
- Very versatile and appealing to most people
Other adorable color options:
- Pure white: Innocent, angelic, winter-themed
- Soft gray: Sophisticated, gentle, calming
- Spotted patterns: Playful, unique, realistic
- Cream/beige: Warm, comforting, vintage feel
- Pastel colors: Fantasy, magical, dreamy (perfect for imaginative projects!)
Adding Realistic and Adorable Accents
Ear interiors:
- Use peach or light pink for the inside of the ears
- This adds warmth and realism – real rabbit ears have pink interiors
- The soft color contrasts beautifully with the main body color
Nose and paw details:
- Color the nose with a soft pink
- Add the same pink to the paw markings
- Use peach coloring for the tail to tie all the accent colors together
Eye details:
- Fill the eyes with solid black for that classic cute character look
- Leave space for white highlights (we’ll add these next!)
Professional Shading for Dimension
Adding strategic shadows:
- Use a darker version of your main rabbit color to add shadows
- Focus on areas where natural shadows would fall: under the ears, beneath the body, around the legs
- Soft, subtle shading creates depth without harsh contrast
Shadow placement guide:
- Under the ears where they attach to the head
- Beneath the chin and head area
- Around the bottom curves of the body
- Under the arms and legs where they meet the body
The Magic Touch – Highlights and Sparkle
Eye highlights:
- Add small white dots or circles in the eyes
- Position them consistently in both eyes (usually upper right or upper left)
- These highlights instantly bring your rabbit to life and add that sparkly, animated look
Nose highlight:
- Add a tiny white highlight on the nose
- This small detail makes the nose look wet and realistic, like a real rabbit’s nose
Final sparkle effects:
- Consider adding tiny white highlights on the fluffiest parts
- Subtle light reflections suggest soft, touchable fur
Variations and Customizations
Once you’ve mastered the basic fluffy rabbit, try these fun variations:
Different poses:
- Rabbit sitting upright (ears more vertical)
- Rabbit lying down (longer, relaxed body)
- Rabbit mid-hop (legs positioned for jumping)
- Rabbit eating (mouth positioned near a carrot or lettuce)
Seasonal themes:
- Spring rabbit: Surrounded by flowers and pastel colors
- Easter rabbit: Add a bow tie or hold a decorated egg
- Winter rabbit: Add a cozy scarf or winter hat
- Autumn rabbit: Warm browns and oranges with falling leaves
Accessory additions:
- Tiny bow ties or ribbons
- Flower crowns
- Small baskets of vegetables
- Reading glasses for a scholarly rabbit
- Artist tools for a creative rabbit
Troubleshooting Common Issues
Problem: My rabbit doesn’t look fluffy enough
Solution: Add more soft curves and gentle texture lines. Avoid any sharp angles or rigid shapes.
Problem: The proportions look off
Solution: Check that the head is large relative to the body, and that the eyes are big enough. Cute characters often have exaggerated proportions.
Problem: My rabbit looks sad instead of happy
Solution: Make sure the eyes are bright and large, the nose is positioned correctly, and add that gentle smile curve.
Problem: The 3D effect isn’t working
Solution: Remember to erase overlapping lines strategically and add shadows in the right places to suggest depth.
Problem: The colors look muddy
Solution: Use clean, distinct colors and don’t over-blend. Keep accent colors (pink, peach) soft but clear.
The Emotional Impact of Cute Art
Creating adorable characters like our fluffy rabbit does more than just produce pretty pictures:
- Stress relief: The process of drawing cute subjects is naturally calming
- Mood boosting: Cute art triggers positive emotional responses
- Confidence building: Successfully creating something adorable feels incredibly rewarding
- Connection: Cute art often gets shared and brings joy to others
- Mindfulness: Focusing on simple, pleasant subjects encourages present-moment awareness
Your fluffy rabbit drawing is more than just art – it’s a little ambassador of happiness!
Frequently Asked Questions
Q: Can I make my rabbit more realistic instead of cute?
A: Absolutely! Reduce the eye size, make the proportions more natural, and add more detailed fur texture for a realistic approach.
Q: How do I draw a rabbit from different angles?
A: Start with the same circle foundation but adjust the placement of features. Practice side view, three-quarter view, and front view.
Q: What if I want to add a background?
A: Keep backgrounds simple so they don’t compete with your cute rabbit. Soft grass, flowers, or simple color gradients work well.
Q: Can I use this technique for other animals?
A: Yes! The circle foundation and cuteness principles work for many animals – cats, dogs, hamsters, bears, and more.
Q: How do I make my rabbit look more animated?
A: Exaggerate the features even more, add motion lines, or show the rabbit in mid-action like hopping or eating.
Take Your Cute Animal Art Further
Now that you’ve mastered the fluffy rabbit, explore these related tutorials:
- How to Draw A Chocolate Bunny https://drawcartoonstyle.com/how-to-draw-a-chocolate-bunny/
- How to draw a Cute Otter
https://drawcartoonstyle.com/how-to-draw-a-cute-otter/ - How to draw a Cute Capybara https://drawcartoonstyle.com/how-to-draw-a-cute-capybara/
- How to draw Cute Kawaii Duck https://drawcartoonstyle.com/how-to-draw-a-kawaii-duck/
Share Your Fluffy Rabbit Creation!
I’d absolutely love to see your cute fluffy rabbit drawings! Did your rabbit turn out to make you smile just like my little plush bunny does? What color did you choose, and does your rabbit have a personality that shines through?
There’s something so wonderfully therapeutic about creating art that’s designed purely to bring joy. Your fluffy rabbit drawing is a little bundle of happiness that you created with your own hands – and that’s pretty amazing! Every time you look at it, let it remind you of the simple pleasure of making something beautiful and the special kind of magic that happens when we set out to create pure cuteness.
Whether your rabbit ends up in a sketchbook, on the refrigerator, or as a gift for someone who needs a smile, it carries with it all the warmth and joy you put into creating it.
More Adorable Drawing Adventures
If you enjoyed learning how to draw this cute fluffy rabbit, visit DrawCartoonstyle.com for more tutorials that celebrate the art of cuteness and the joy of creating characters that make people smile. Because sometimes, the world needs a little more adorable art!
Happy drawing, and may your art always bring smiles! 🐰💕
This post includes affiliate links. If you choose to purchase something, I may make a small commission at no extra cost to you. For more information, please read my Privacy Policy.

Leave a Comment