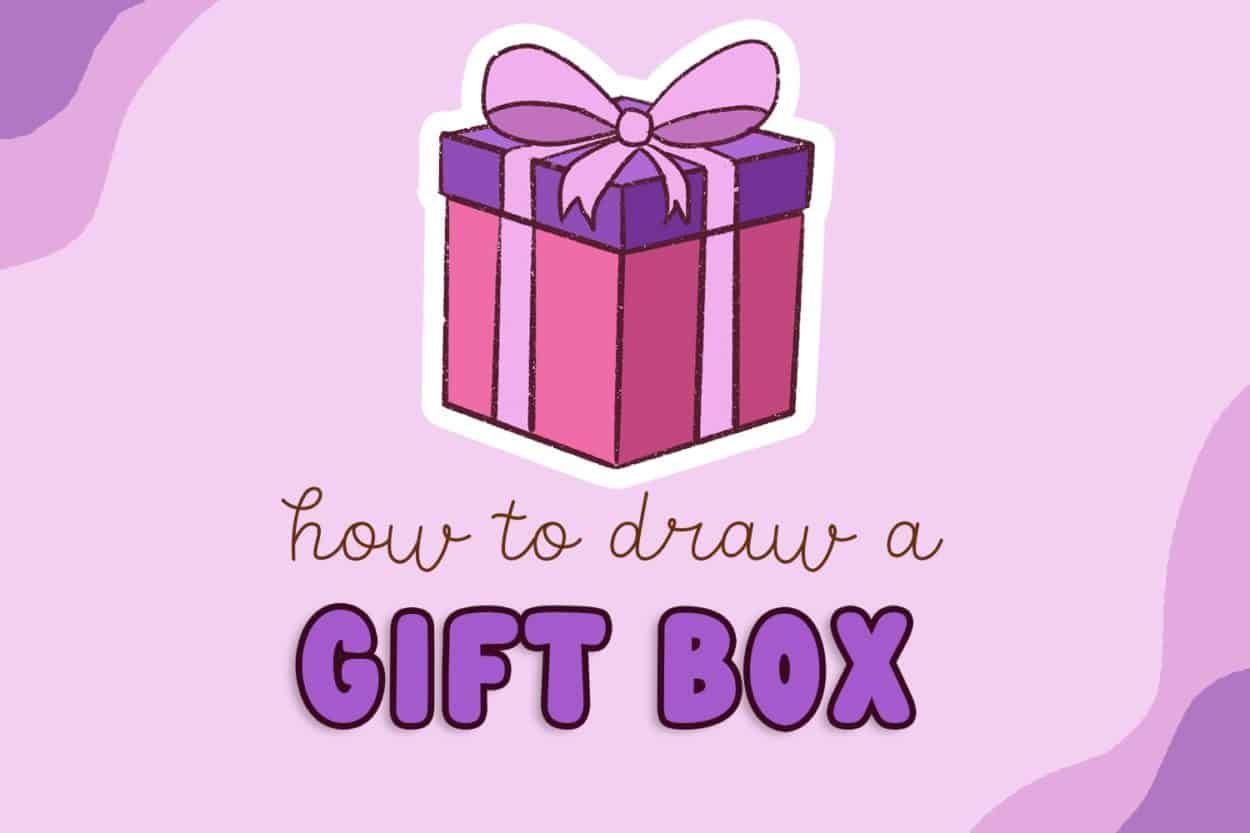
In this post, I’m going to teach you how to draw a gift box, step by step.
Don’t worry.
It’s super easy to draw, and you can draw it in less than 10 minutes if you follow this post step by step.
You can check out all my other kawaii and cute drawing tutorials here.
It doesn’t matter whether you are a kid or an adult, I will break down how to draw a gift box with a pretty bow using basic shapes, and I’ll even show you how to color it easily, so you get something like this:

You can use this tutorial to draw a birthday present or a Christmas gift!
This post includes affiliate links. If you do decide to purchase something, I will make a commission at no extra cost to you. For more information, please read my entire Privacy Policy here.
Please note that I usually use an iPad Pro and an Apple Pencil to create all my illustrations. I use the Procreate app, and I find it super easy to use. You can see this course if you want to learn how to use Procreate.
But you can use any tool – pencils and paper or Copic markers or Photoshop because the drawing method remains the same.
Let’s dive in!
How to draw a simple Gift Box – Easy Step by step Tutorial
We will break it down into simple shapes so you can draw the gift box easily, okay?
I’m going to start with the main box first.
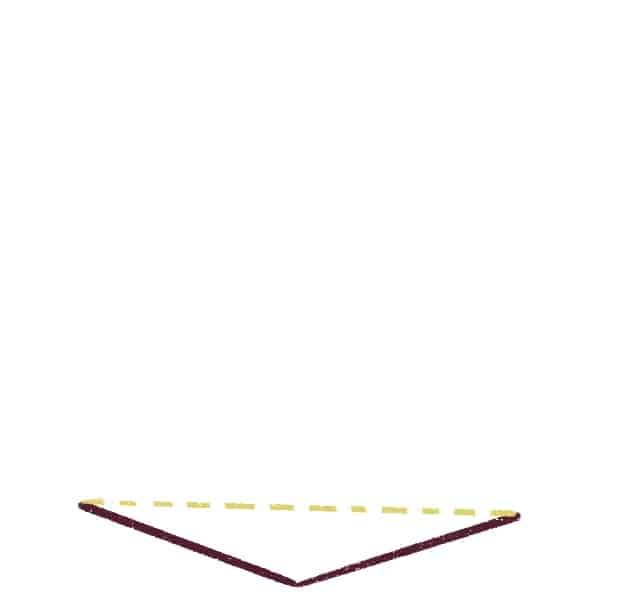
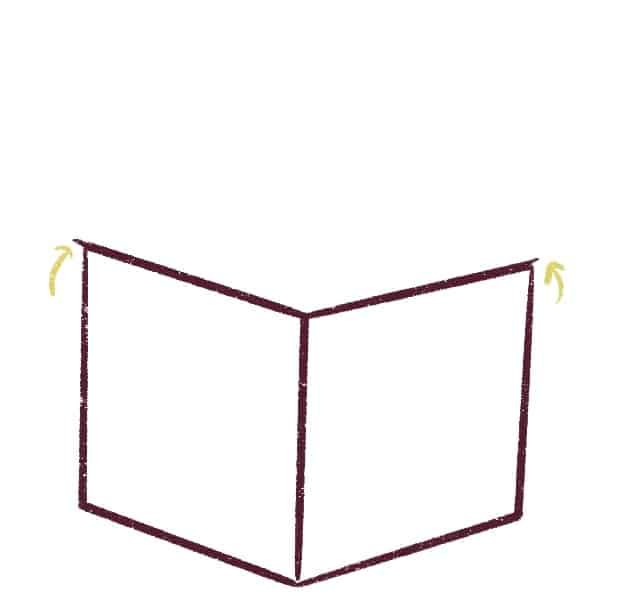
Let’s draw a simple V shape first. Make sure that the top part of the “V” is aligned in a straight line like this:
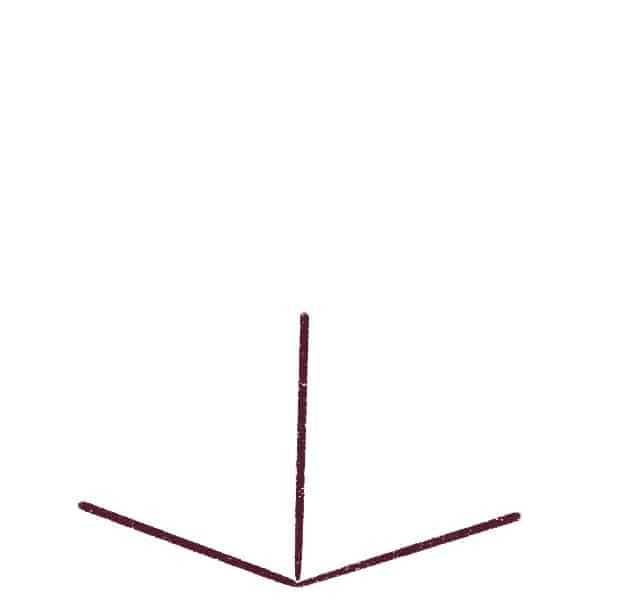
Now, from the center of the “V” shape, draw a vertical line upwards.
Easy, isn’t it?
Please note that I am drawing this gift box in a cartoon style.
If you’re looking for a book to teach you how to draw cute things in a kawaii style, there is no better book than this!
Next, draw another “V” shape at the top of the line very similar to what we drew before.
Make sure that the end points align with the previous “V” shape we drew, like this:
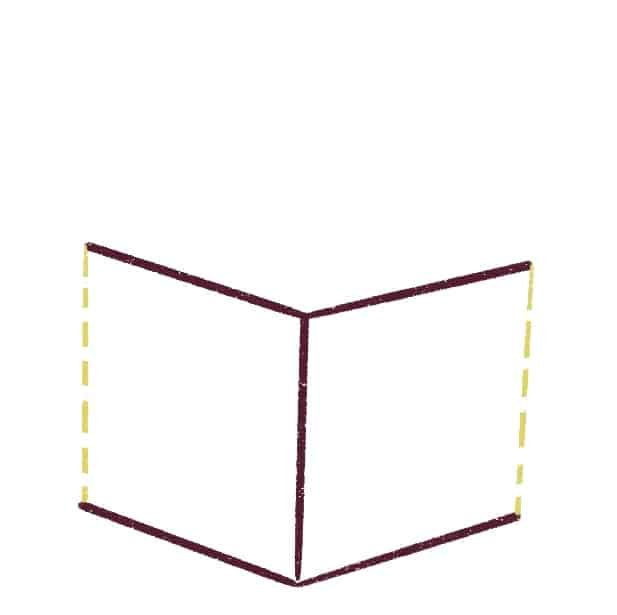
Now, simply connect both the ends of the V shapes together so you get this:

We need to keep in mind that the lid of the gift box is slightly bigger than the gift, so we are going to extend the top V shape just by a little bit like this:
Now, simply draw upward lines from each point on the top and draw another V – this will become the lid of the box.

We’re nearly done with drawing the gift box.
Just draw an upside-down “V” on the top and complete the gift box.
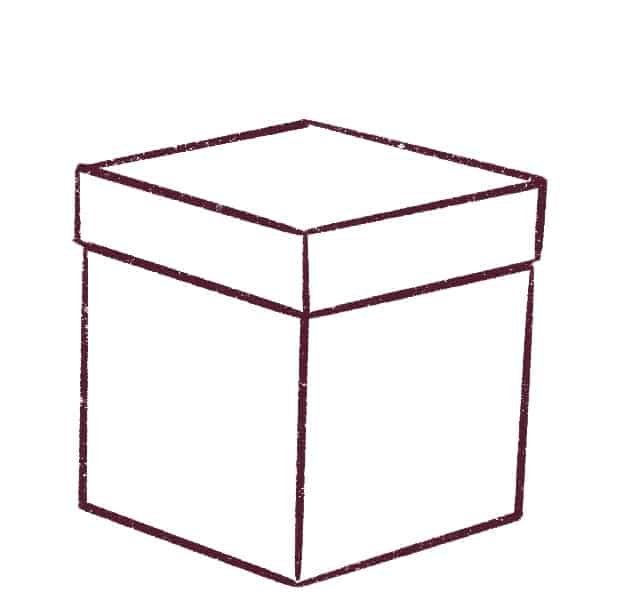
We’ve finished drawing the box.
Now, we need to add the ribbon and bow to the box to make it look like a gift.
On both sides of the box, just draw 2 parallel lines right in the middle of each face of the box like this:
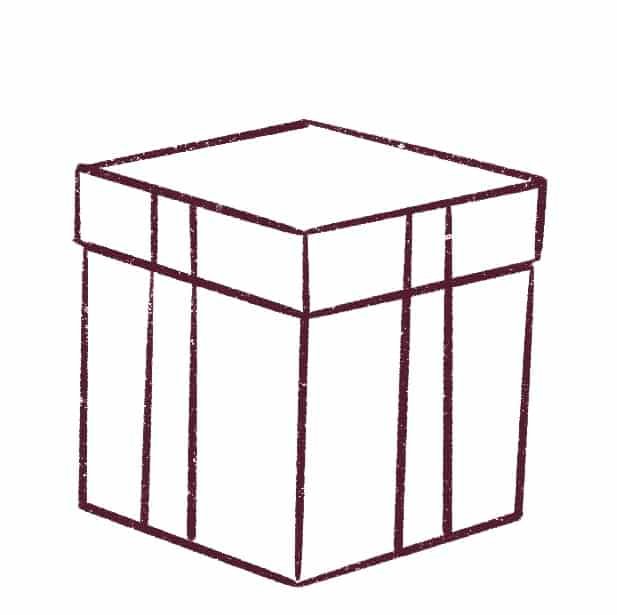
This part is super easy!
Now, draw the bow right on the top of the gift box.


This bow looks great, but to add more texture we need to draw the inner edges of the bow so we’ll add 2 curves like this:

And in order to complete the bow, we need to draw two ribbon extensions like this.

Just complete the ribbon on the top by extending the lines and we should get something like this:

I’m going to clean the lines up a bit so we get a good drawing of a gift box.
How to color a gift box easily
And then I will proceed to color it. You can use any color but I’m going to use pink because I love pink. I want to make the gift look real so I will draw one side with light pink and the other side with dark pink.
This is because the light is hitting the box from the left side.

I’m going to repeat the same strategy with the lid.
You can use the same color or a different color!
I want to use purple. On the left side, I’ll use light purple and on the right side, I’ll use a darker shade of purple.

Now, because the light is mostly on the top, the top of the gift box can be the lightest shade of purple.

I’m quite happy with how this looks.
Now, I’ll add a nice light lilac bow. So, I’ll color the ribbon with a light shade of lilac. Remember to color the insides of the bow a darker shade of lilac so it looks real.
Wasn’t that fun?
We just finished drawing and coloring a gift box!
Conclusion of how to draw a gift box+ Drawing Resources
I hope this tutorial was really helpful to you and you were able to learn how to draw a simple gift box.
Keep drawing objects till you get the hang of it.
Drawing things in a cute cartoon style is easy once you break them down into simple shapes, as you can see from this post.
If you’re interested in drawing more cute things, take a look at this book, please!
If you want to see more tutorials on drawing kawaii animals and kawaii things, please leave a comment below on what you’d like to see next!
I will be adding more kawaii drawing tutorials (animals, plants, and more) to this blog, so keep a lookout!
In the meantime, check out these really nice books that teach you how to draw cute stuff!


If you are interested in drawing in a kawaii style and then selling clipart or merchandise on Etsy, check out this course!

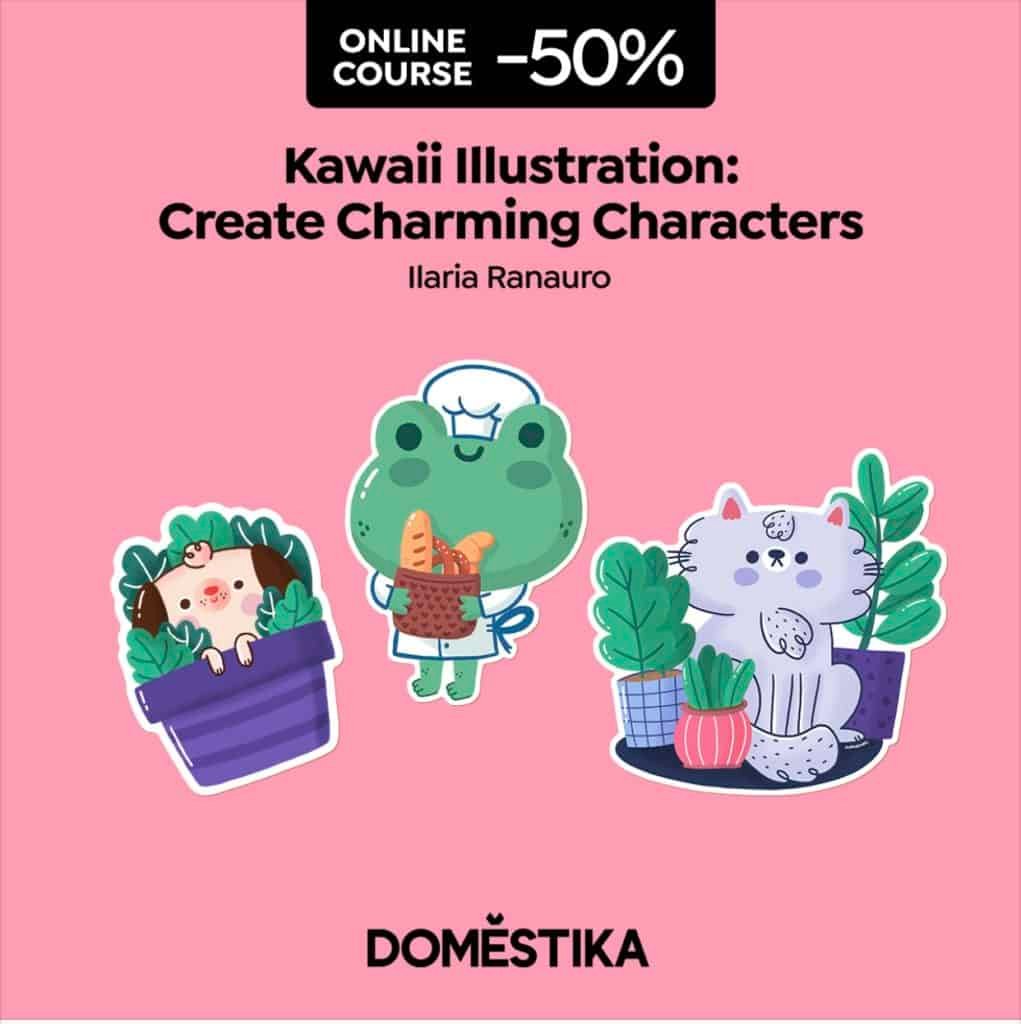
My old bud Ilaria (we’ve been friends on Instagram back when I had Instagram) created this course! I’ve watched her grow from 0 followers, and I’m so, so proud of her!
And believe it or not, there is not 1 single good online course about learning how to draw kawaii art and then making physical stickers on the internet. I’ve been looking for a course like this for a long, long time.
And it’s finally here!!!
You can create your own stickers and print them and sell them on Etsy or any space! She goes into detail about how to draw the characters.
This is by far one of the best courses I’ve taken that is so cute and so educational.
The course is in English, and it’s amazing!
What do you need?
A sketchbook, Photoshop, and a graphic tablet so that you can draw the kawaii characters. If you want to make stickers, you’ll need a printer and sticker sheets.
Even if you don’t want to make stickers and just draw kawaii characters, this course is perfect!
And if you are really keen on improving your drawings or you want to create cute kawaii animals and kawaii people, check out this second course by Sara.
Sara teaches you how to draw anything in a nice kawaii style. I really love these kinds of courses because they’re so easy to learn and it’s very easy to get clients because this is a really relatable drawing style.
It is in Italian but it comes with subtitles and it’s really easy to follow.
Use code STRAYCURLS-10 to get a 10% discount!
If you are just getting started with ProCreate, I highly recommend this course: Procreate for Beginners: Digital Illustration 101
Thanks for the tutorial! My gift box turned out okay other than me altering the bow (made it fancy with a Diamond on the center lol). It took me a half hour to get the angles of the box to look right though.. Does Procreate let you know if your angles are off when you do your sketch? I’m currently using a regular sketchbook and pencil for now, just waiting for my drawing pad and pen in the mail.
Hey Maria,
Thst’s wonderful, glad your gift box turned out good. Yes, Procreate lets you draw straight lines and lines at angles. So, overall, your perspective slowly gets better as you keep drawing cubes and squares – it just needs more practice.
Warm regards,
Angela