Especially when you want to make your clothes look as organic and natural as possible. But once you understand how cloth hangs on human bodies and get a good idea of drawing folds, it will come naturally to you.
In this post, I will teach you how to draw rolled-up sleeves step by step.
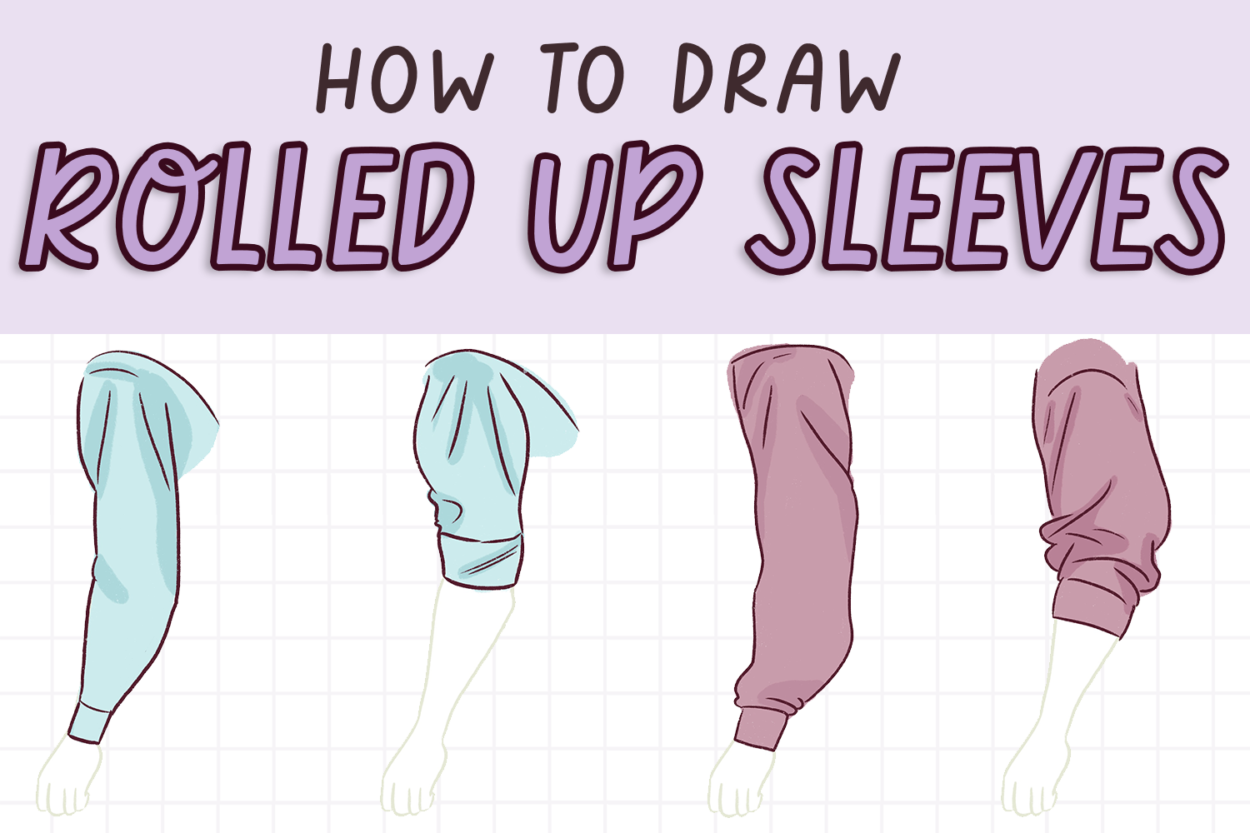
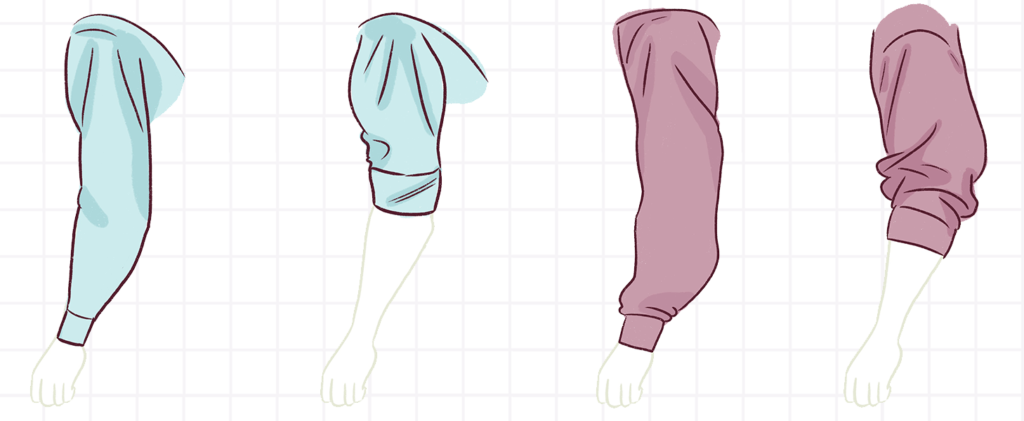
You will learn how to draw rolled-up sleeves for a formal shirt and something simple like a hoodie/sweater. You can also use this post as rolled-up sleeves drawing reference, so bookmark it!
Here’s what you will learn to draw:
Let’s begin!
This post includes affiliate links. If you do decide to purchase something, I will make a commission at no extra cost to you. For more information, please read my entire Privacy Policy here.
Table of Contents
How to draw rolled-up sleeves
Please note that I am using Procreate to draw this. I suggest using Clip Art Studio, as most digital artists and anime artists also use this software.
Let’s begin now.
How to draw rolled-down sleeves (formal shirt)
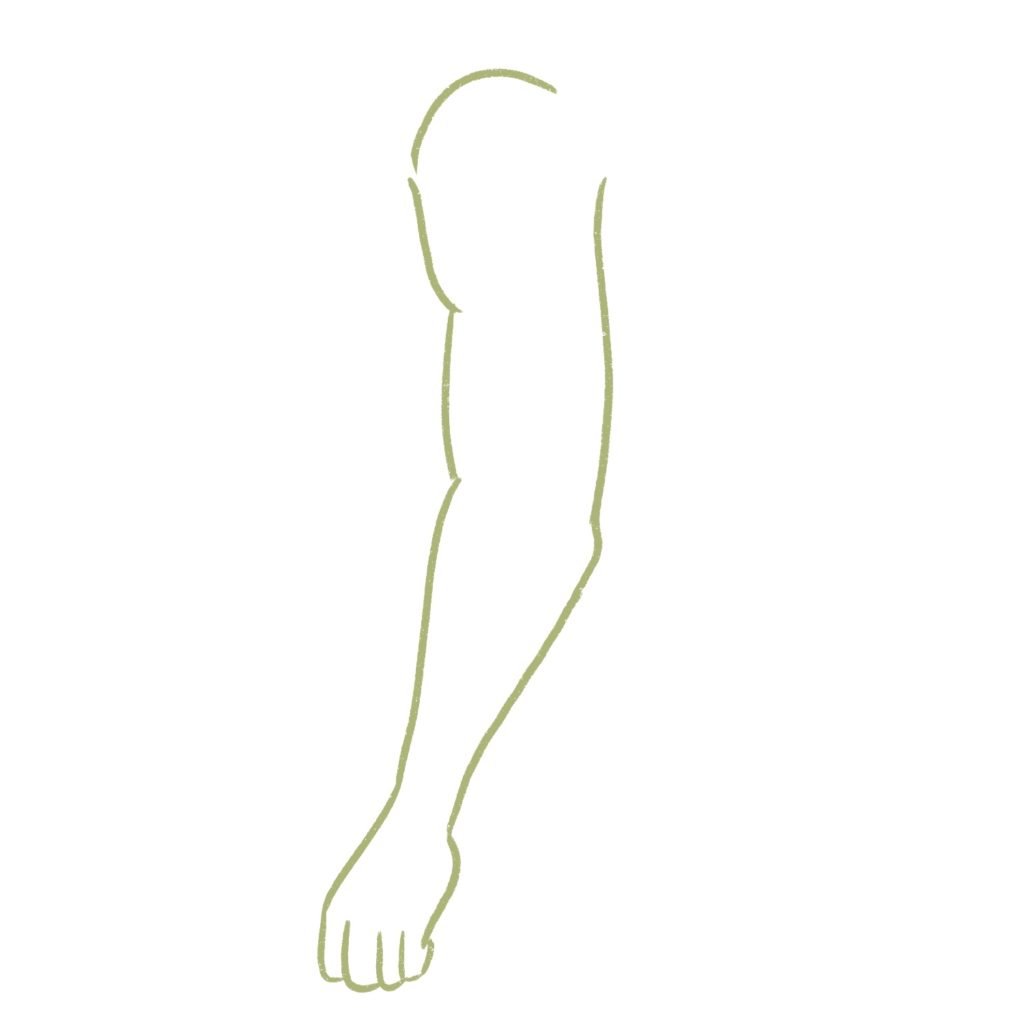
Before I show you how to draw a rolled-up sleeve, let’s understand how to draw a sleeve first.
You can also skip this section and move to the next section, where I directly teach you how to draw the sleeve rolled up.
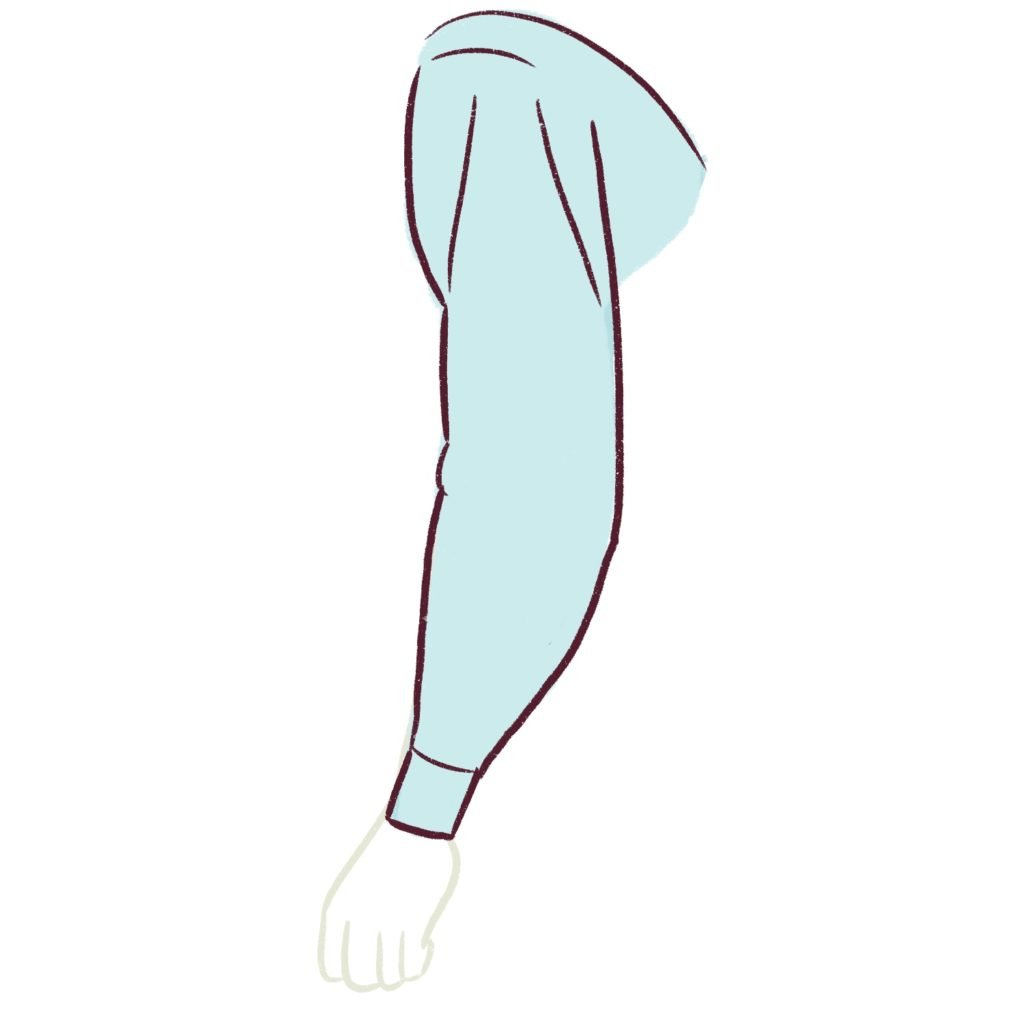
First, I am going to draw the arm.
I’m not going to go into detail about drawing arms and hands, but you can check out this
This will make the sleeve look very realistic.
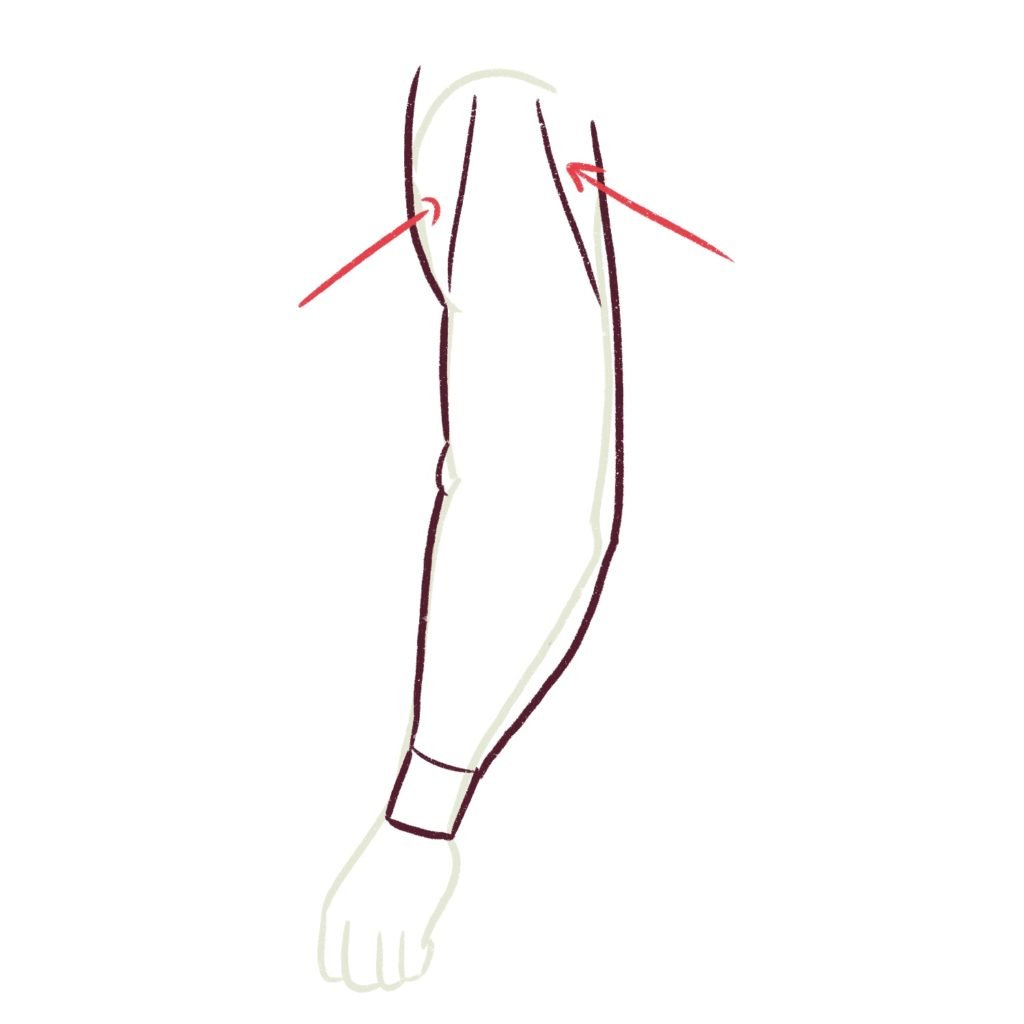
Now, it’s time to add some folds and wrinkles.
You can start by drawing the folds on the top of the sleeve where the sleeve falls from the shoulder. These are tension folds. Just draw simple lines – they don’t need to be perfect.
Next, I’m going to draw some folds around the shoulder – remember to use loose lines and curves when drawing folds and wrinkles on shirts.
And lastly, we can color the shirt. I’m going to use light blue since I really love this color.
When coloring clothes, remember to color the folds darker and make the coloring very thick and spaced out.
This gives a nice 3D effect to the rolled-up sleeves.
Drawing clothes doesn’t have to be hard, especially if you’re drawing them in a cartoon style. Just make sure that you use basic colors and add shadows afterward – this will give your clothes a very realistic look.
Now, you have a basic idea of how clothing sits on the arm.
Let’s draw a rolled up sleeve.
How to draw rolled-up sleeves (formal shirt)
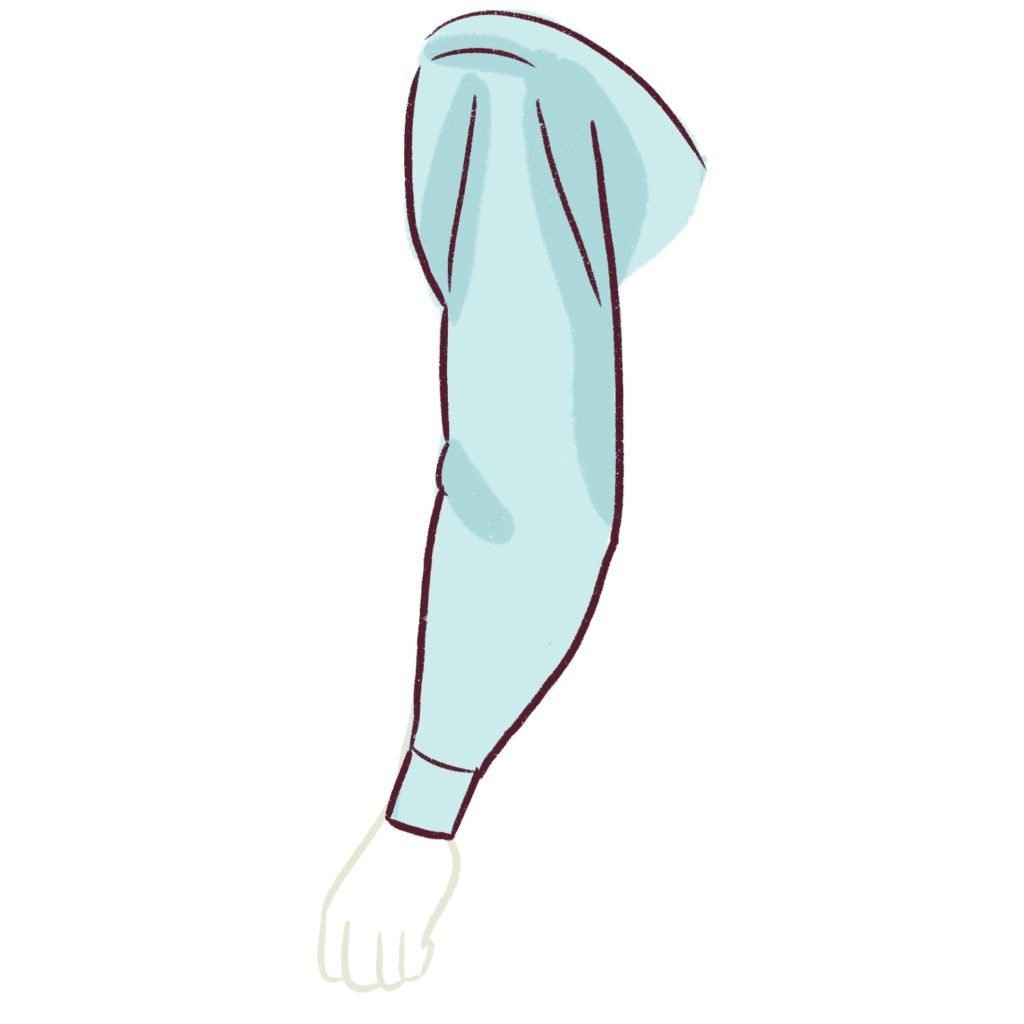
We are going to use the same arm as before.
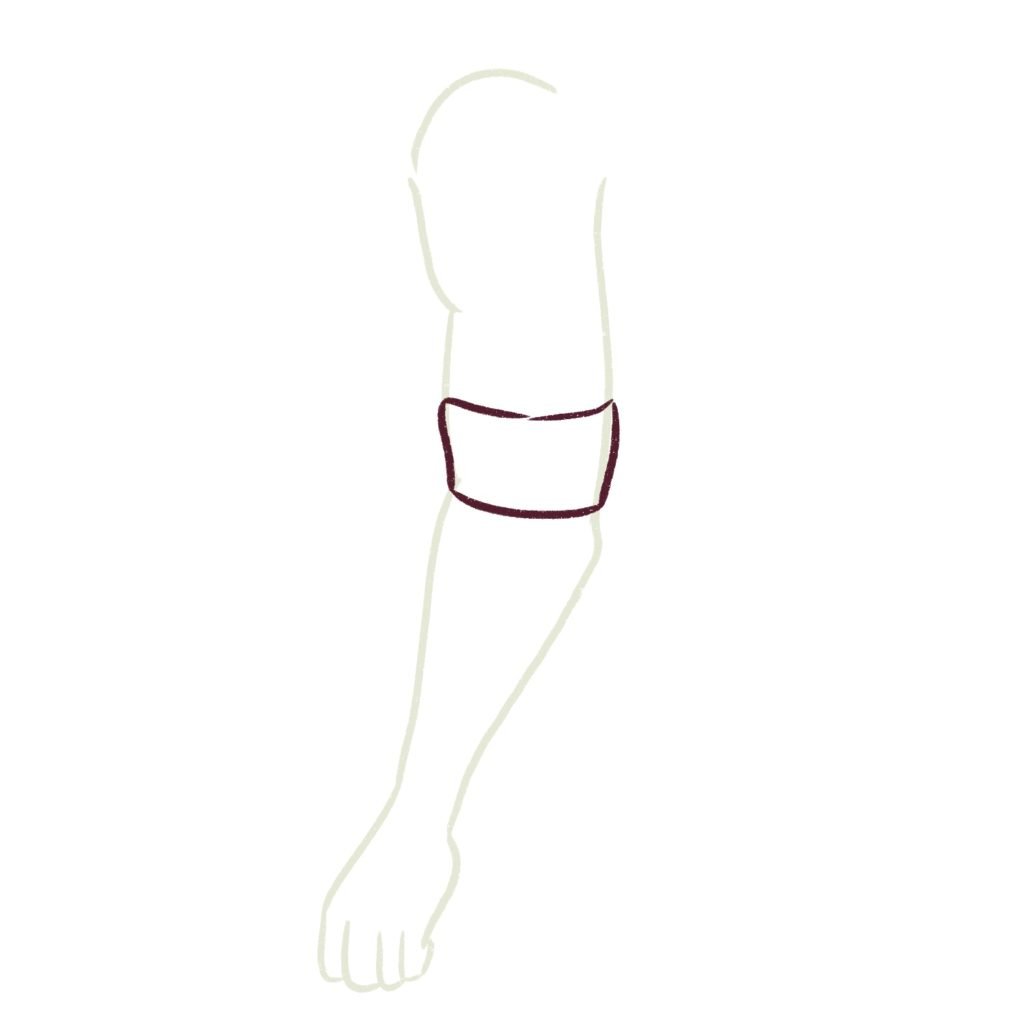
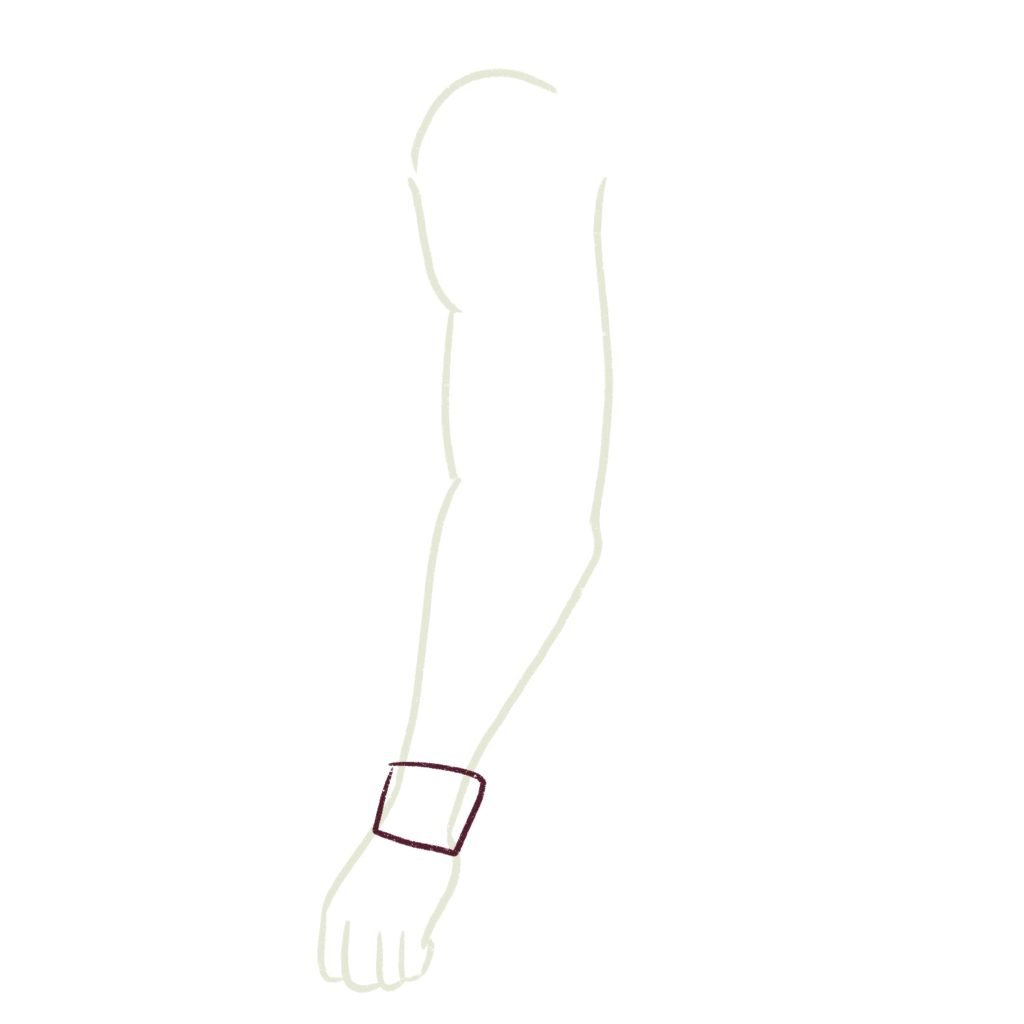
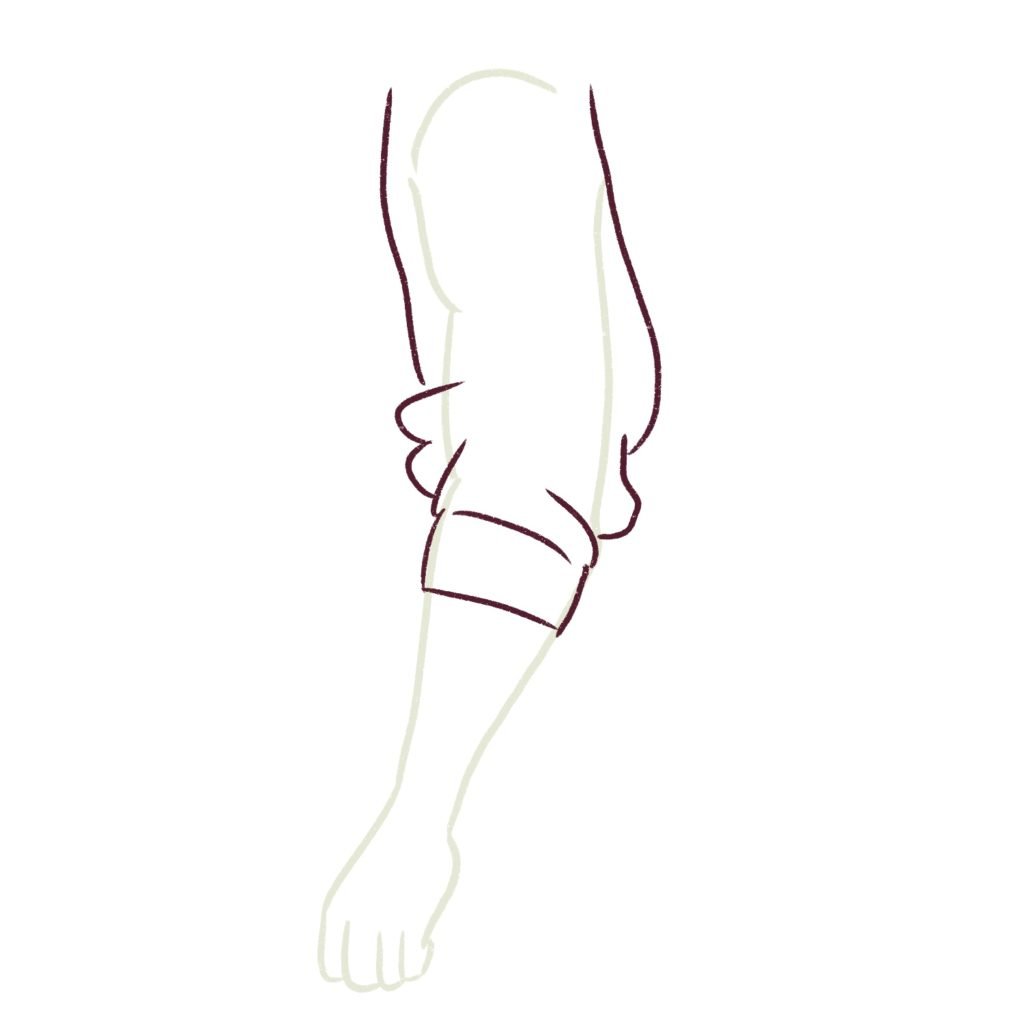
First, we’ll start with the cuff of the shirt. Just draw the cuff wherever you want it on the arm – preferably, you should draw it over the elbow.
This is because most people (myself included) prefer keeping the shirt above the elbows to be more comfortable.
Draw a simple rectangular cuff like this:
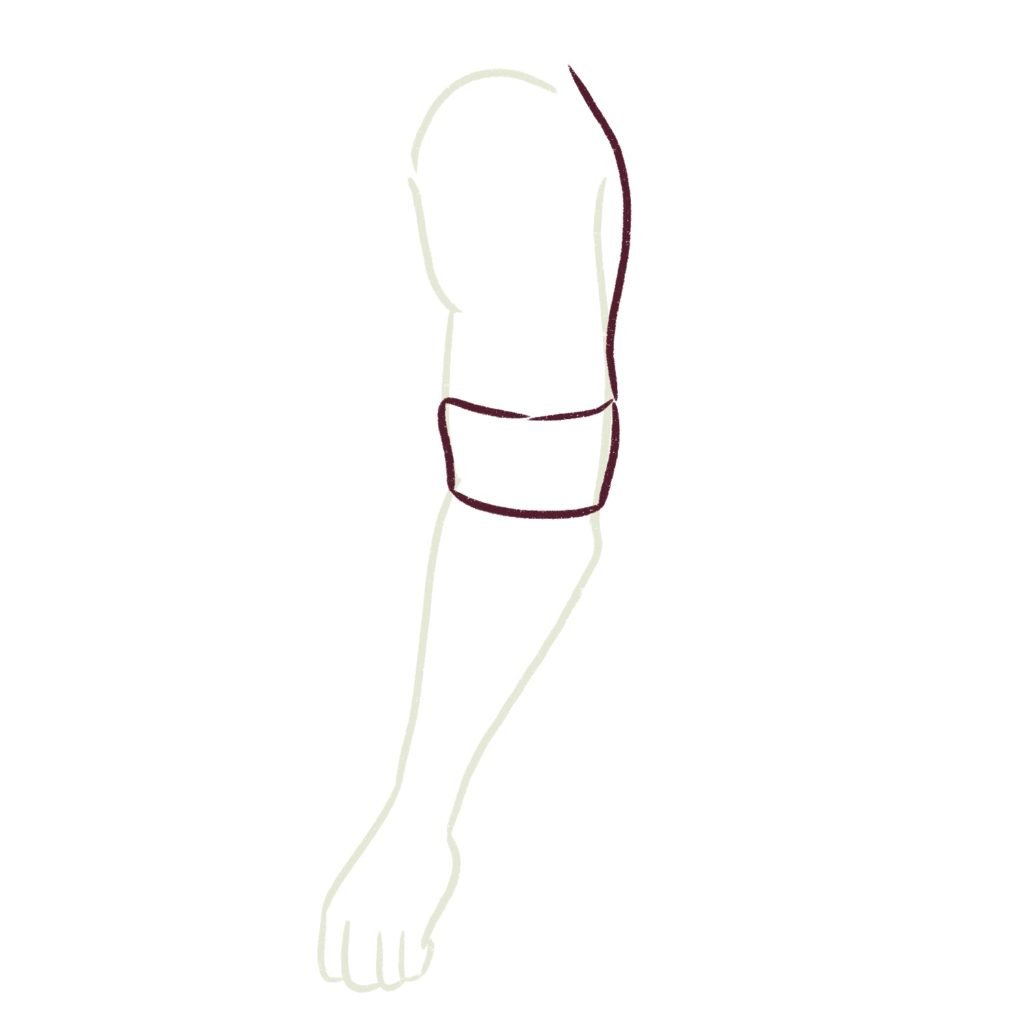
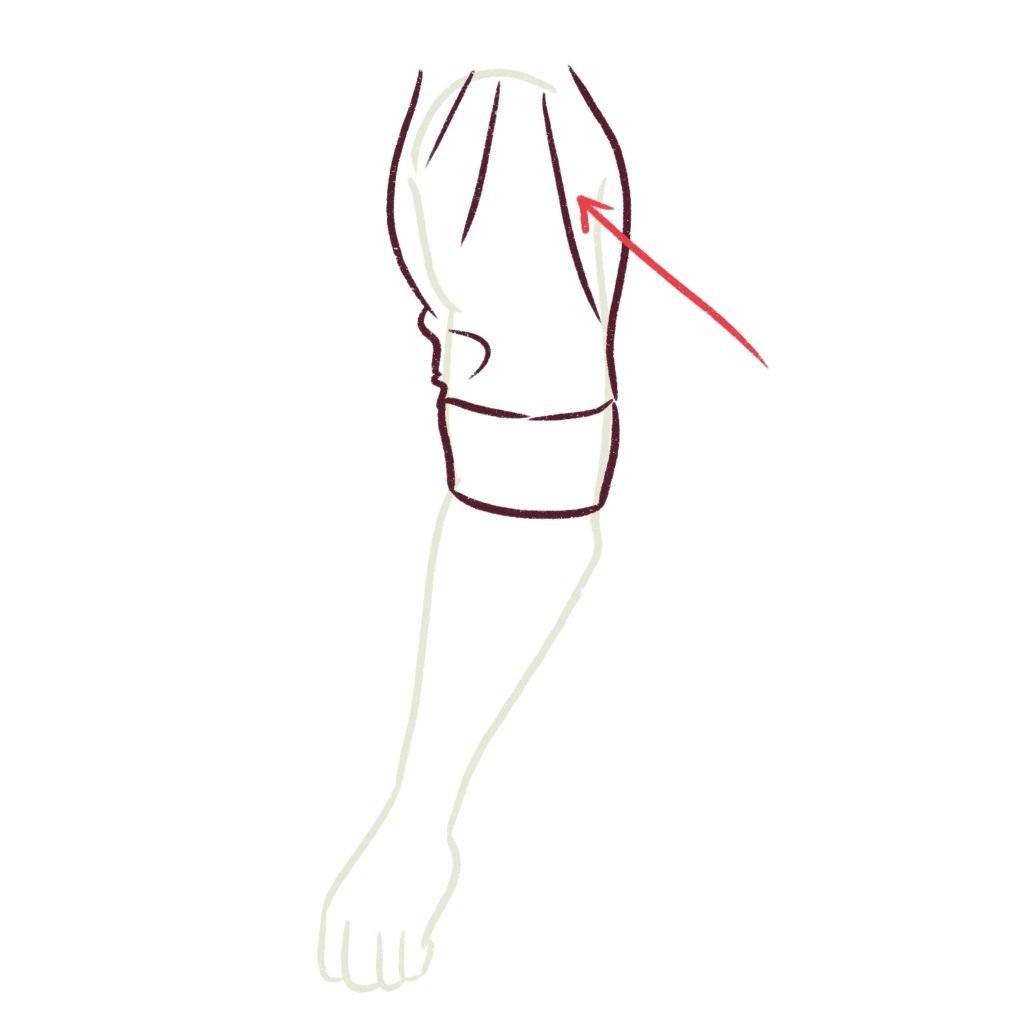
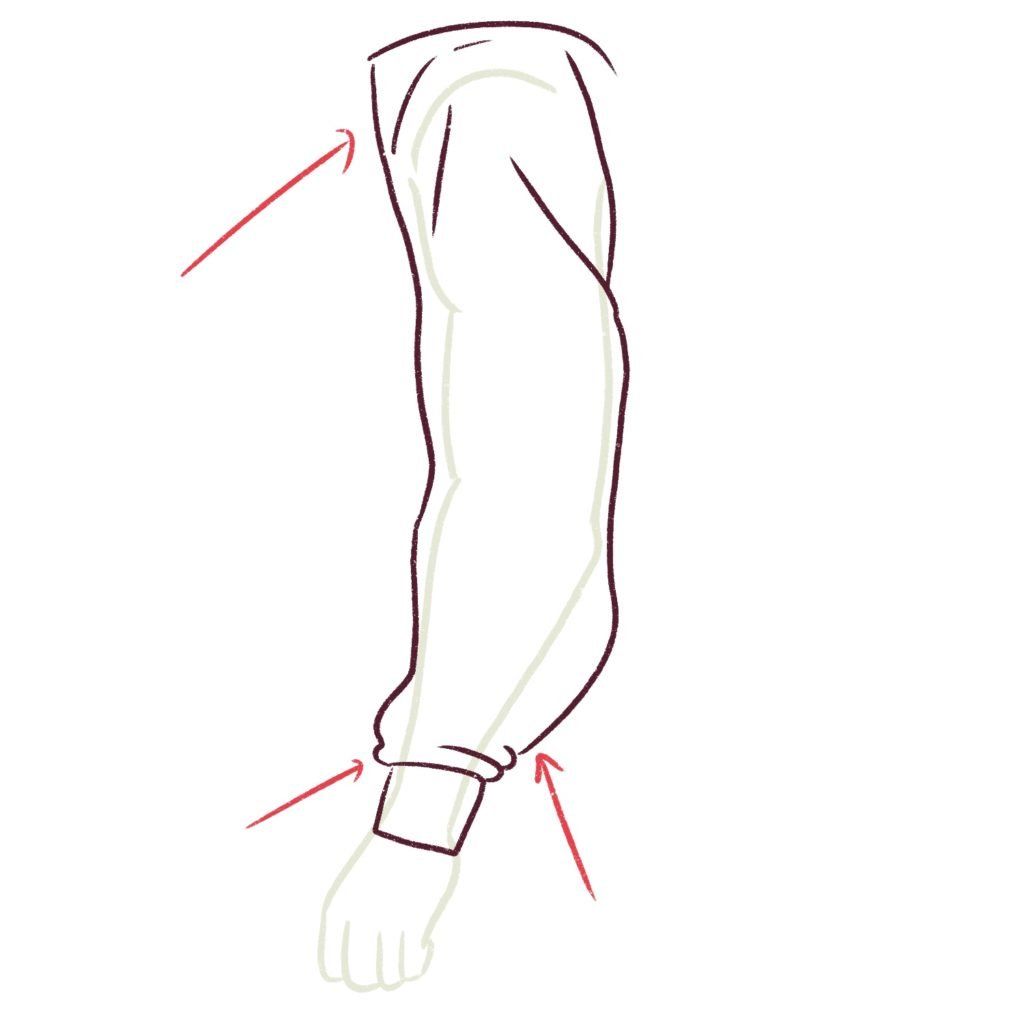
Next, we’re going to draw the sleeve from the back. Remember the fabric is rolled up meaning it will be looser and puffier so it’s okay to draw a huge air gap under the sleeve.
Now I’m going to draw the front of the rolled-up sleeve.
Remember to draw wiggly lines as you get closer to the cuff when you’re drawing this part.
The sleeve will be puffier and gathered towards the cuff of the sleeve. Look at the arrow to understand this better.
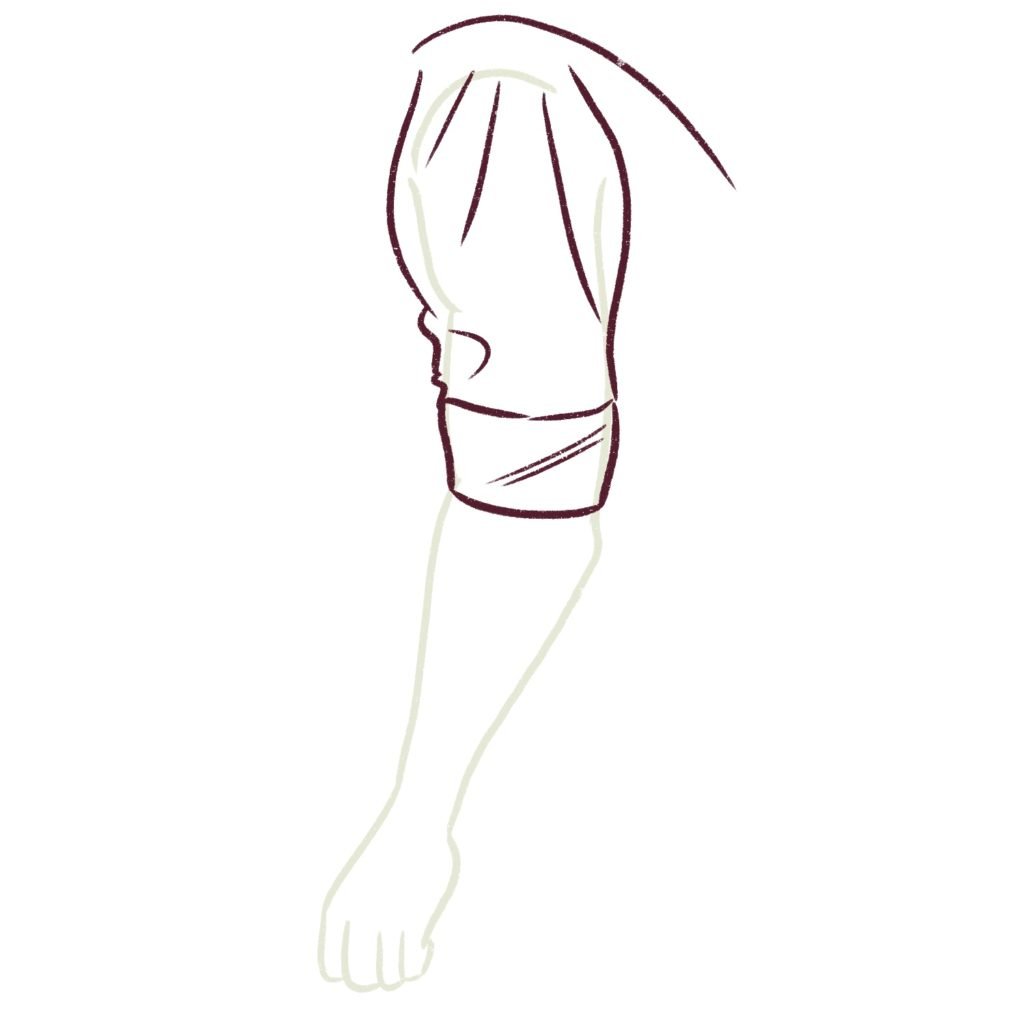
Now, it’s time to draw the folds at the top of the shoulder – this basically remains the same because the tension folds don’t change much and are unaffected.
Next, we’ll add more folds and wrinkles on the cuff and at the top of the shoulder.
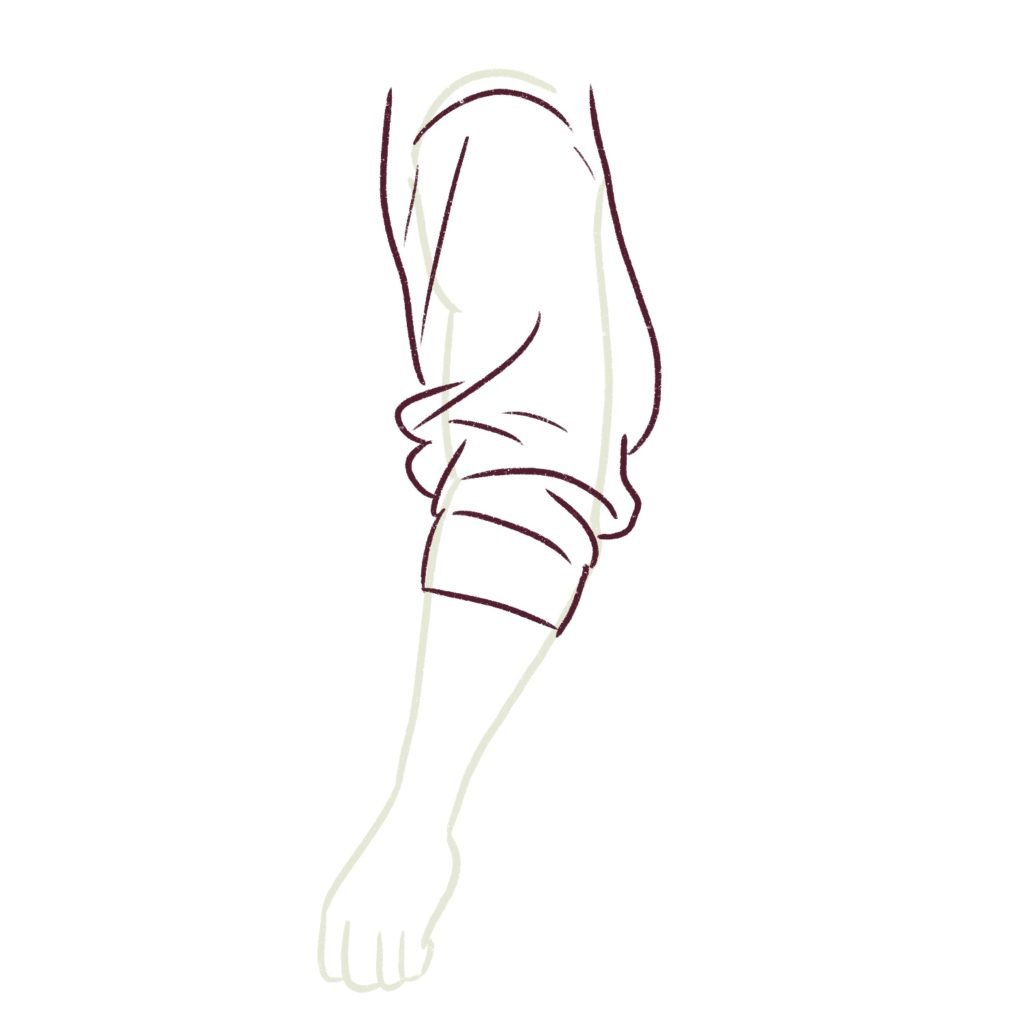
And we’re done!
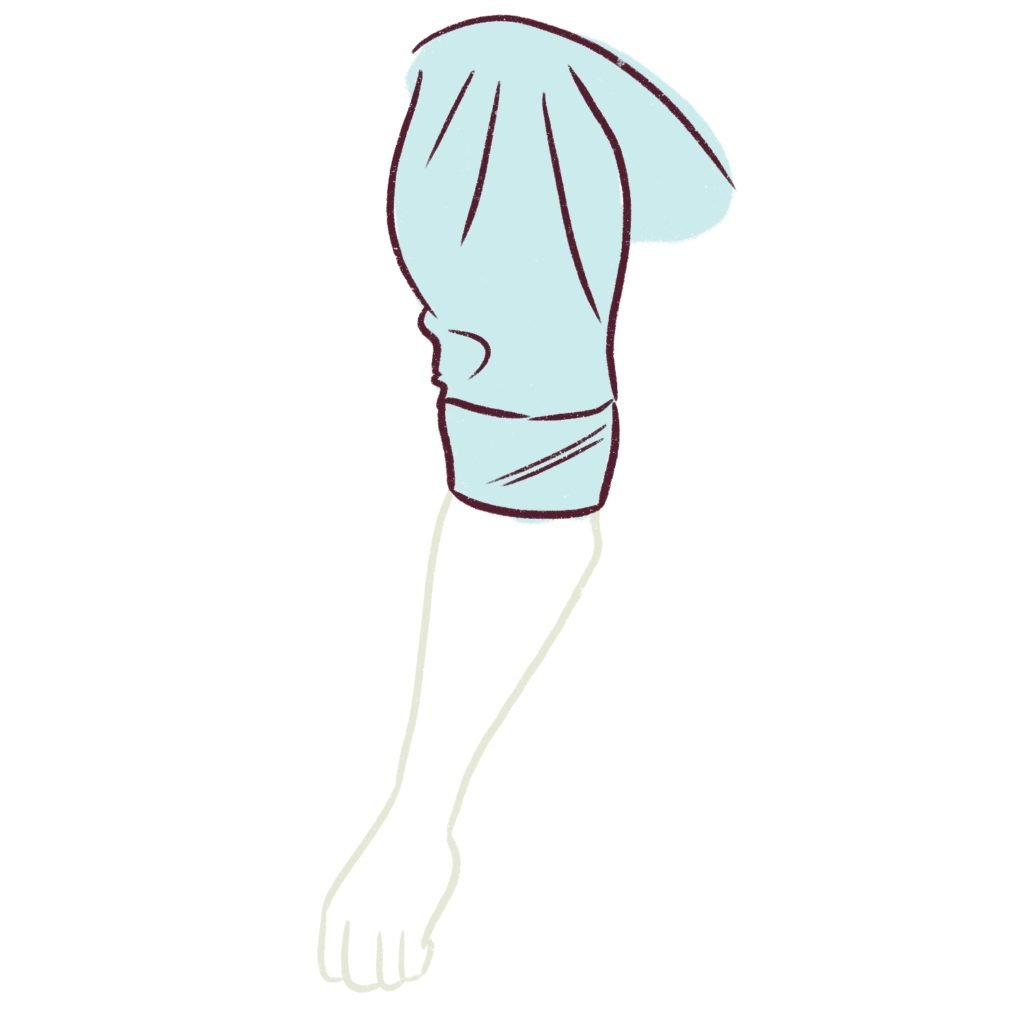
All that’s left is to color the shirt.
I’m going to go in with a base color first – I’ll use light blue again for the purpose of keeping things simple.
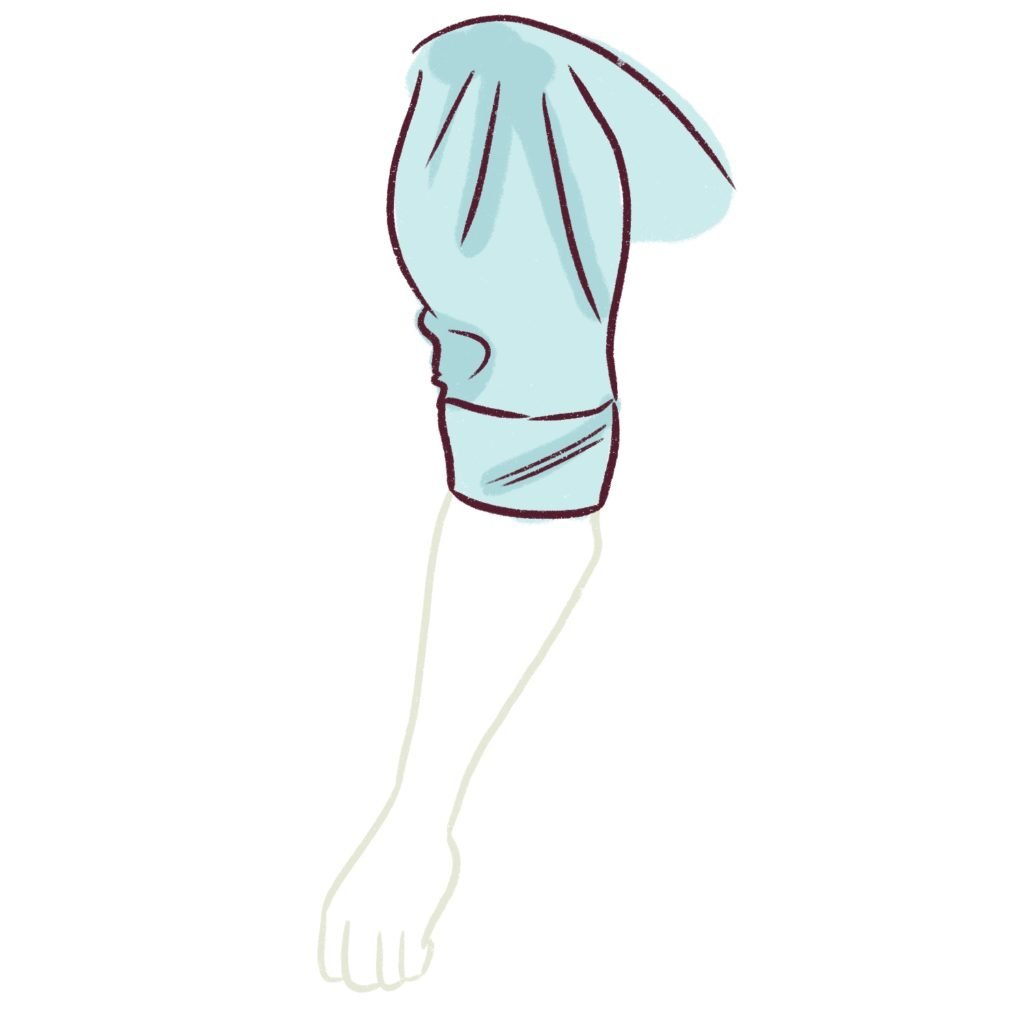
Next, using the same coloring method as above, I am going to color the folds and wrinkles a darker color to make the fabric look more organic and real.
Doesn’t it look perfect?
Congratulations!
You’ve learned how to draw rolled-up sleeves on a formal shirt.
Let’s try something different now.
Let’s try drawing rolled-up sleeves on a hoodie or a sweater – something more casual.
So, I won’t be going into too much detail on what a hoodie looks like and how we will draw it.
But I want to remind you that hoodies or sweaters have thicker fabrics than shirts. This means that the folds will be thicker and more spaced out too!
Let’s begin with the same arm template and draw the sleeve fully rolled down first.
We’ll start by drawing the cuff of the sweater at the end of the arm on the wrist first.
Always begin with the ends so that you can draw the sleeve last – this makes it easy to draw the sleeves.
After drawing the cuff, we will draw the whole sleeve.
Remember to draw folds and wrinkles at the top of the hoodie sleeve like this and draw gathers at the bottom of the sleeve near the cuff.
Because the fabric is thicker, the gathers will also be thicker!
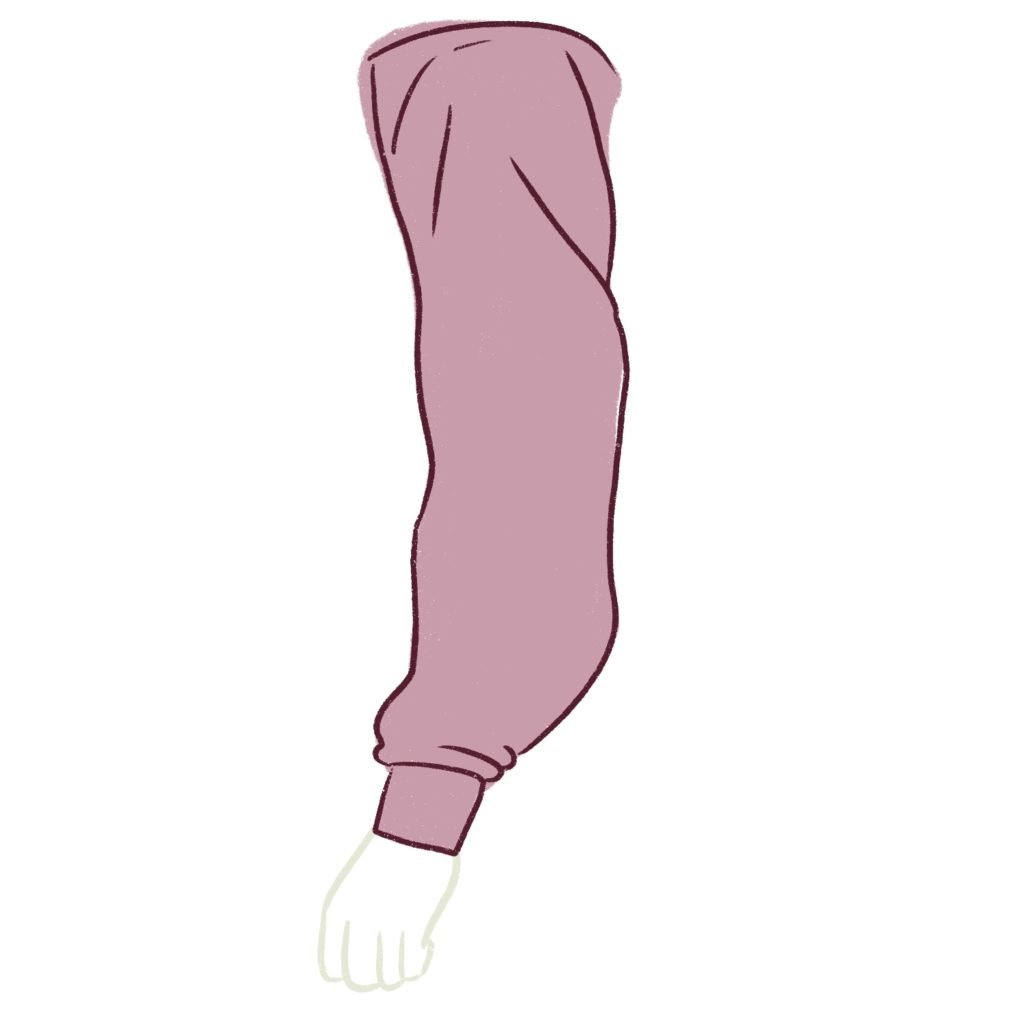
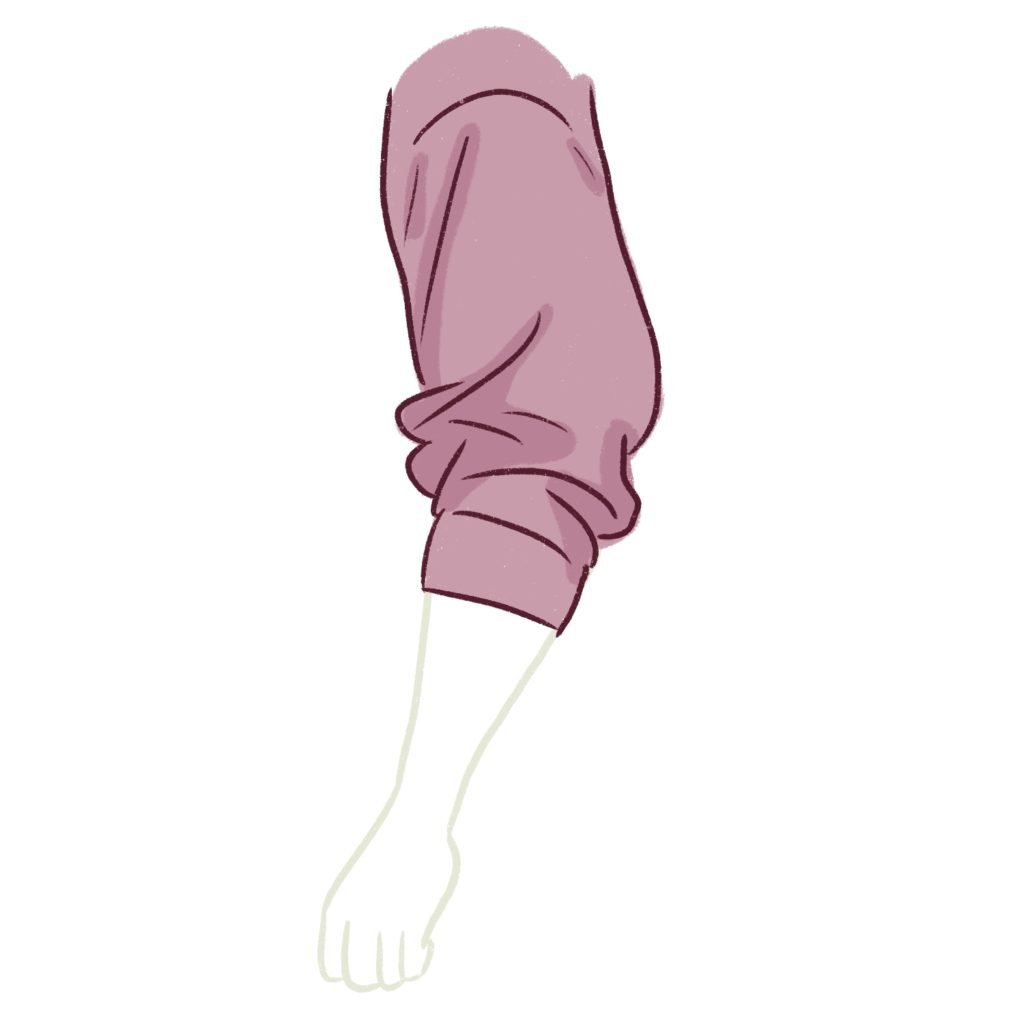
Now, it’s time to color the sleeve. I will go in with a basic color like plum pink.
And then color the folds very lightly using a deep plum color.
You now have a sleeve that’s fully rolled down!
Next, we’ll learn how to draw a rolled up sleeve for a hoodie!
How to draw rolled-down sleeves (Hoodie/Sweater)
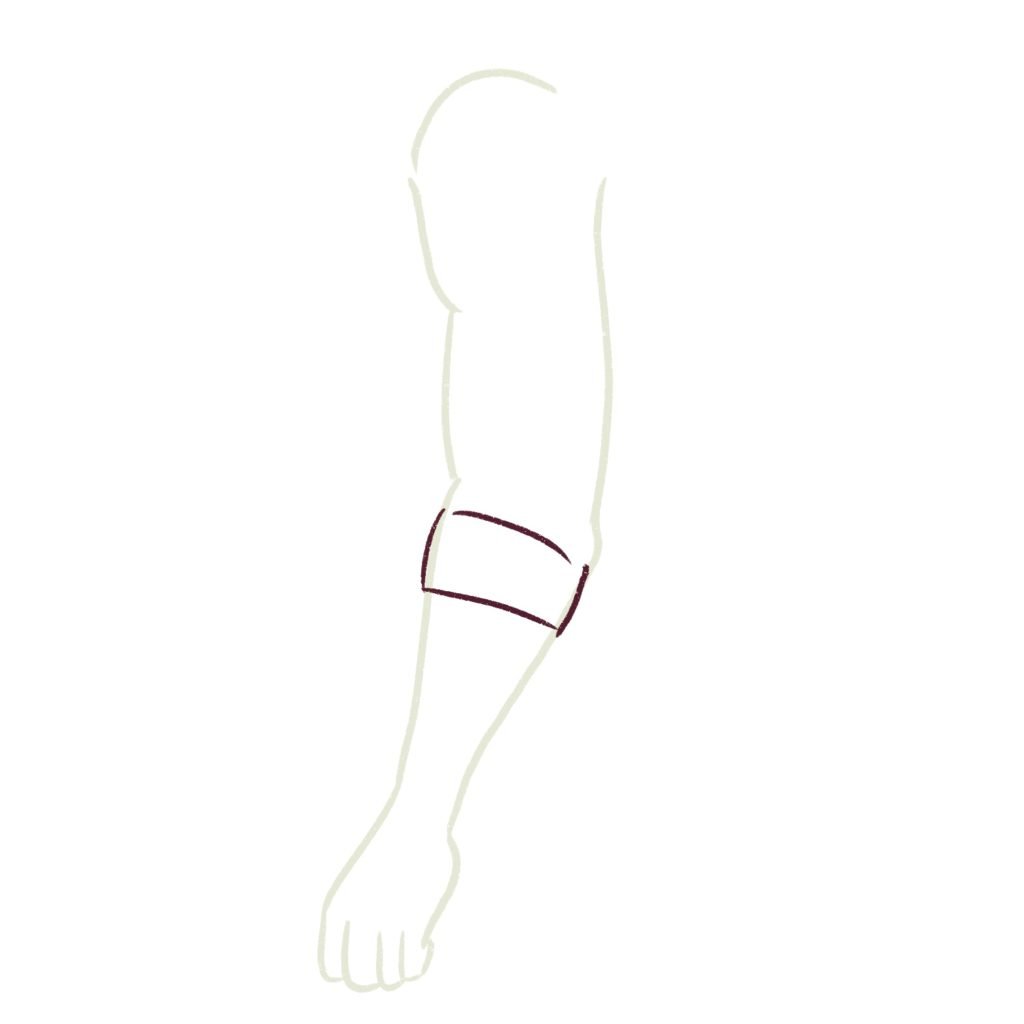
Okay, just like before, let’s start by drawing the cuff.
When you’re drawing hoodies, there is a small change – you need to draw the cuff below the elbow – this makes it look like the sleeve is heavy and gives a better appearance to the person wearing it.
Once you’ve drawn the cuff, start drawing the gathers of the sleeve over the cuff. Remember that the fabric is much thicker, so draw bigger folds and wrinkles!
Now, it’s time to draw the rest of the sleeve – hoodies are usually huge. So, you can draw the fabric very far away from the skin or the arm – it needs to hang on the arm.
You can now add internal folds and wrinkles like this – make sure the lines are loose and vary the thickness and length of the folds to make the rolled up sleeves look more natural.
I’m going to add some tension folds at the top of the arm.
And that’s pretty much it.
You can now start coloring the hoodie.
I’m going to go in with the plum color again and color the whole sleeve.
After that, just like before, I’m going to color the folds using a darker plum color.
Adding shadows to the clothes will help you make your hoodie look organic and beautiful.
And that’s it!
You’ve learned how to draw and color rolled-up sleeves – on a formal shirt and a hoodie.
Conclusion and Resources
I hope you enjoyed this tutorial and you were able to draw rolled-up sleeves. You can always bookmark this post to use this as a rolled-up sleeve drawing reference also!
If you are really looking to learn how to draw clothes easily, I highly recommend this Udemy course that is super inexpensive – you will get to own the course forever once you buy it.
Patricia (one of my favorite course creators) teaches you how to draw clothes and wrinkles step by step. She draws it step by step so that you can draw with her while she’s drawing.


Leave a Comment