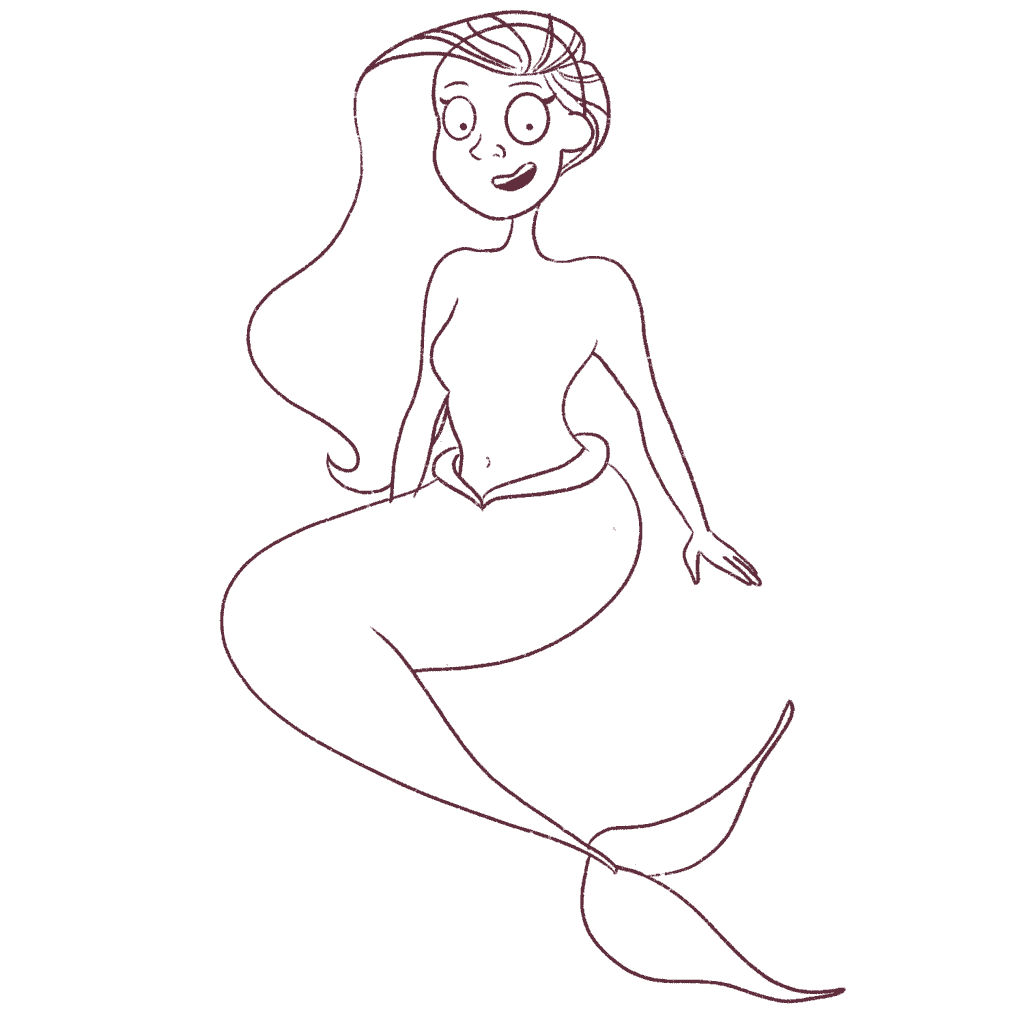
With Mermay coming up, I thought a great idea for a post would be to teach you how to draw a mermaid on a rock step by step.
I absolutely love drawing mermaids because of the long flowy mermaid hair, the beautiful mermaid tails, and all the striking poses you can draw the mermaid in.
I’ve already covered how to draw a mermaid tail in this post and how to draw a mermaid cat.
In this post, I’ll teach you how to draw a mermaid on a rock and even show you how I color the mermaid drawing from scratch using Procreate.
I will teach you how to draw the mermaid in a cartoon style.
It may look complicated, but it’s actually very simple if you follow this tutorial step by step.

This post includes affiliate links. If you do decide to purchase something, I will make a commission at no extra cost to you. For more information, please read my entire Privacy Policy here.
I use an iPad Pro and an Apple Pencil to create all my illustrations. But you can use any tool – a pen and paper, Copic markers, or Photoshop because the drawing method remains the same.
Let’s begin drawing this beautiful mermaid!
Table of Contents
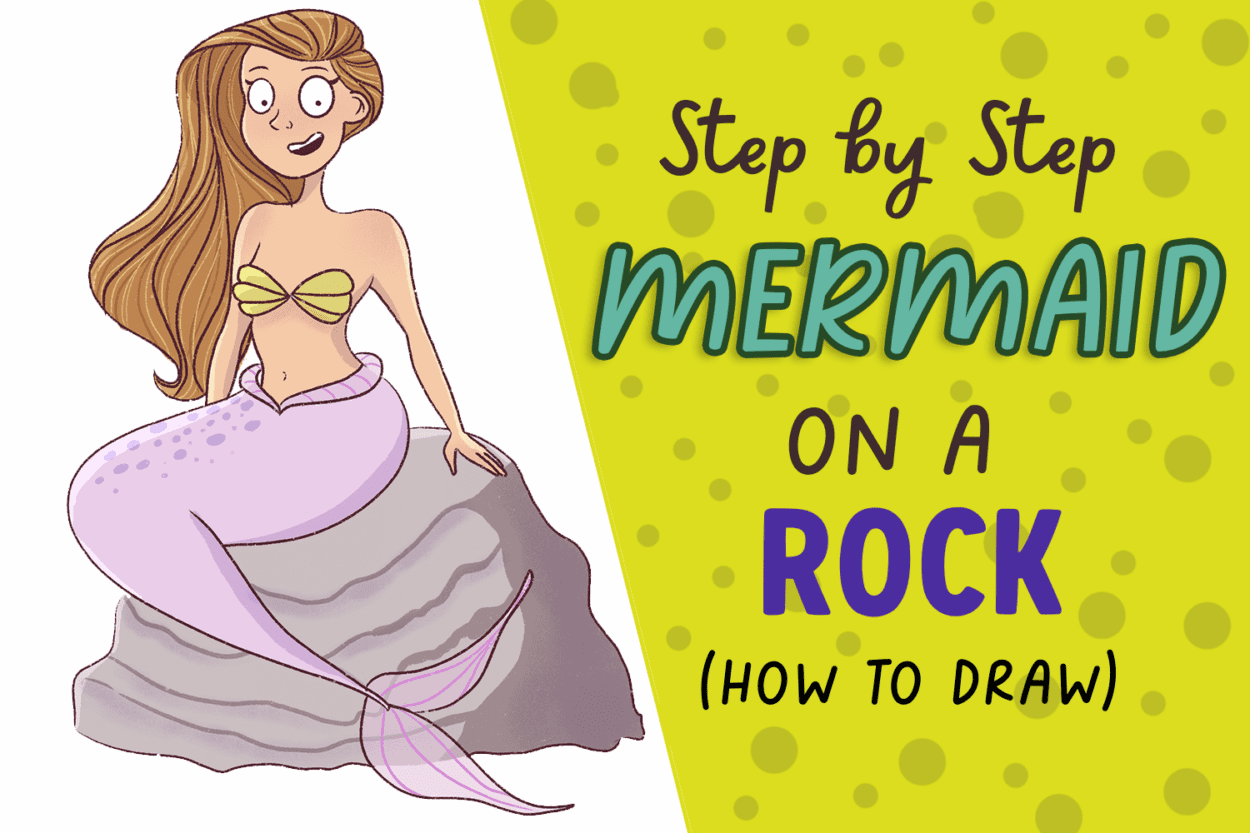
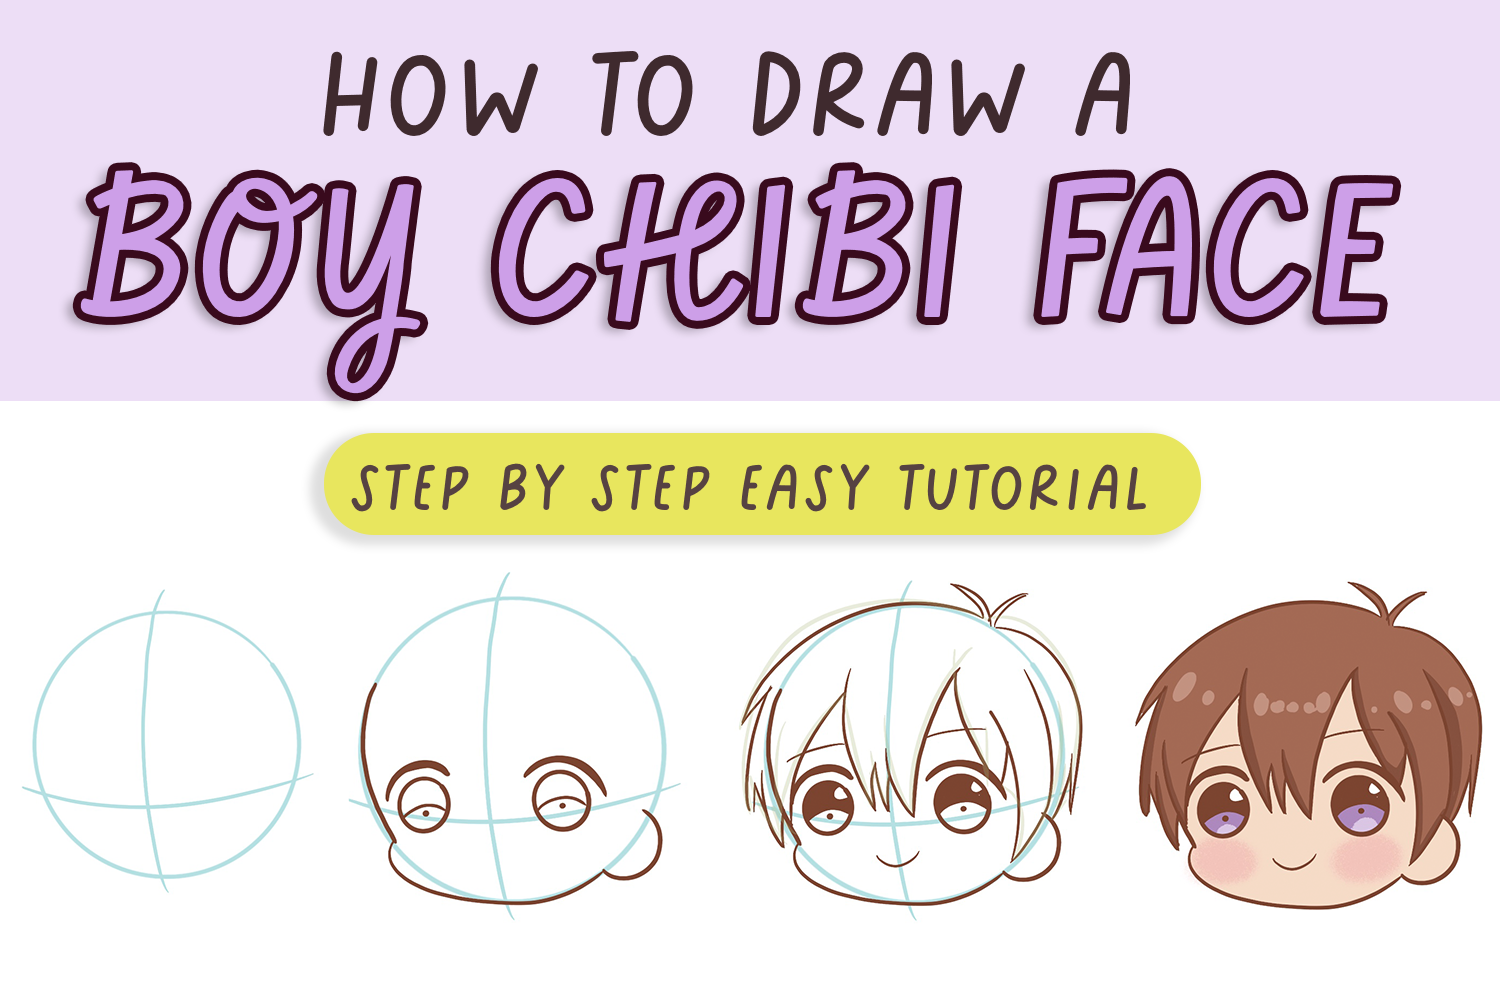
Step 1: Drawing the head of the mermaid
I’m not going to delve into drawing cartoon heads in this tutorial. However, if you want to learn how to pick up drawing heads and faces, get this book.
First, I’m going to draw a circle and 2 lines across the circle.

I’m going to use this circle as a guide to draw the head of the mermaid.
Next, let’s draw the face.
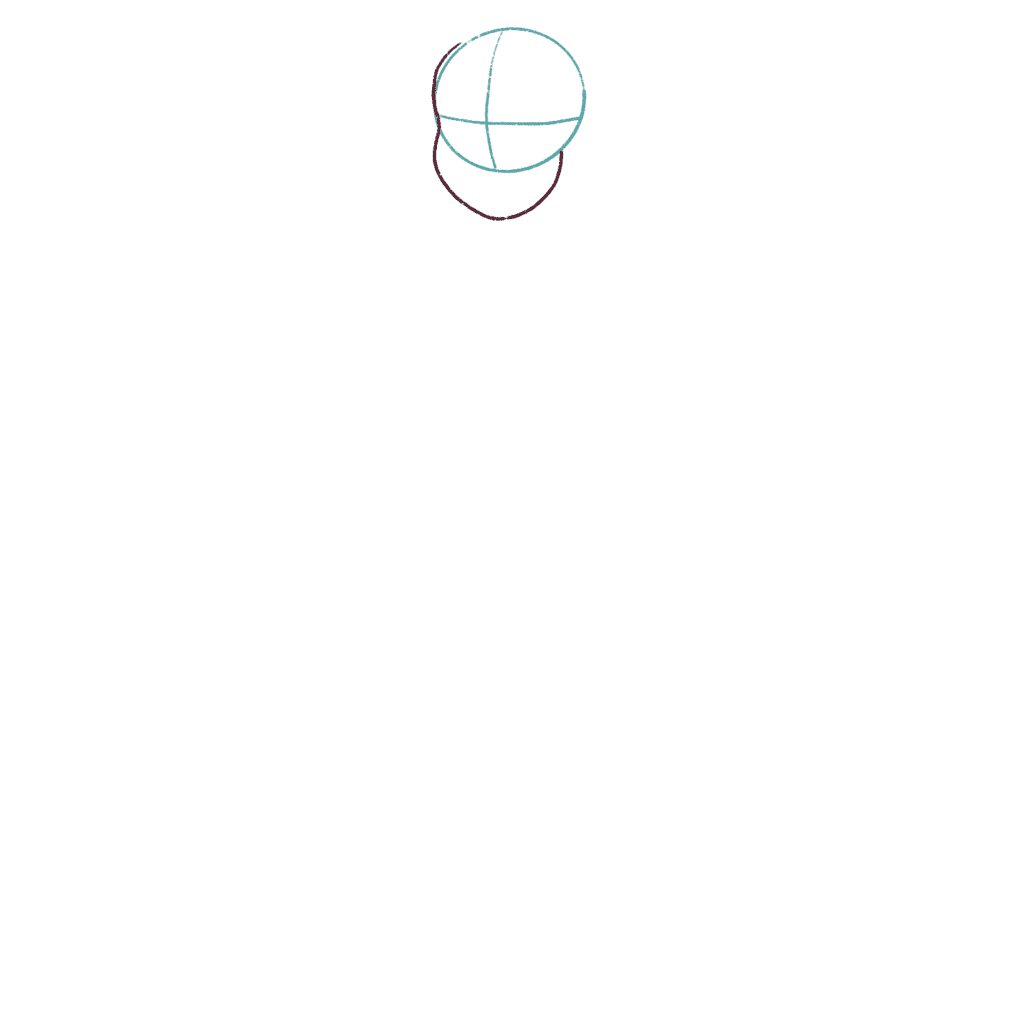
Now, I’ll draw the ear of the mermaid.
Yes, I like to draw big ears on my cartoon heads.
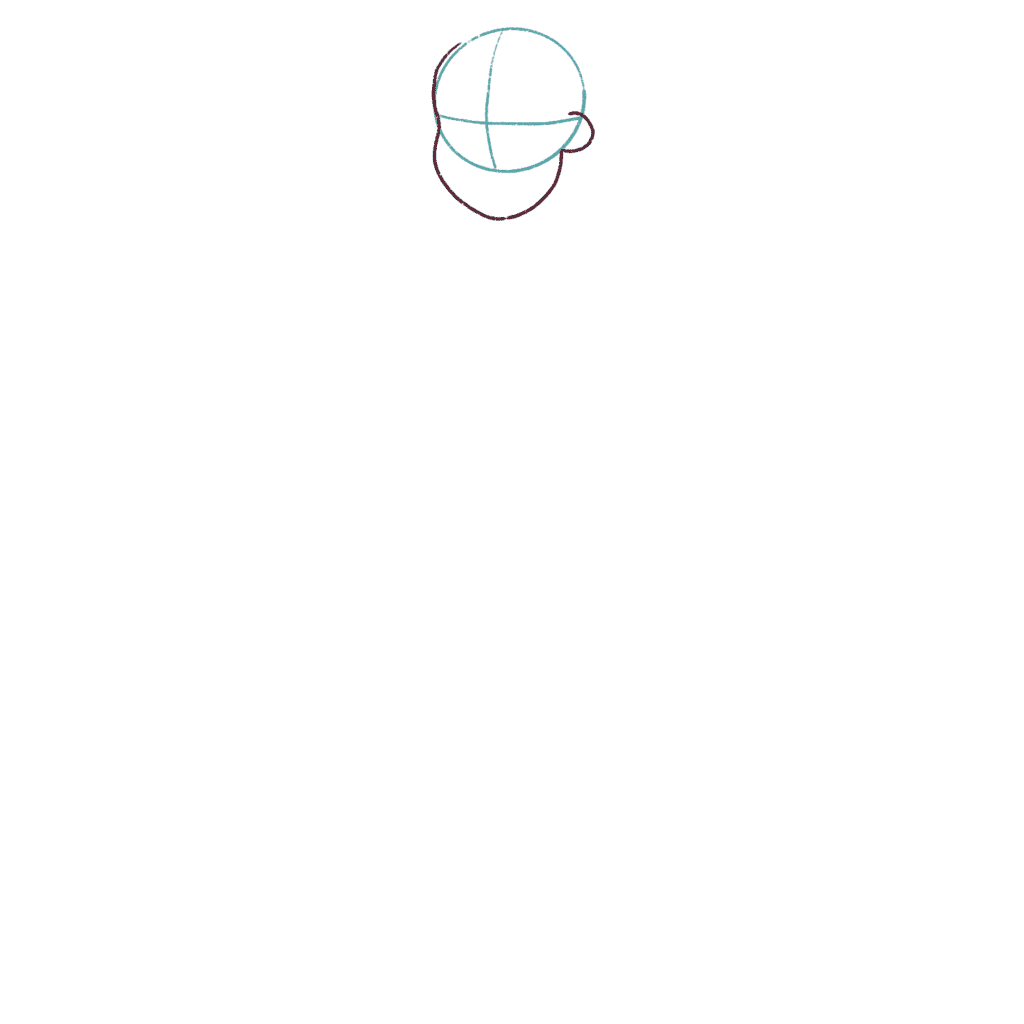
And then I’ll draw the rest of the skull of the mermaid.
Okay, we’re done with the head shape. Now, we can go in and draw the expressions.
I’m going to use the guide to draw the eyes and eyebrows.
Please note, that I’m not doing anything too complicated. I’m trying to keep things simple.

Next, I’ll draw the nose.
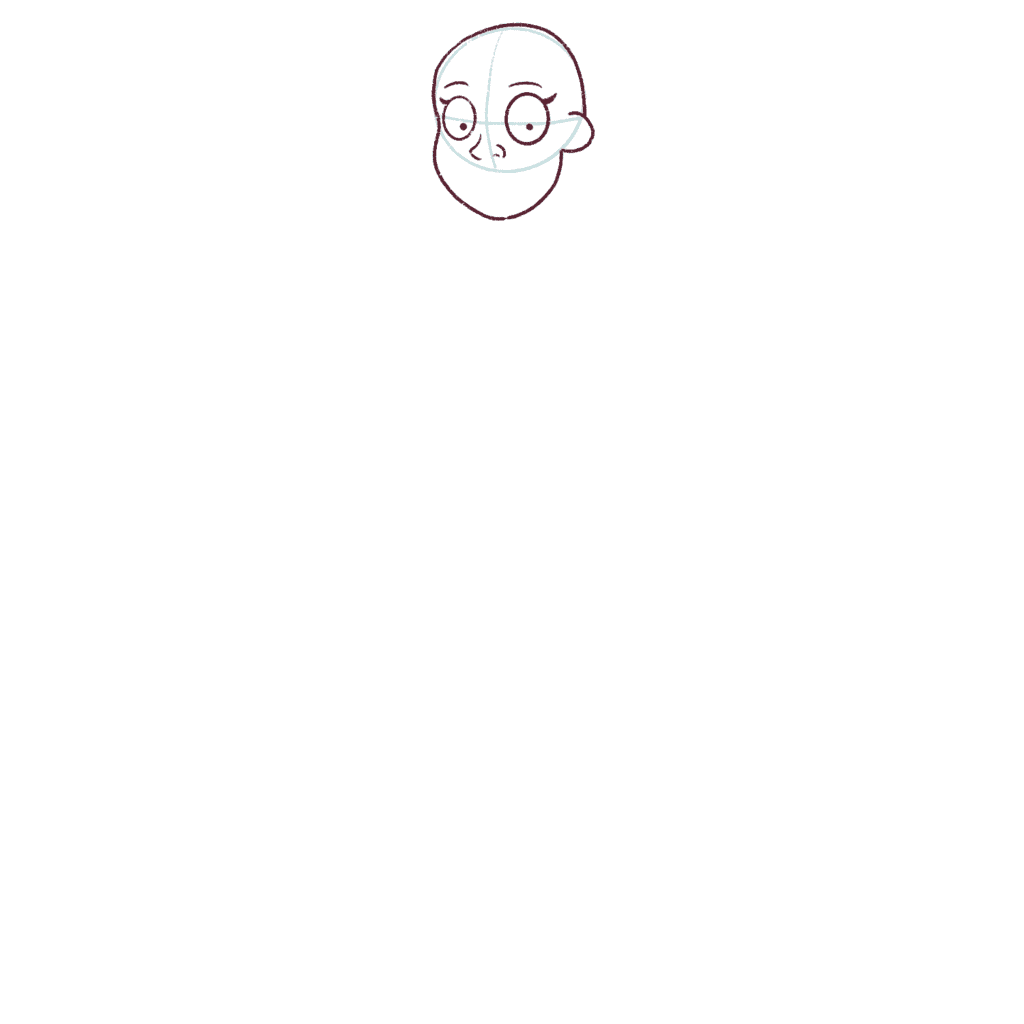
Next, I’m going to draw the mouth on her face.

And now that we’re done drawing the mermaid’s face, we can draw her body.
Step 2: Drawing the torso of the mermaid
Okay, we aren’t drawing a real human being or mermaid here.
It’s a cartoon-style mermaid, so the proportions are different.
I draw my characters with big heads. So, the torso is twice as big as the body.
So, to get the measurements of the body right, I’m going to measure 2 heads and draw a line that is as long as 2 heads of the mermaid.
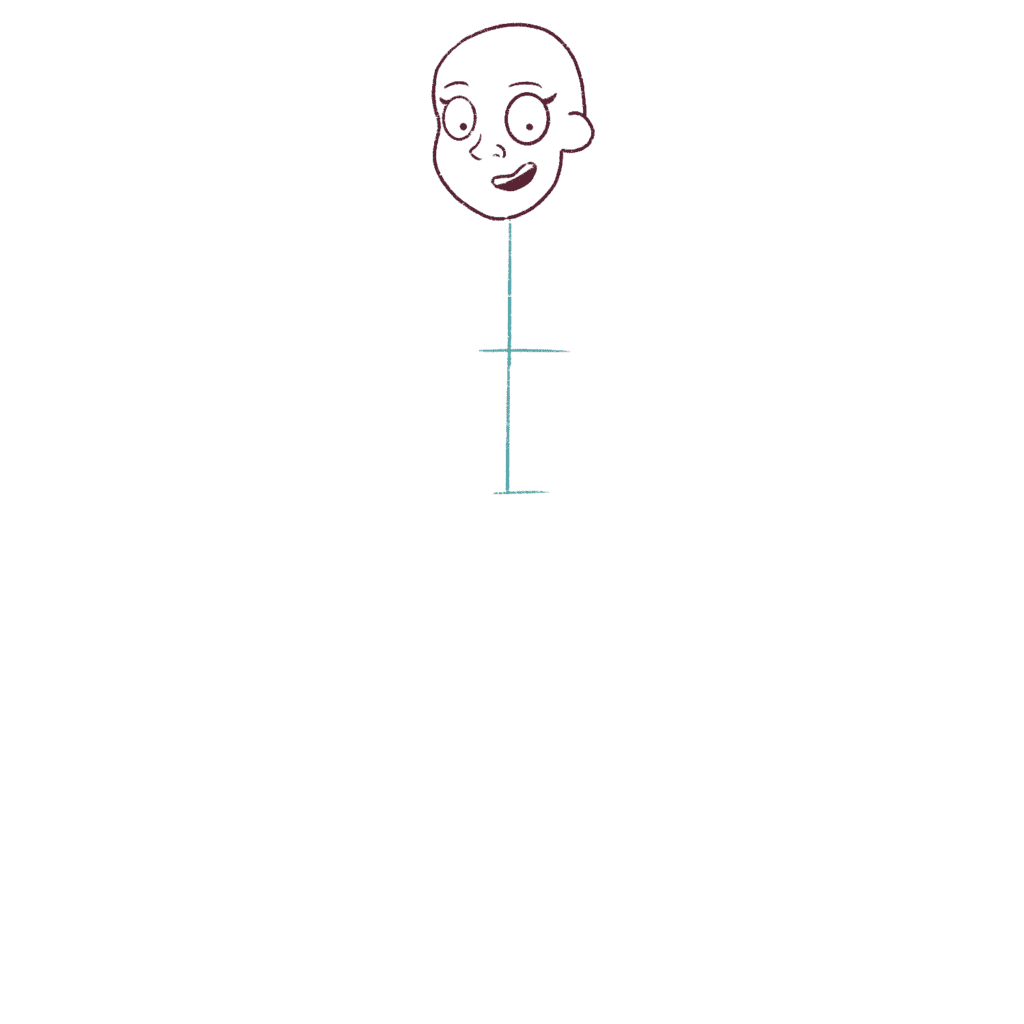
This is going to help us draw a proportionate torso.
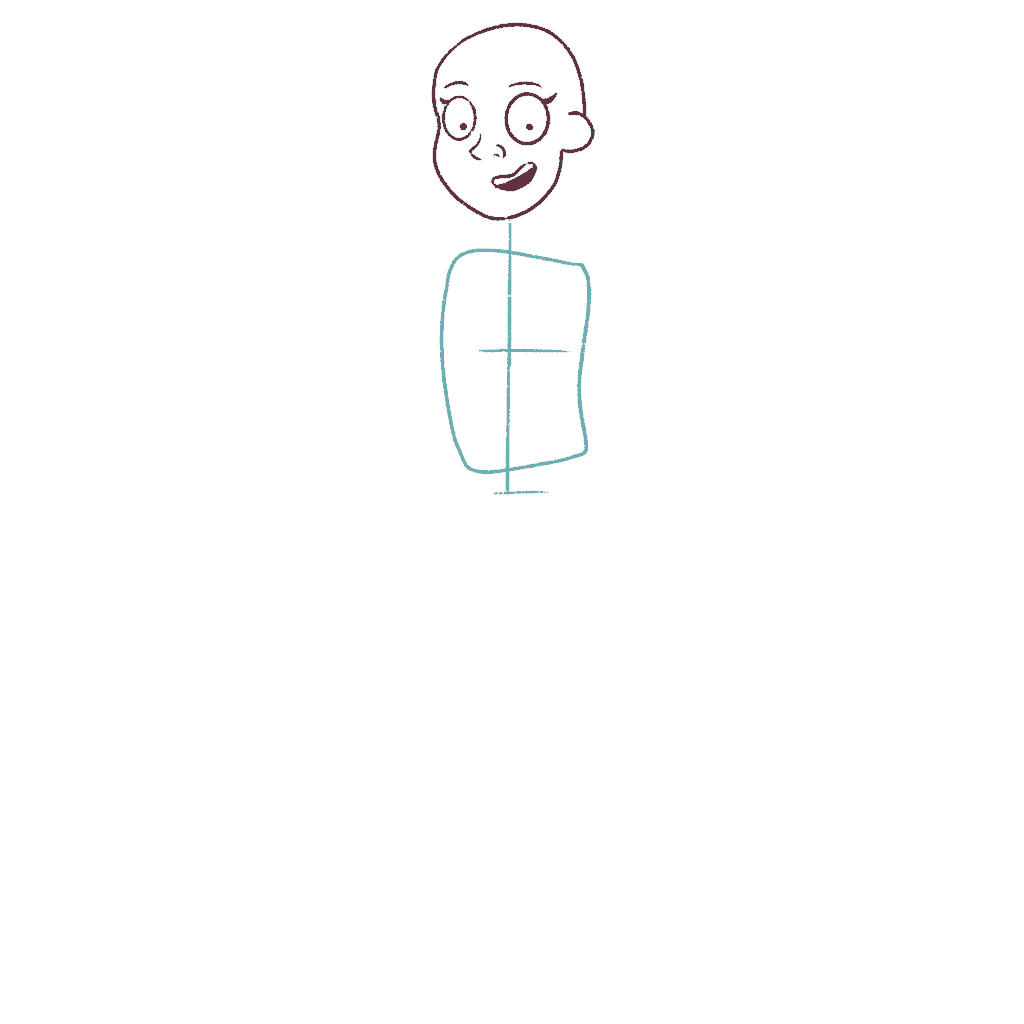
Next, we’ll draw the torso roughly just to give us an idea of what the body looks like.
When drawing people, it’s best to break the body into easy and understandable shapes because this makes drawing complex objects easier!
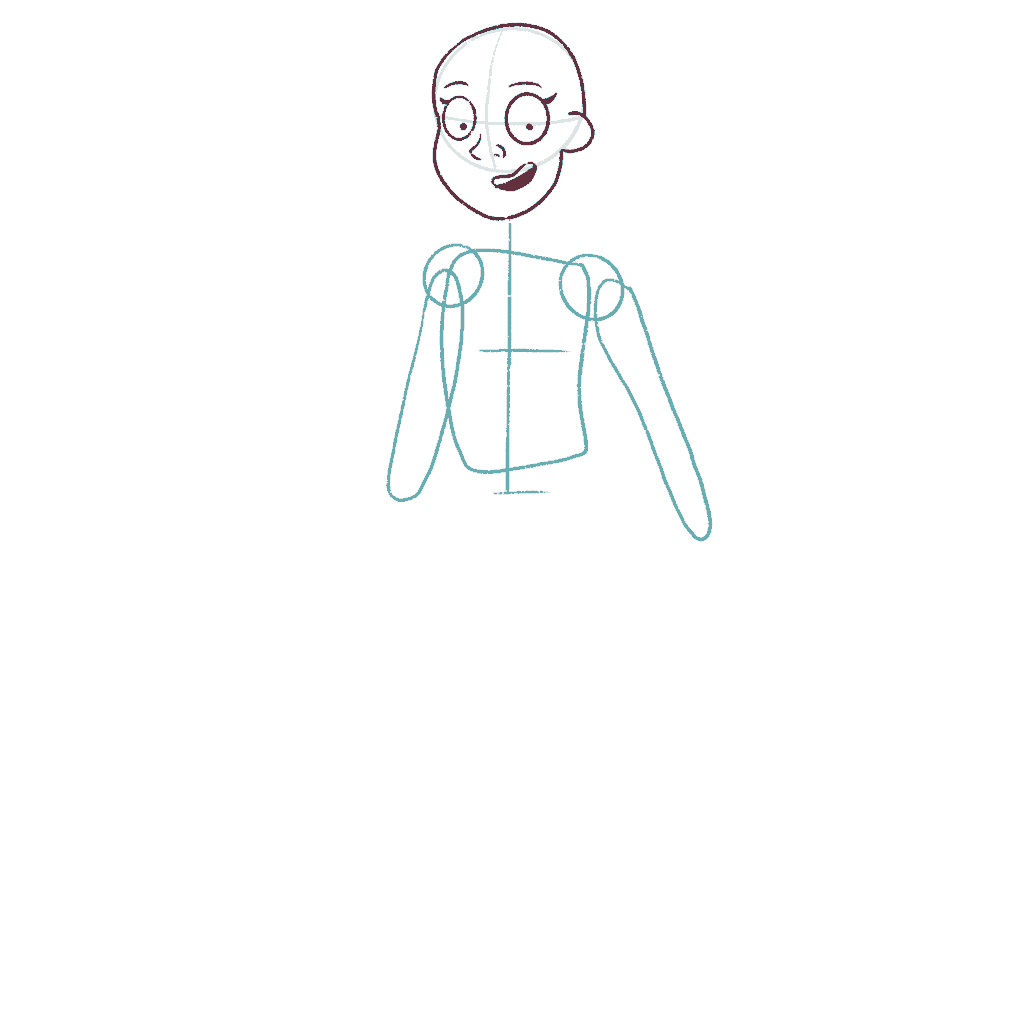
Next, I’m going to draw the joints, shoulders, and arms.
Notice how the arms aren’t equal in size. This is because the right arm is in front of the mermaid. I’m going to place it on the rock so that she’s propping herself up with it.
The left arm is behind her so it will look smaller.
Now, I’m going to draw the neck of the mermaid.
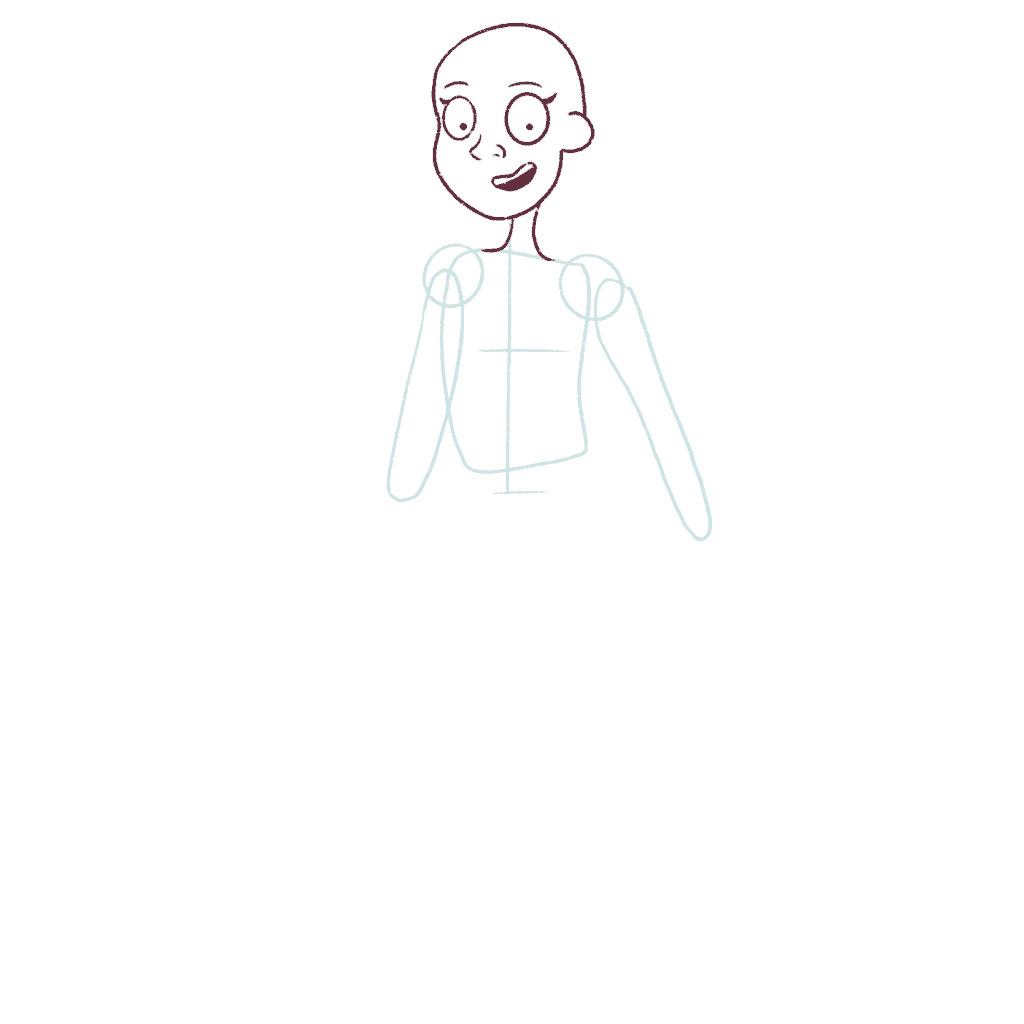
Next, let’s draw the outline of the torso. I’m also going to add the mermaid’s navel.
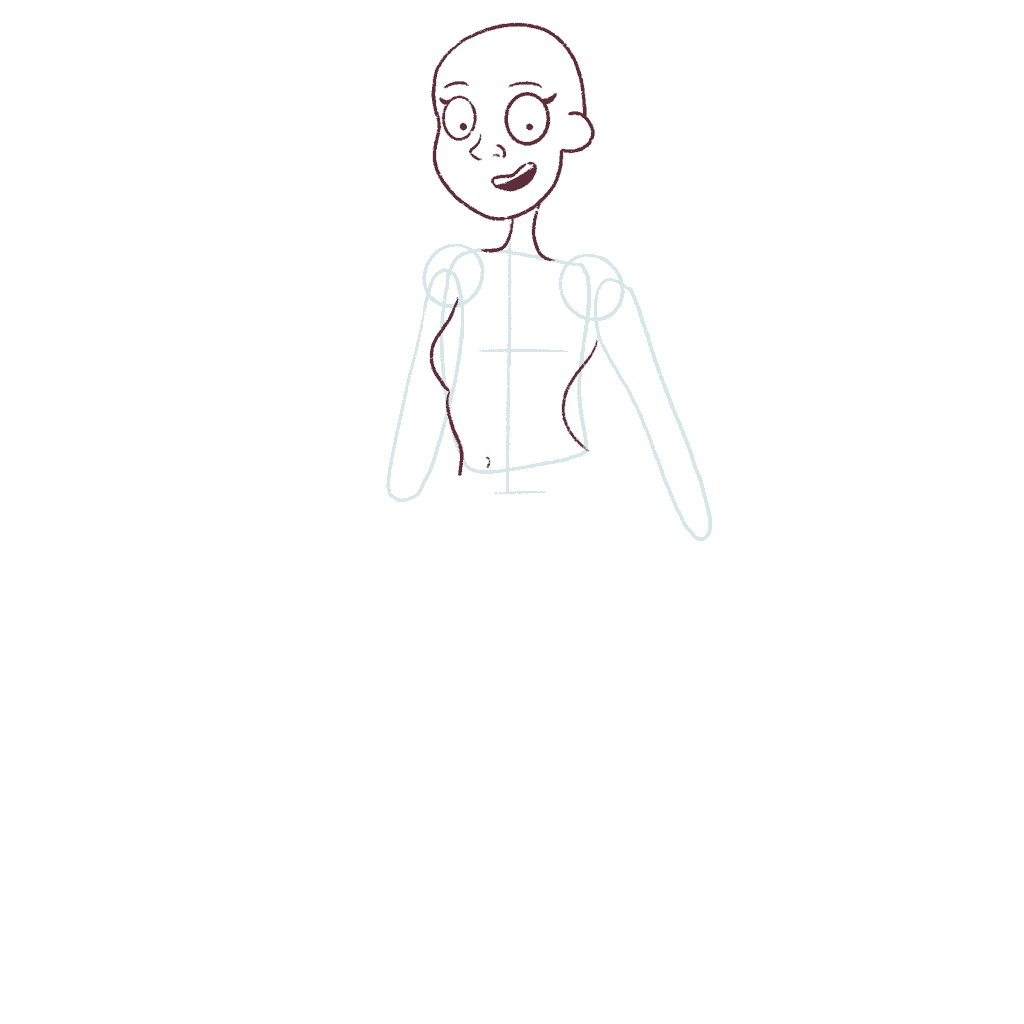
And now, I’ll draw her arms. I’m not going to go into detail about the arms, but if you are looking to learn how to draw human anatomy, I suggest picking up these books:


Remember, the left arm is smaller than the right because it is behind the mermaid.
Next, I’m going to draw her right hand.
I won’t go into detail about drawing hands, because I already have a tutorial on drawing hands that you can follow here.
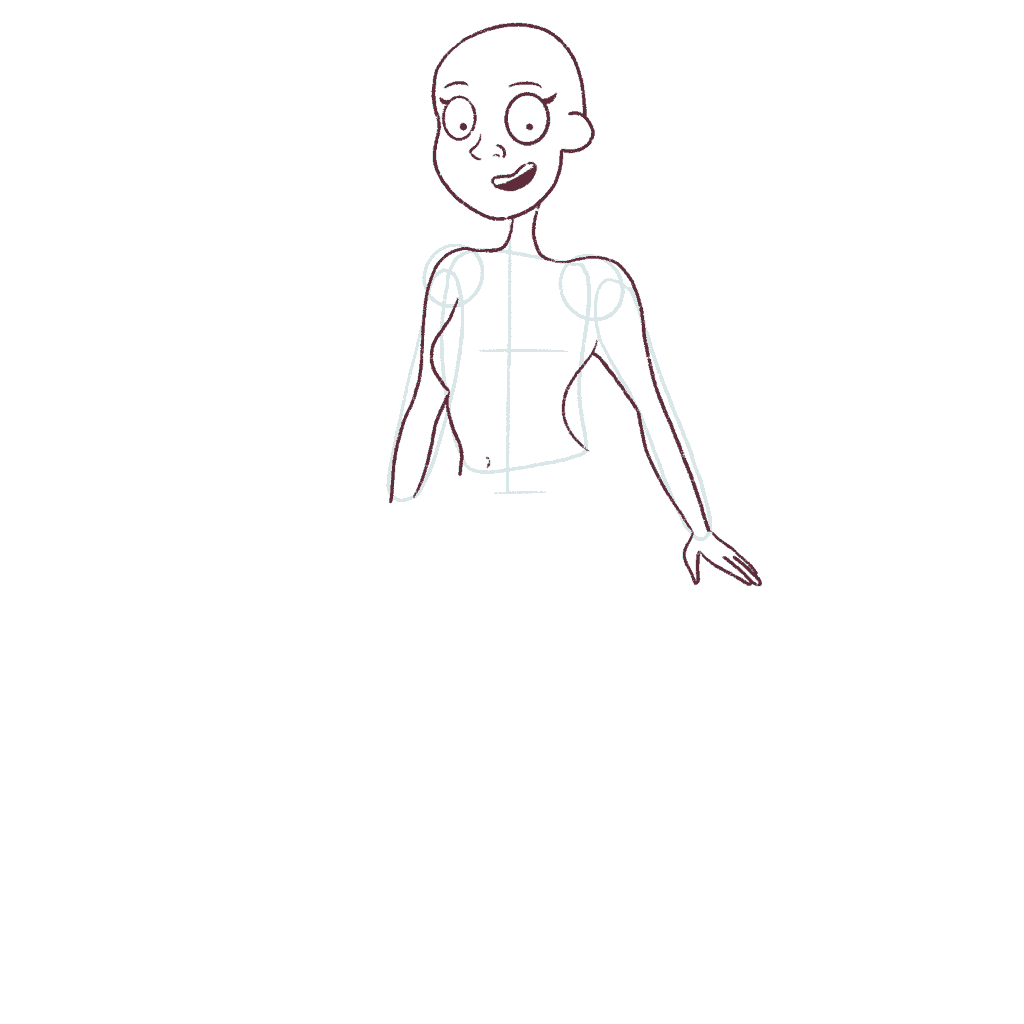
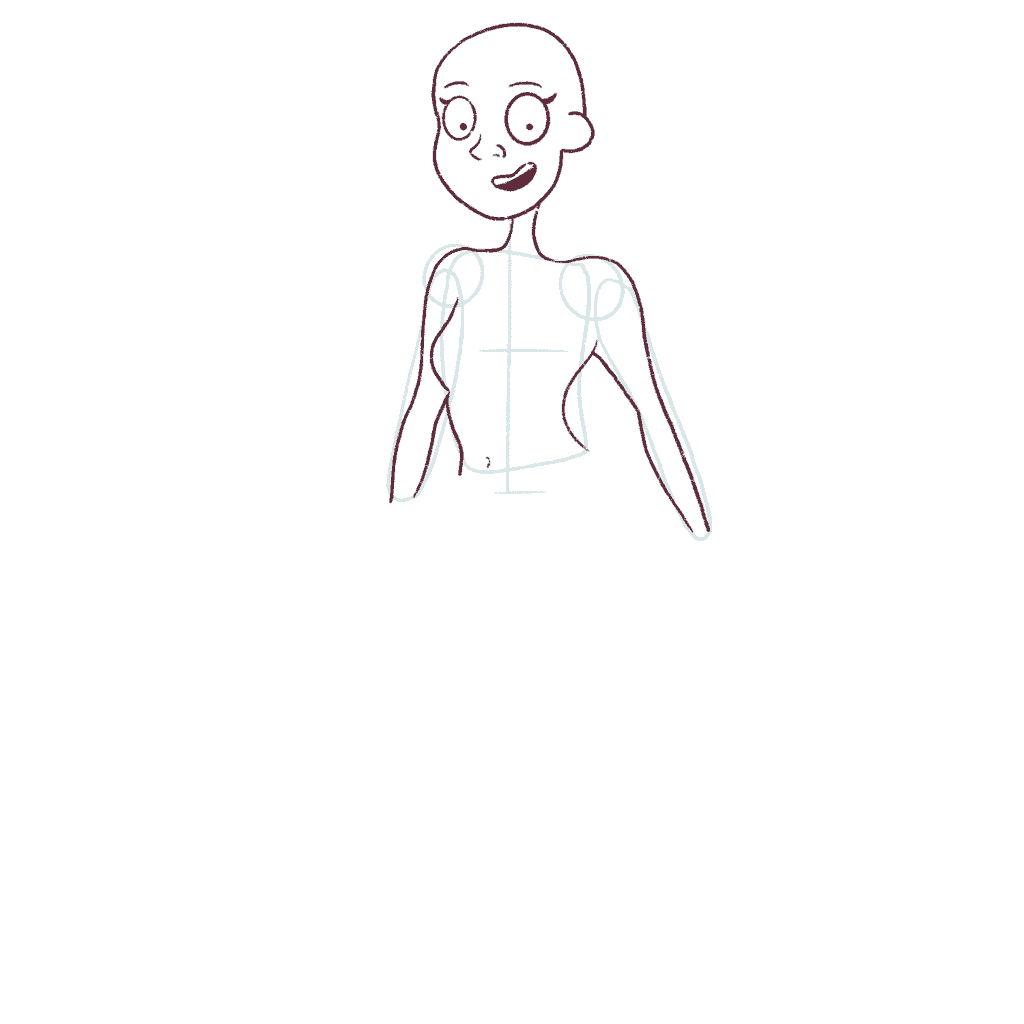
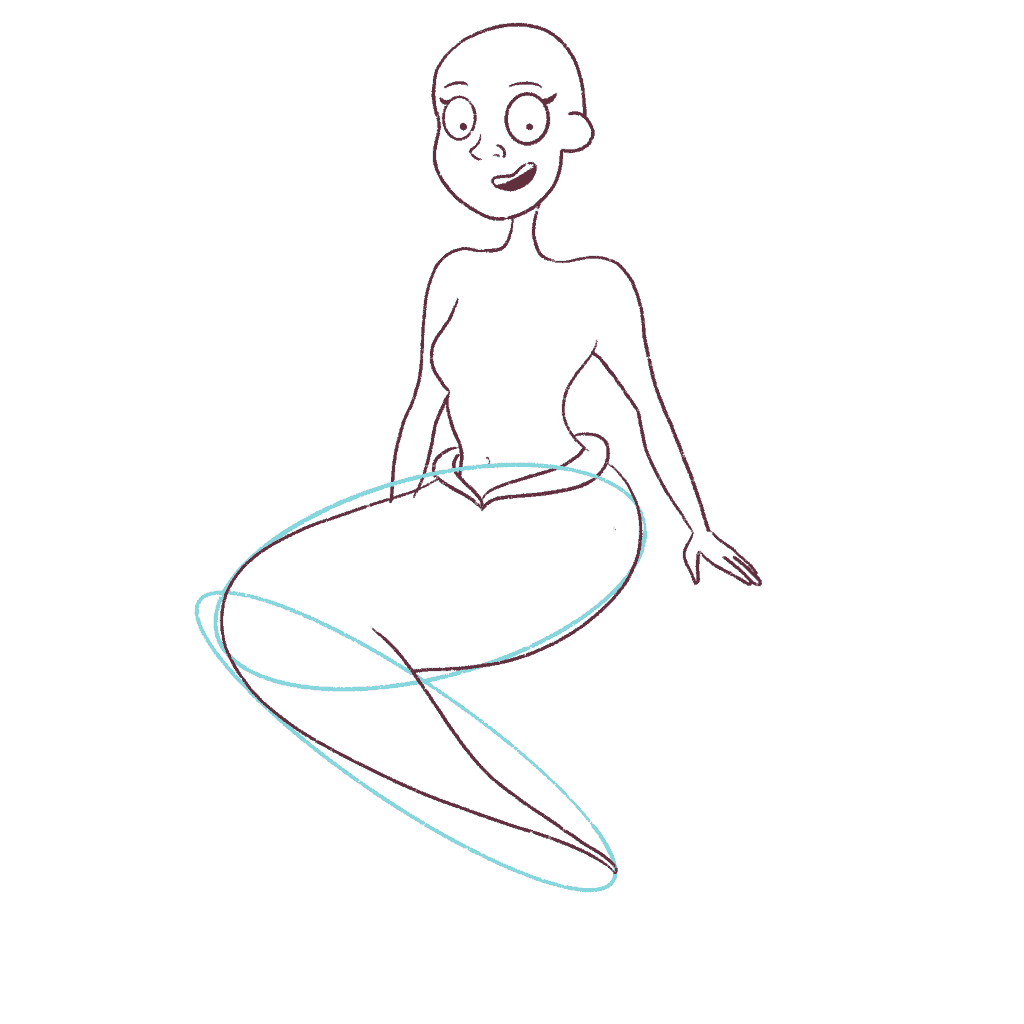
Step 3: Drawing the mermaid tail
Okay, we’ve finished the torso.
Now, we get to the fun part – the mermaid’s tail!
I’m going to draw two fins around the mermaid’s torso and then draw the rough guidelines for the mermaid tail.
I won’t be going into too much detail on drawing the mermaid’s tail since I have a long post about it here.
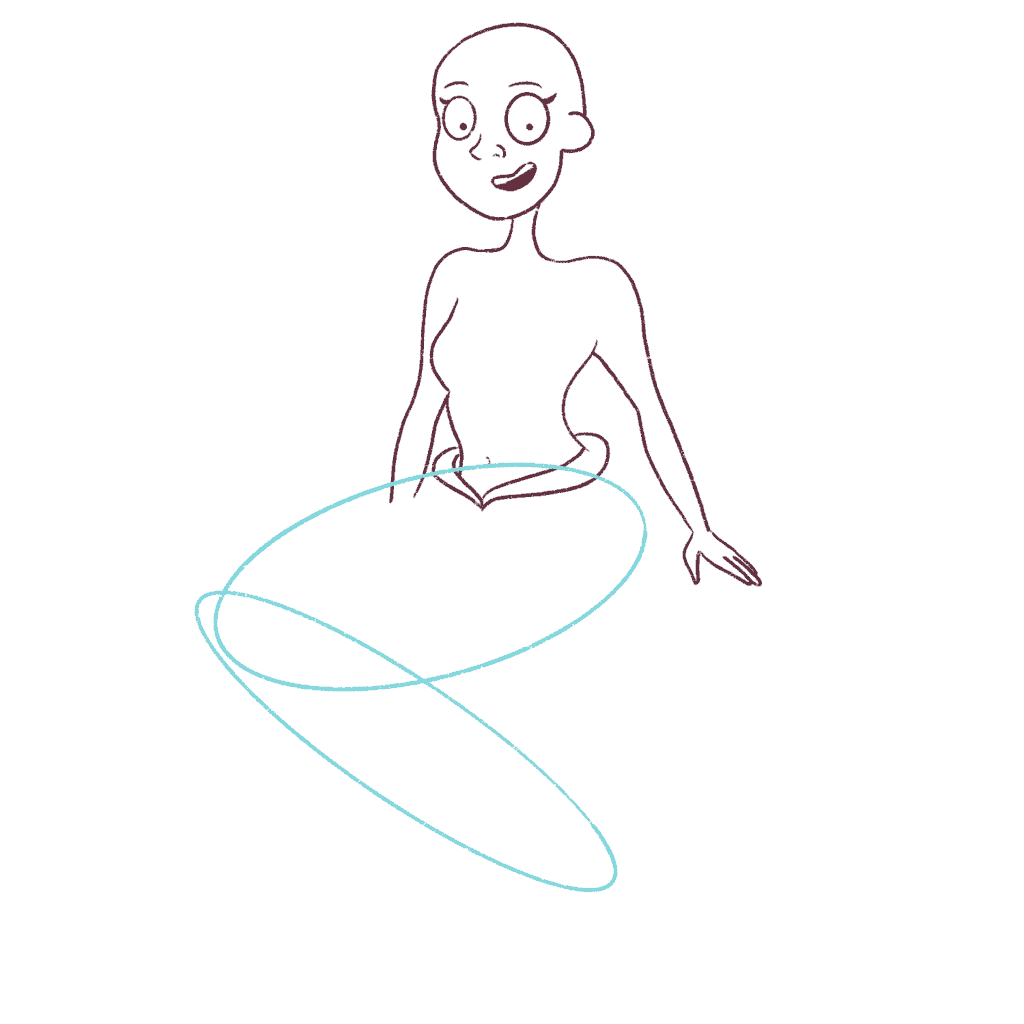
Next, using the rough guidelines, I will start drawing the mermaid’s tail.
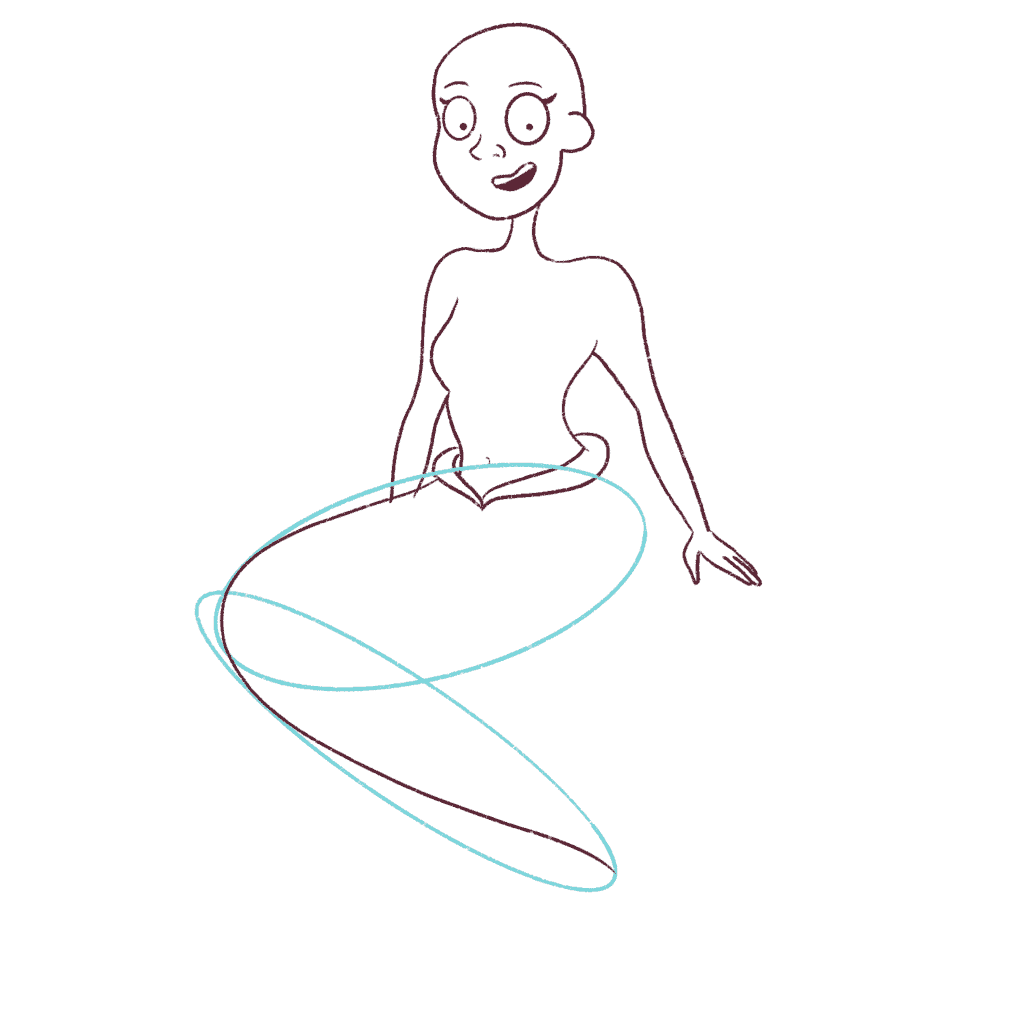
And now, I will continue to draw the rest of the tail.
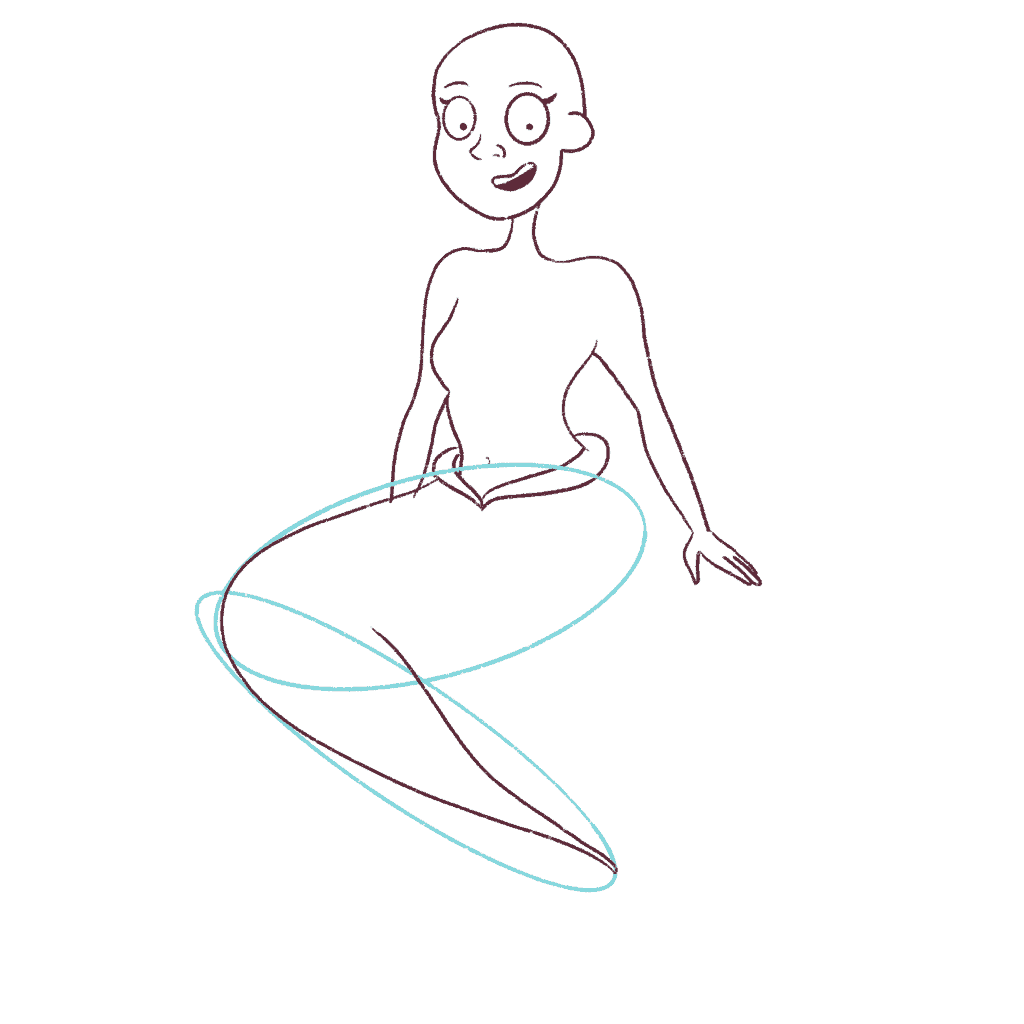
And now, complete the mermaid’s tail. Make sure that the tail lines up with the outline of the torso. That way, it will look more organic.
Now, I’m going to draw the tail fins.
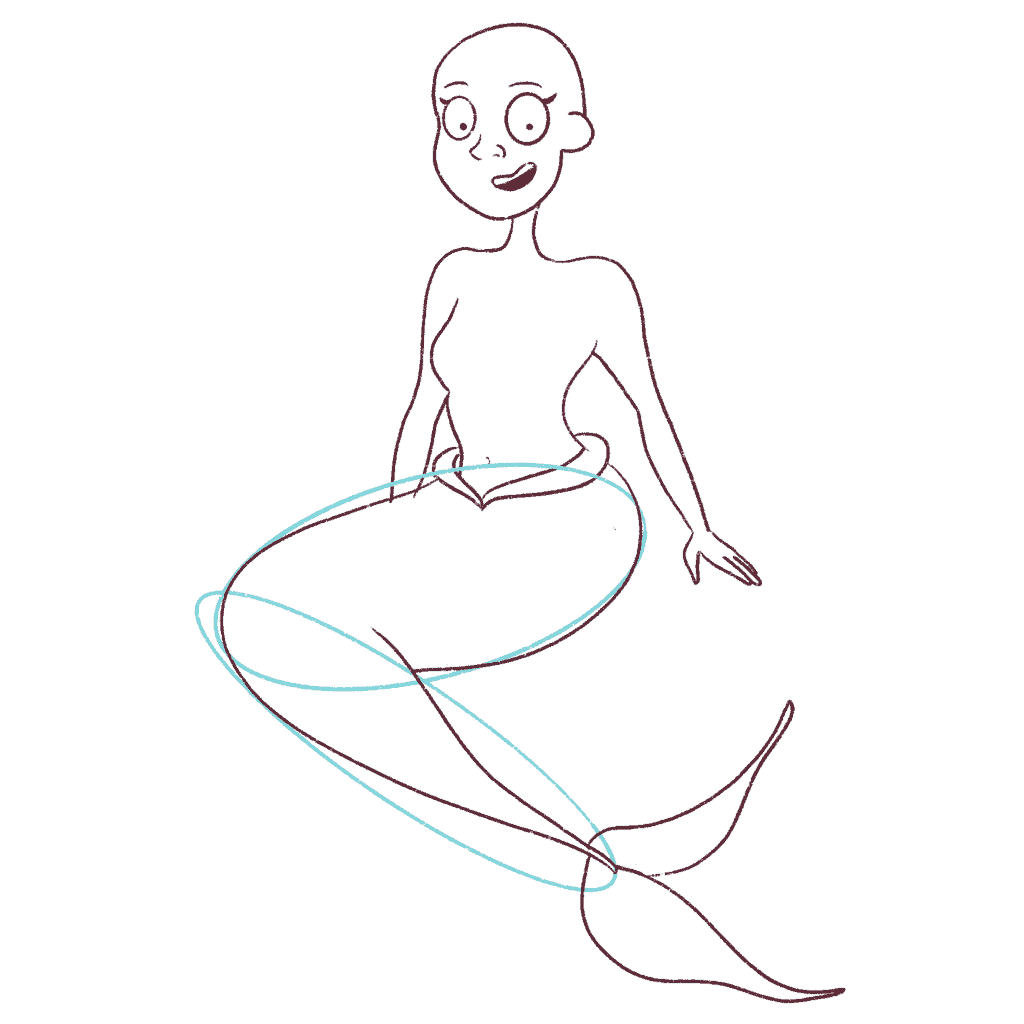
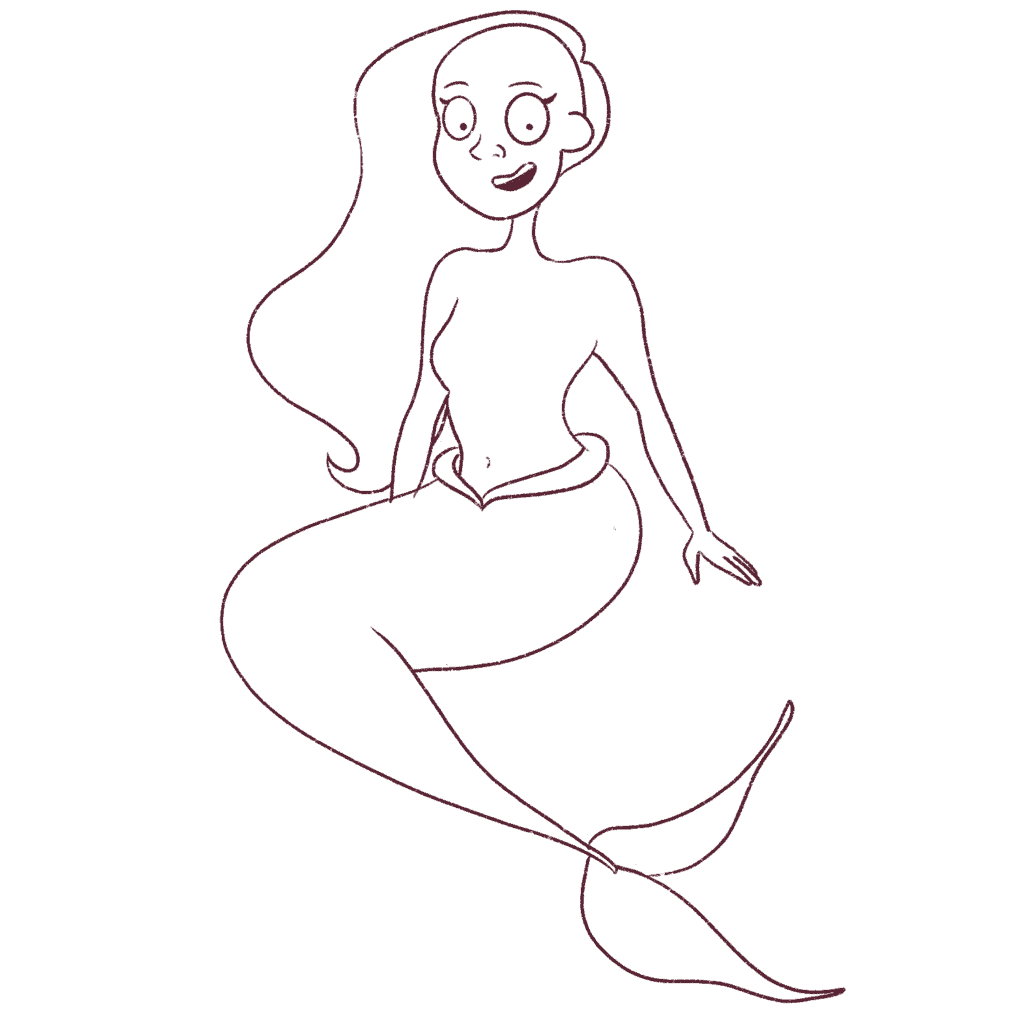
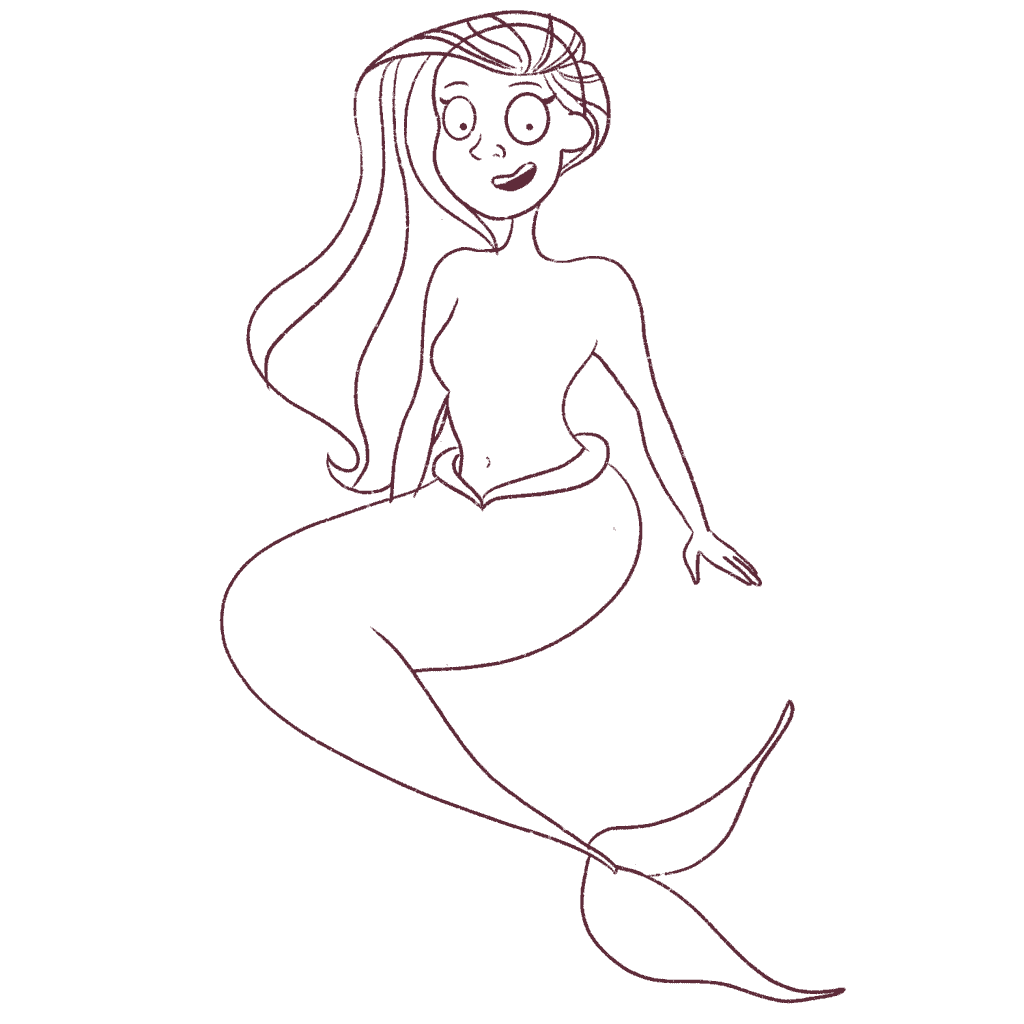
I’m going to erase all the rough lines now and draw the hair.
Step 4: Drawing the mermaid’s hair
It’s important to think of the hair shape you want your character to have when drawing hair.
So, I’m just going to start with the shape of the mermaid’s hair.
Hair can be quite tricky to draw.
Once you know what shape you want the hair to be, you can manipulate it and start detailing the hair.
Here are some books that will help you to draw hair:


So, this is the shape I’m going for. Now, I’m going to divide it into 2 sections.
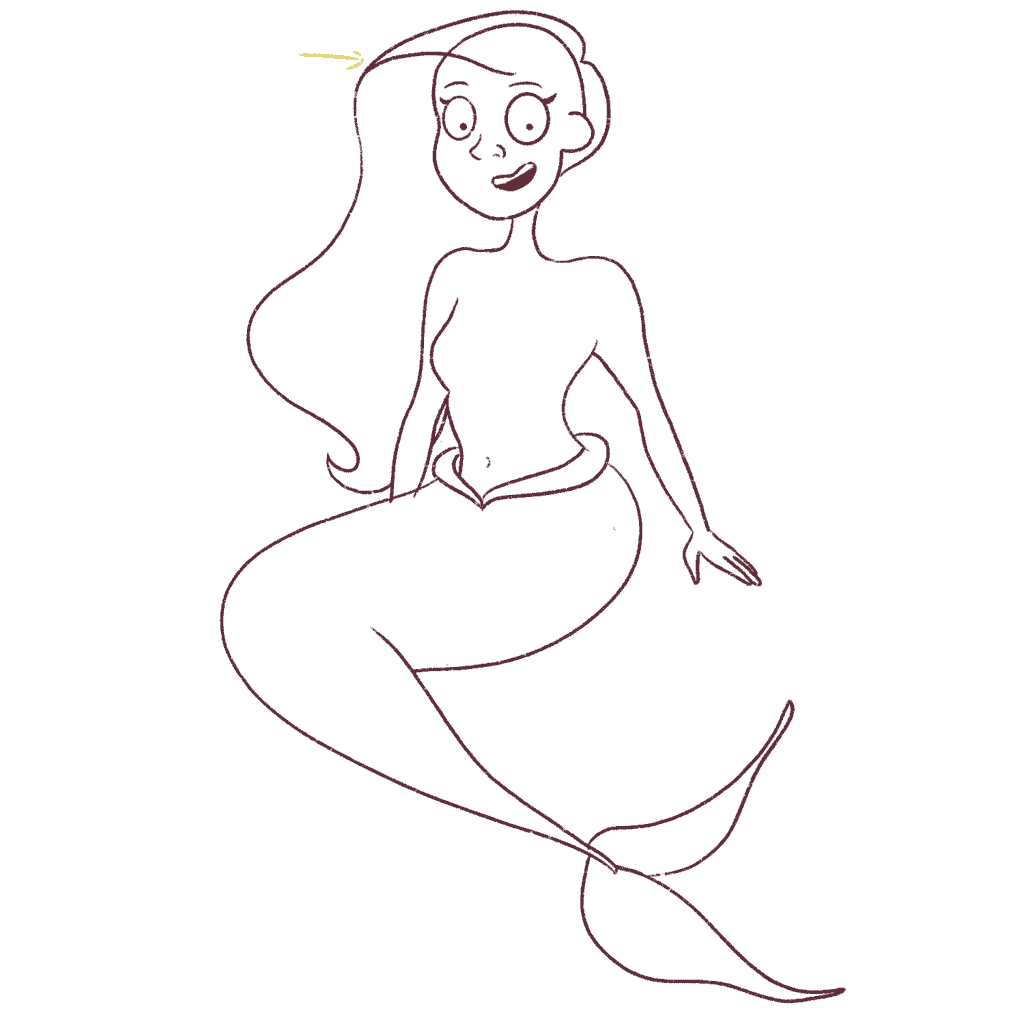
Now, I’m going to draw multiple strands – remember to draw it in the direction of hair growth.
At this stage, you can divide your hair into multiple sections.
Another note to remember when drawing hair strands, don’t make the strands parallel.
Vary the distance between the strands so that it looks more organic.
That’s how you draw cartoon hair with conviction!
Take it section by section – drawing hair requires a lot of fluid strokes. And it becomes better with practice.
Now, I’m going to section the lower part of the mermaid’s hair.
I’m now going to divide these sections into more sections just to add more texture to her hair.

Remember not to take too much stress when drawing hair.
If it’s not perfect, let it be. Drawing hair becomes better with practice!
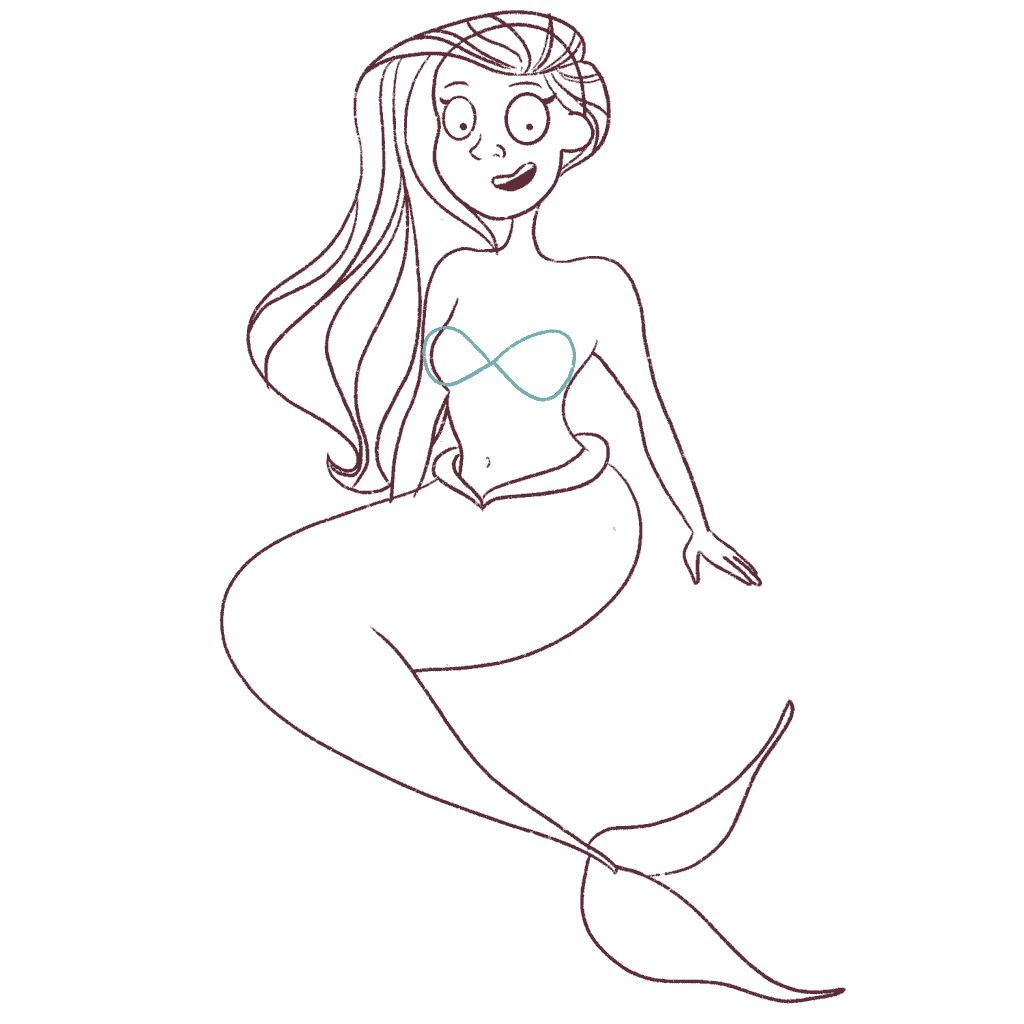
Now, I’m going to move to the seashell bra.
Step 5: Drawing the seashell bra and the rock
Simply draw an “8” shape figure on the chest of the mermaid.
And now, use that as a guide to draw little teardrop shapes so that you can make a seashell bra for your mermaid!
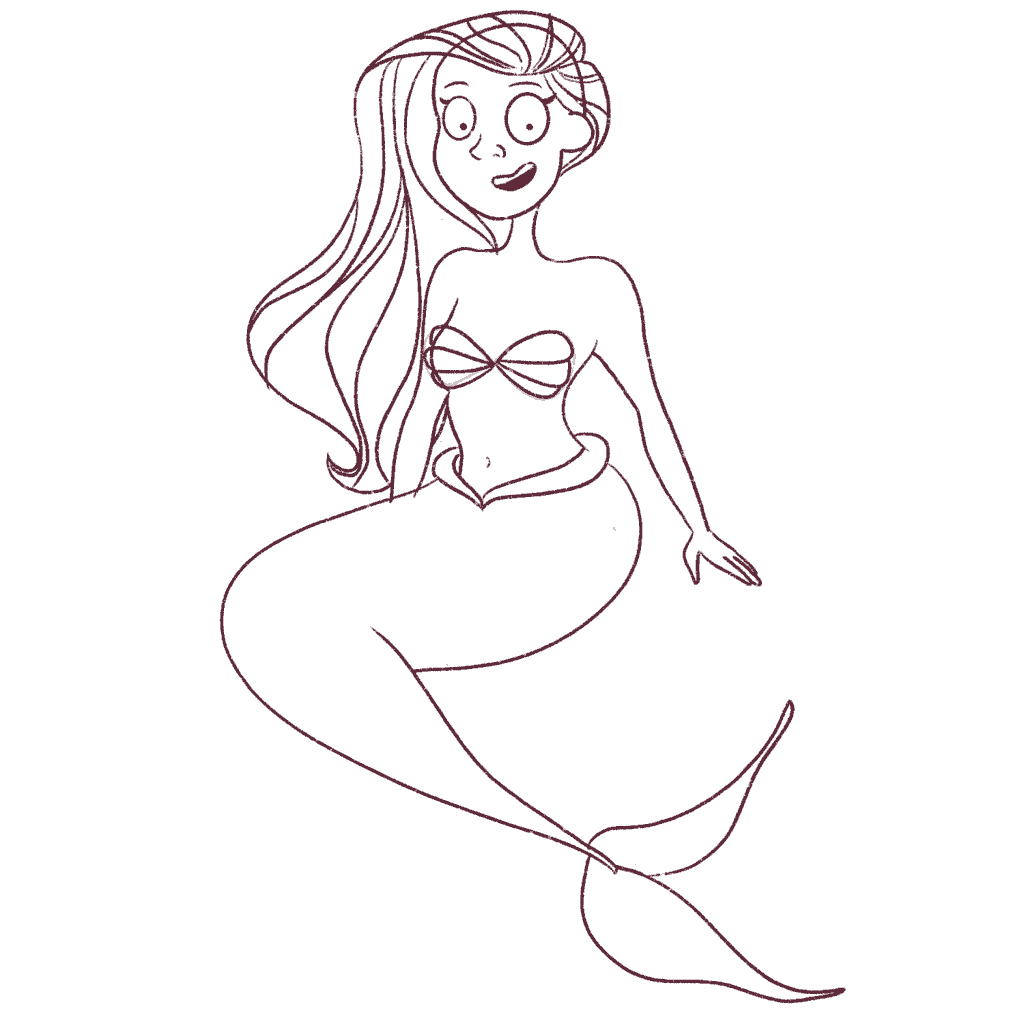
Next, it’s time to draw the rock since we are learning how to draw a mermaid on a rock.
I’m just going to go with a very simple rock figure because it needs to be in the background.
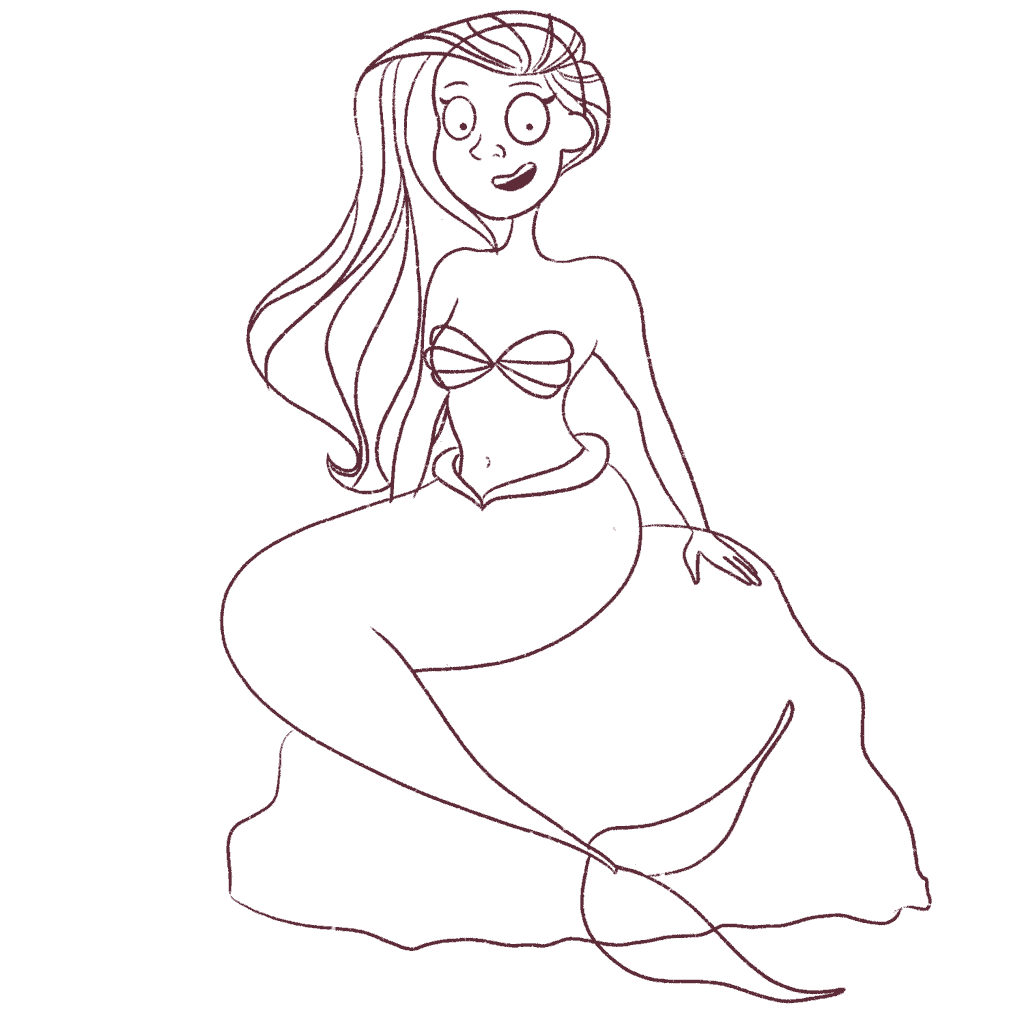
And voila!
We’ve finished learning how to draw a mermaid on a rock.
Now, we can either leave it like this, or we can color it!
Coloring this is going to be a lot of fun.
The process is kinda long, so if you are interested, keep reading further and I’ll show you how I color my mermaid.
Step 6: How to color the mermaid on a rock
I am drawing this illustration and coloring it via Procreate on an Apple iPad while using an Apple Pencil. However, you can use any coloring method like Copic markers or watercolor paints or color pencils.
I first group all the layers and then duplicate it. I merge the first group into 1 layer and make it my reference layer. This will help me color the illustration more easily because I can simply drag and drop the color to the part I want to color.
Every colored layer will be underneath the outline layer.
Please leave a comment if you are stuck with this, and I’ll be more than happy to help.
Also, please note that every single coloring is done on a different layer – this makes it easy to change and manipulate layers.
For instance, the skin base tone is on one layer while the blush and makeup are on another layer, and so on!
I use the dry ink brush mostly (comes free with Procreate) for coloring.
Let’s start with the skin of the mermaid. I’m going to go with a peachy tone.

Now, with a pinkish tone (slightly darker in hue than the peach), I’m going to add some detail on her shoulders, hand, and cheeks.
I’m using the bonobo brush for this.

Now, how do we color the rock the mermaid is sitting on?
I’m going to go ahead and color the big rock with a base color first.
I’m going to use a brownish-toned gray.

Now, I’m going to divide this rock into sections to make it look more realistic. With a darker gray tone, I’m just going to draw rigid lines.

Now to add some more depth to this rock, I am going to take the same dark color and draw a vertical line on the edge of the rock.

And then, I will color the edge of the rock – so that it acts as a shadow.

Now, I will add a little shadow to the sections of the rock as well just to make it look more realistic.

Now, I’m going to start coloring my favorite part of the mermaid – the tail.
I won’t be going into too much detail with this mermaid tail because I already have a post on coloring mermaid tails here.
Remember, you can go in with any color – I’m going to go for a nice pinkish purple.

And now, I’ll go in and color the tail as well.
I’m going to use a more pinkish tone and then after I’m done coloring the tail fins and the fins around her waist, I will decrease the opacity of those layers to 40% just to make it look more transparent.
This is why it is essential to have each section on a different layer so that you can manipulate layers without affecting the other parts you’ve colored.

By making these layers transparent, you will notice that you can see a bit of the rock behind her tail fins. It just adds extra detail to the illustration.
Okay, time to add more texture!
Over these transparent layers, create a new layer and use a dark pink tone to separate the fins into sections.

It’s time to color the seashell bra.
I’m going to go with a bright green since it contrasts with the lilac-colored tail.

And now, I will paint some spots to her tail in a deeper color just to add more definition to the tail.

Now, it’s time to color the hair.
I will make a whole new post on how I color hair soon, but for now, I’m just going to color the hair with a base color like a blondish brown.

And to add more definition to the hair, I’m going to go in and separate the hair into fine sections by adding dark brown strokes.

And now I’ll add some lighter strokes to her hair too.

Coloring the hair is honestly my favorite part of coloring illustrations.
Take your time with this because it can be a little tricky and don’t worry too much if it’s not perfect. Coloring hair comes with a lot of practice.
Now, you can stop here.
Or you can add some shadows and highlights to your mermaid illustration to make it pop!
Light plays a vital role in illustrations.
Let’s begin!
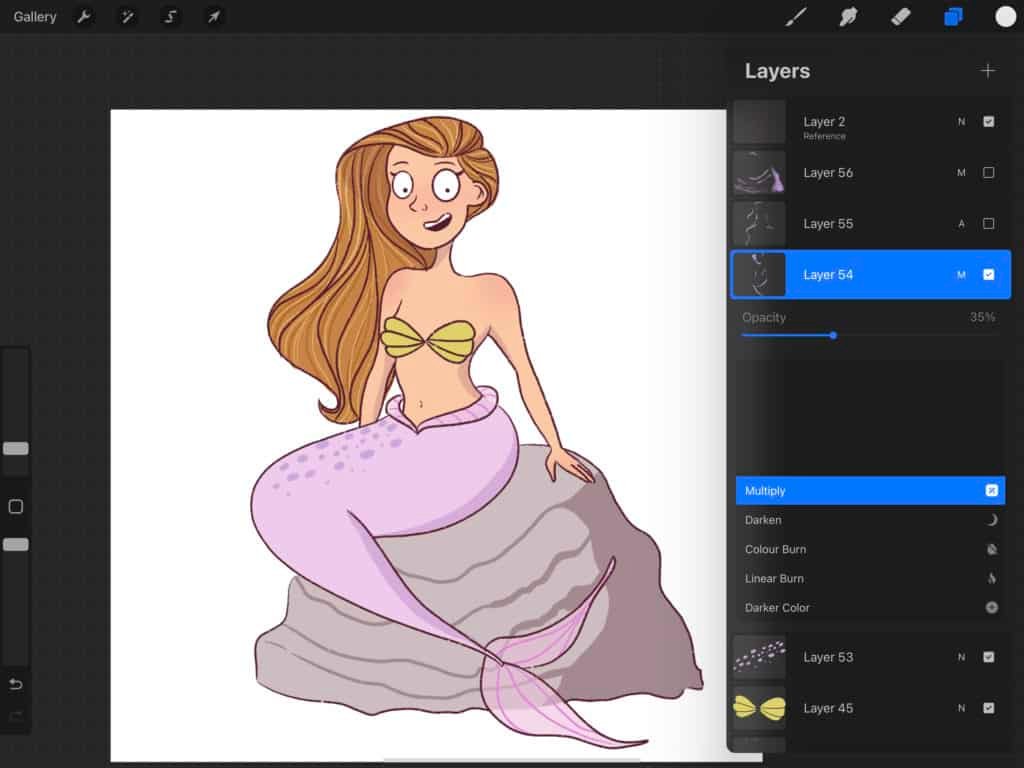
Step 7:How to add light and shadows to your mermaid illustration
First, I’m going to add very obvious shadows to this illustration.
With my dry ink brush (on a new layer), I will just paint over the prominent sections where shadows are cast using a medium purple.

Now, I’ll just change the blending mode of this layer to Multiply and decrease the opacity to 35%
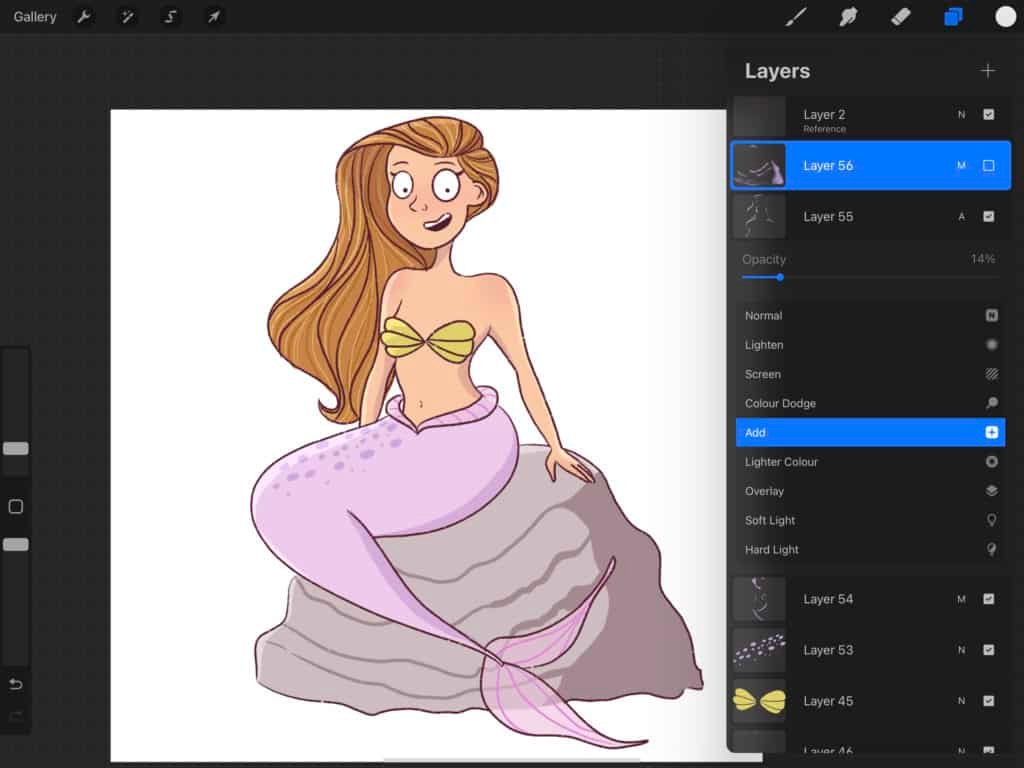
And after that, I’ll add some highlights.
Now, using the same dry ink brush, I will add the highlights using a light blue shade.

And then, I’m going to change the blending mode to add while decreasing the opacity to 14%.
So I should get something that looks like this!
And voila!
We’ve just learned how to draw a mermaid on a rock.
What to do if you find it challenging to draw mermaids?
Practice, practice, practice!
There are countless illustrations of mermaids, and you can even study women’s anatomy because a mermaid is a half-woman!
For the tail, you will have to study a little fish and shark anatomy just to understand the tail’s movement and draw it in various poses.
You can also read my post on how to draw a mermaid tail to see a simple pose you can start with.
You can use Google Images for references or just go ahead and check out these fantastic books for studying human anatomy.
I would also suggest getting this course to help you speed up your learning: It will help you draw people from your imagination.
Keep practicing different poses until you get comfortable drawing women and mermaids.
Conclusion + Resources
I hope this in-depth tutorial was helpful to you, and that you were able to learn how to draw a mermaid on a rock.
Of course, this tutorial will help you get started. You do have to practice drawing women and mermaids before you get the hang of it.
Learning human anatomy does take time. So, don’t panic if you don’t get it right away.
Every artist you see online that draws people has practiced drawing faces, arms, legs, and bodies repeatedly in their sketchbooks till they got to a stage where they can draw from memory.
It’s called enhancing your visual memory.
If you keep practicing drawing mermaids in various poses, you’ll soon be able to draw from memory.
The more you draw, the easier drawing becomes!
You can make things easier by picking up this Character Drawing Toolkit.
If you want to see more tutorials on hair and people, just leave a comment down below. You can check out my other People Tutorials to learn how to draw people and clothes.
I will be adding more drawing tutorials to this blog, so keep a lookout.
If you are looking for books on drawing mermaids, check this out!
If you’re looking to improve your drawings faster and want to really draw as a hobby or even pick up drawing professionally, I highly recommend picking up this beautiful online course that teaches you how to draw female cartoon characters.
Use code STRAYCURLS-10 to get a 10% discount!

This class will teach you how to draw a female character from scratch!
If you are just getting started with ProCreate, I highly recommend this course: Procreate for Beginners: Digital Illustration 101


Leave a Comment