If you’ve been following me for a while, you’ll know that I am madly obsessed with hair
I even had a comic page on Instagram (a while ago) solely focused on hair comics because I couldn’t get enough of drawing hair.
And it is slightly difficult to draw hair – there is a steep learning curve in the beginning because hair is fluid – it can be considered as a whole object or sections of 1 material.
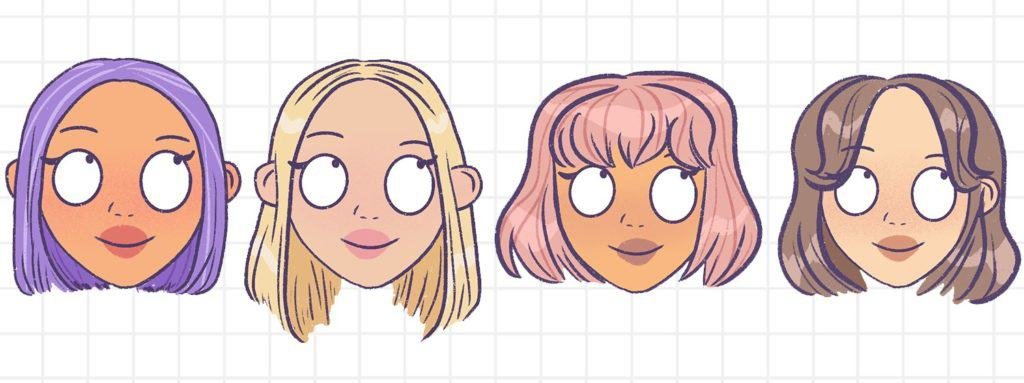
In this post, I’m going to break down how to draw a bob haircut in step-by-step instructions so that you can draw different types of bob haircuts.
Bob haircuts are a very chic and trendy hairstyle.
You can draw this on your cartoon characters and your anime characters – the possibilities are endless.
I already have a few hair tutorials here if you want to check them out.
It doesn’t matter if you’re a kid or an adult learning to draw hair, these steps are easy to follow, and as long as you follow the tutorial step by step, you should have no difficulty drawing it.
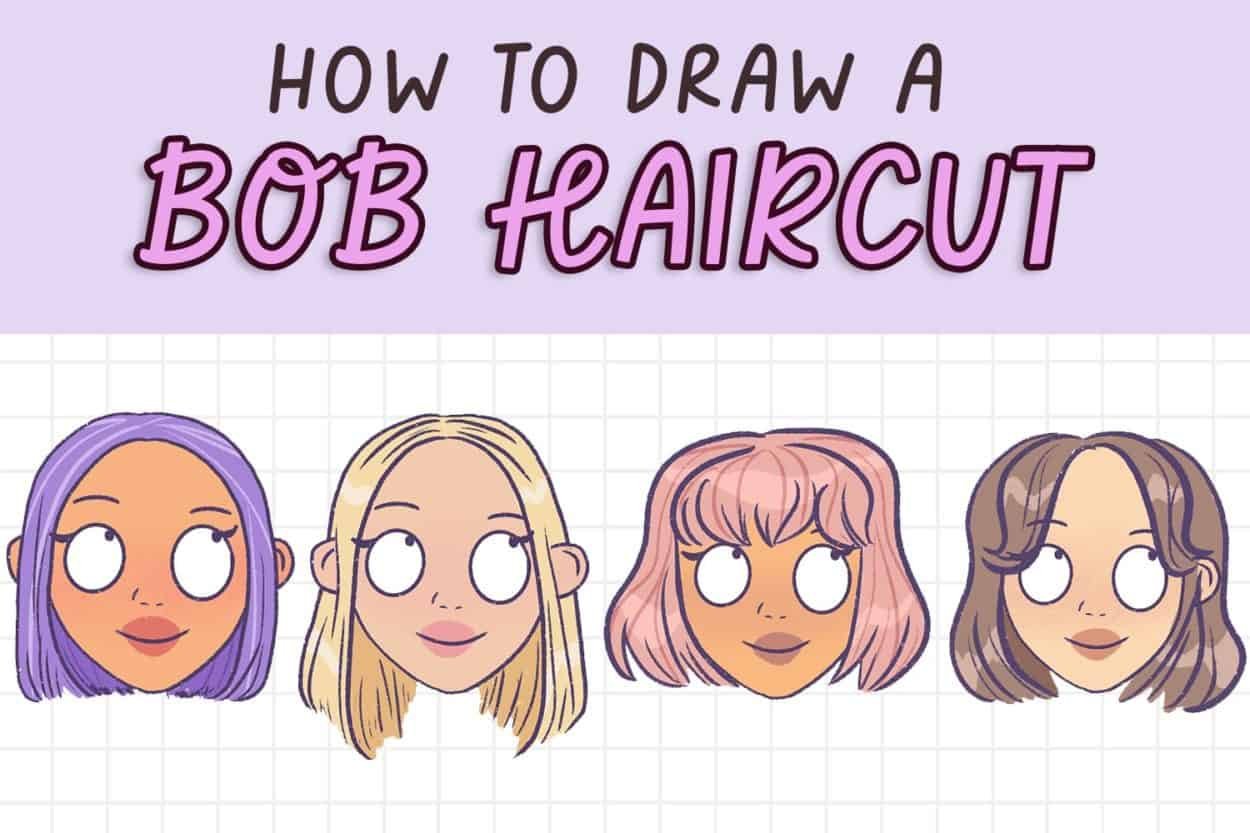
There are many types of bob haircuts we’ll be drawing today – We will learn to draw:
- Short bob haircut
- Shoulder-length bob haircut
- Bob haircut with bangs
- Korean bob haircut
This post includes affiliate links. If you do decide to purchase something, I will make a commission at no extra cost to you. For more information, please read my entire Privacy Policy here.
Please note that I am currently using an iPad Pro and an Apple Pencil to create all my illustrations. But you can use any tool – a pen and paper or Photoshop because the drawing method remains the same.
If you have Procreate but don’t know how to use it, please look at this beginner online course as it’s bloody amazing.
Let’s begin.
Table of Contents
What is a bob haircut?
A bob haircut is a haircut where the hair is cut either at the jawline or at the shoulders so it’s short to medium hair length.
How to draw a bob haircut – Easy Step by Step for Beginners
Let’s start by drawing the head first.
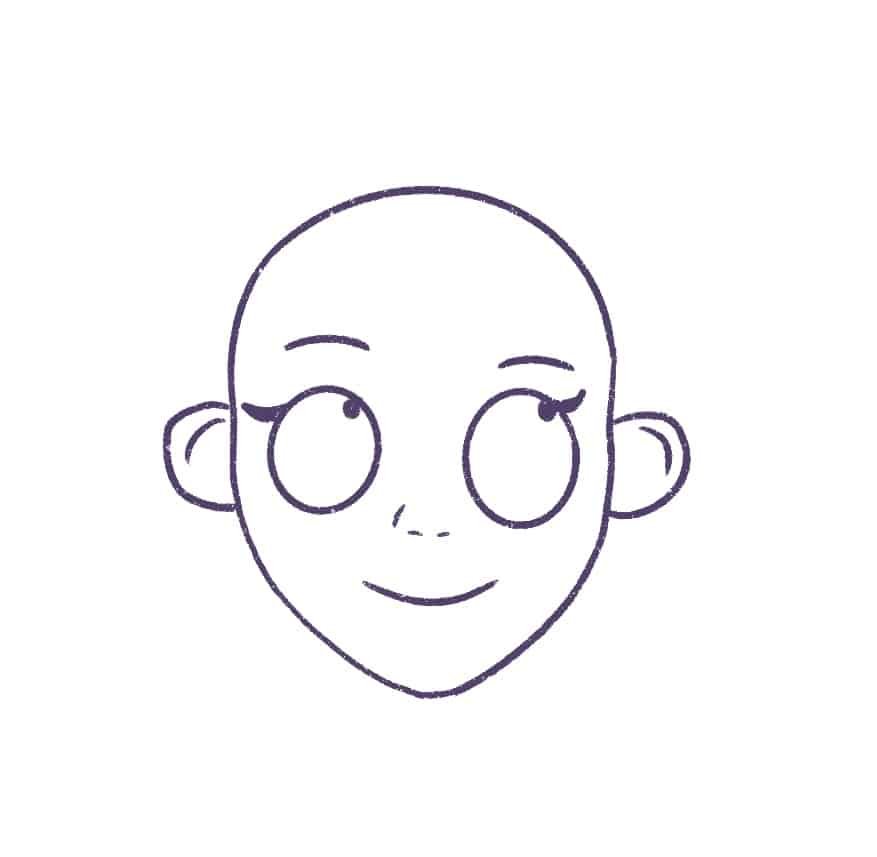
I’m drawing this cartoon head in a simple cartoon style.
You can also draw the cartoon head in an anime style.
If you’re looking for books to help you draw anime heads and hairstyles, get this book.
1. How to draw a short bob haircut
The best bob cut hairstyle is Dua Lipa’s. So, I’m going to copy her hairstyle in this drawing tutorial.
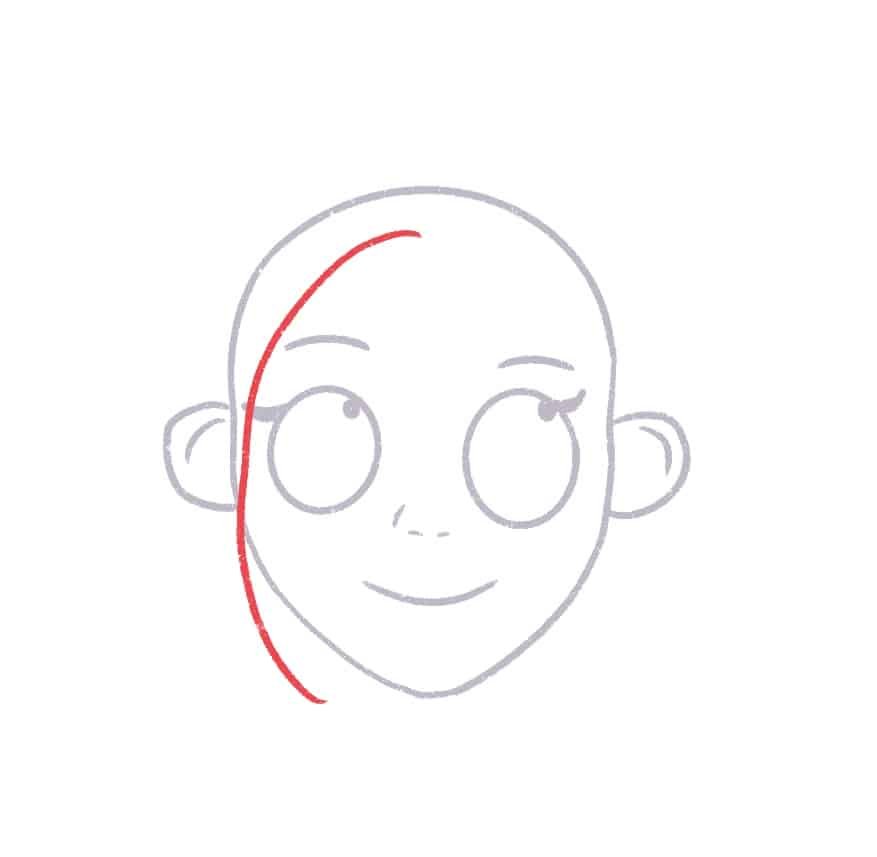
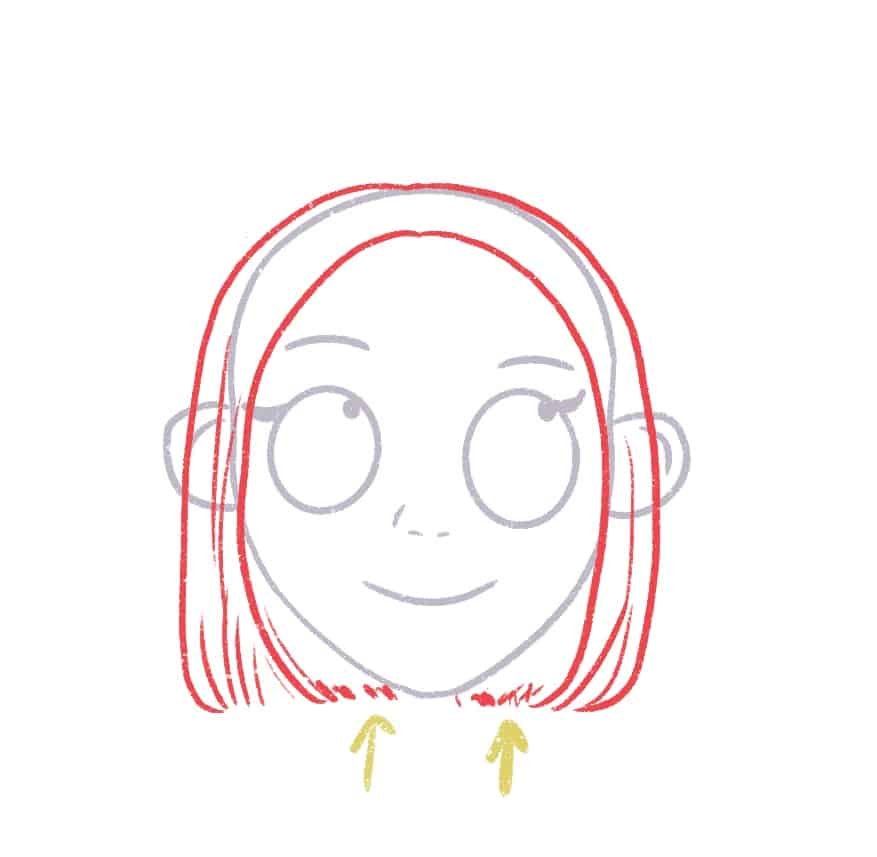
Let’s start by drawing the front of the hair. This is easy.
We’ll draw a “C” shape that ends precisely at the jawline. Start the C a few millimeters from the top of the head.
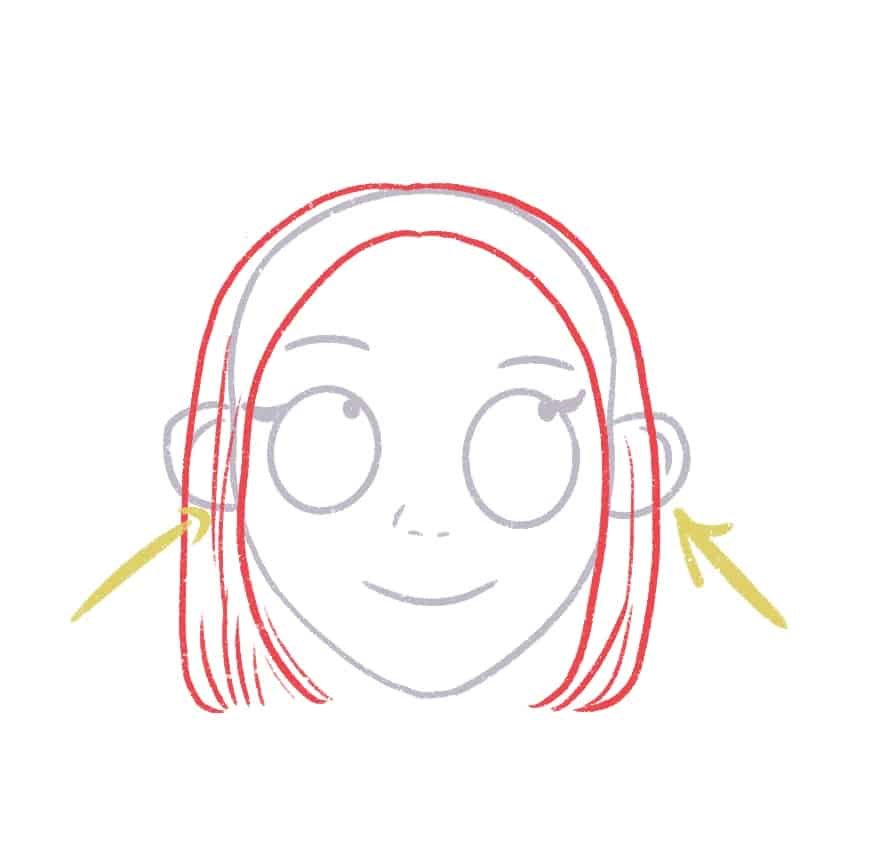
Now, we need to draw the back.
Keep very little space between the skull and the hair because the short bob haircut is straight hair and straight hair generally sticks close to the scalp.

Let is draw some ends on the hair and repeat this on the other side of the hair.

It’s okay if the hair isn’t even – it looks more organic this way.
Now, divide the hair into sections by drawing some strands – it doesn’t need to be perfect.
Once you’re happy with how it looks, it’s time to draw the back of the bob cut so just draw small upward dashes to indicate the haircut.
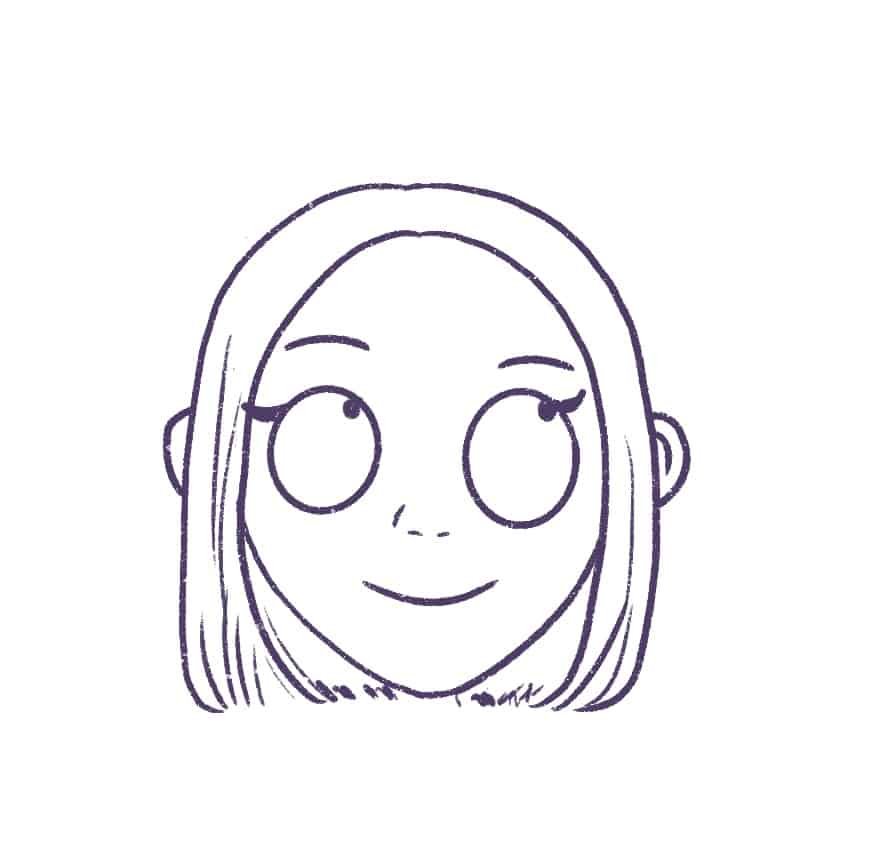
I’m going to clean up all the rough lines and color the whole outline in 1 color – I’m using a dark shade of blue.
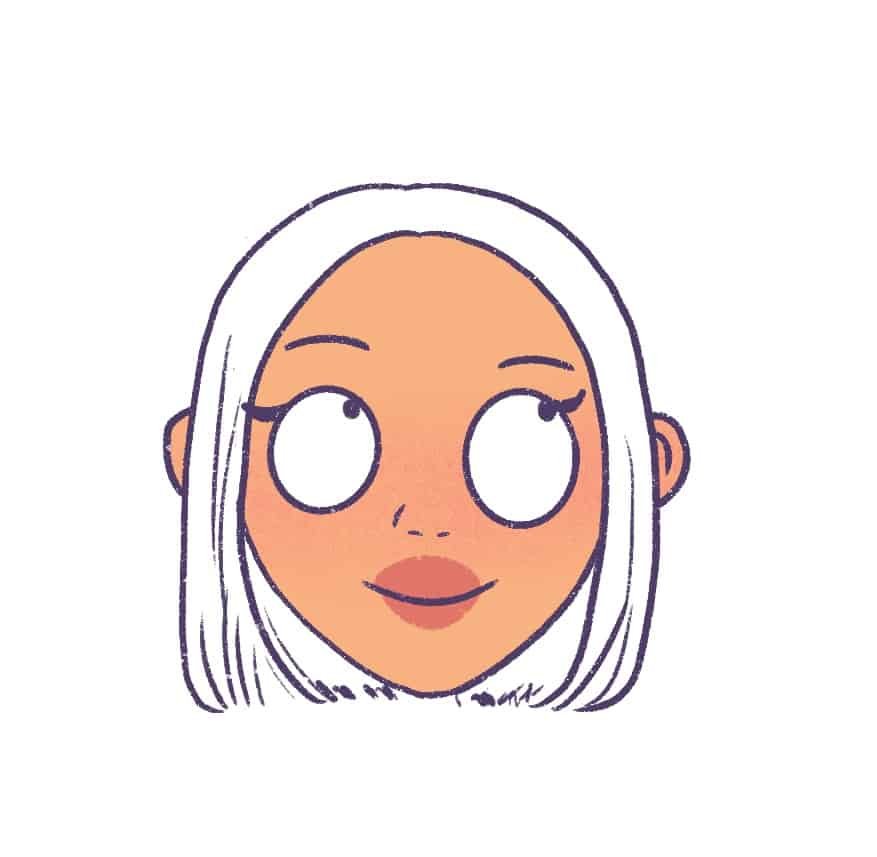
Next, I’ll color the skin and add some blush to her cheeks as well as nude lipstick to her lips. Please see this post to learn how to color digital art.
Next, I’ll color the short bob haircut with a simple base color – I am going to use purple.
You can go with any color you wish.
Remember to color the inner portion of her hair a darker shade since there isn’t much light hitting the inside of the bobcut.
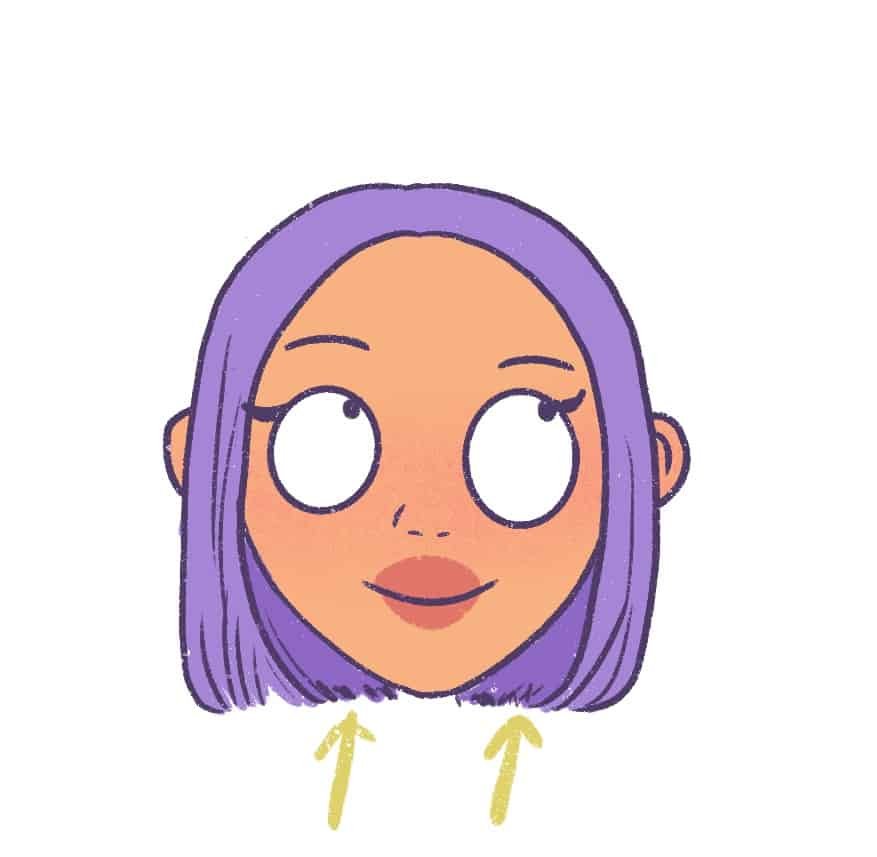
If you want to take your drawing up a notch, add some strands – the trick is to draw the strands in the direction of the hair growth.
I’m using a lighter shade of purple to get this effect.
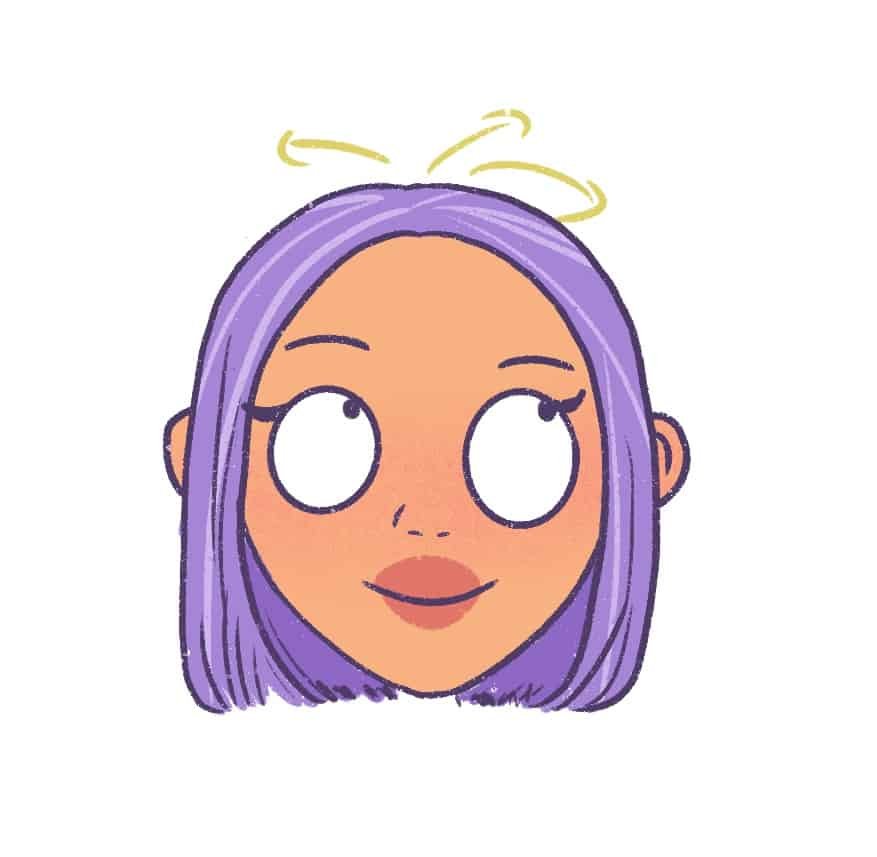
And I think we’re done.
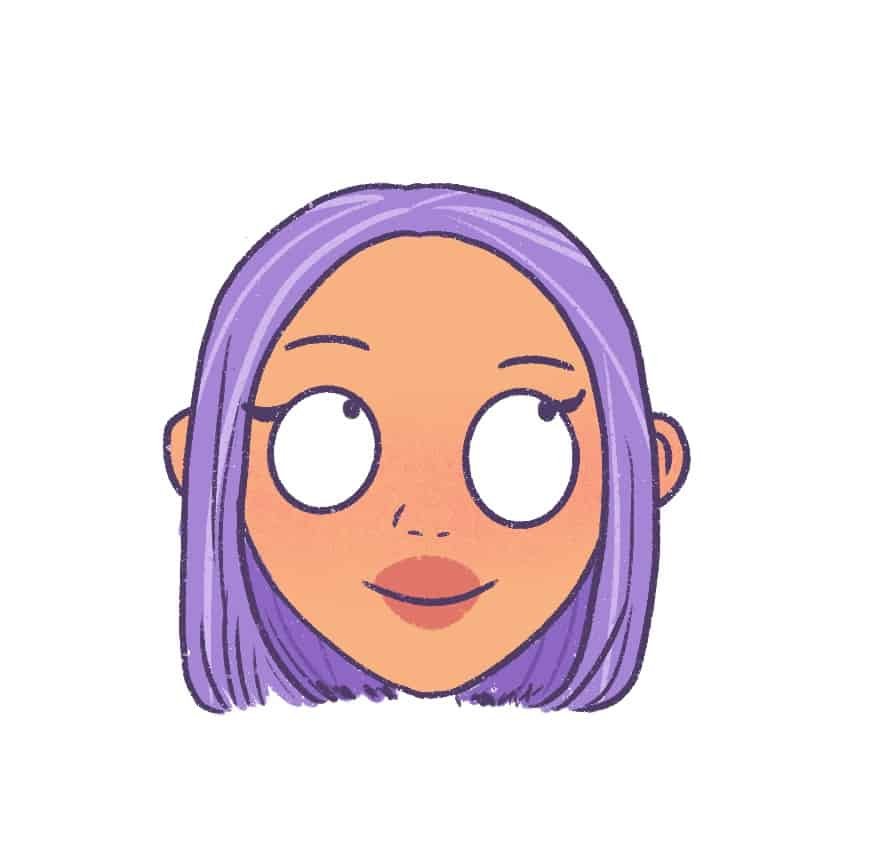
I am so happy with how this looks.
This is a simple short bob haircut that we’ve learned to draw!
Let’s move on to a slightly longer hair length – the shoulder-length bob haircut
2. How to draw shoulder-length bob haircut
As the term says, this bob haircut is shoulder length and slightly longer.
It’s beautiful for people with long necks and overall gives a very edgy look to the character.
Let’s begin with two long curves that end at the shoulder.
Remember to curve the line more as you reach the shoulders.

Usually, the hair decreases in length as we go backward, so when drawing the back part of the hair in a shoulder-length bobcut, keep this in mind.
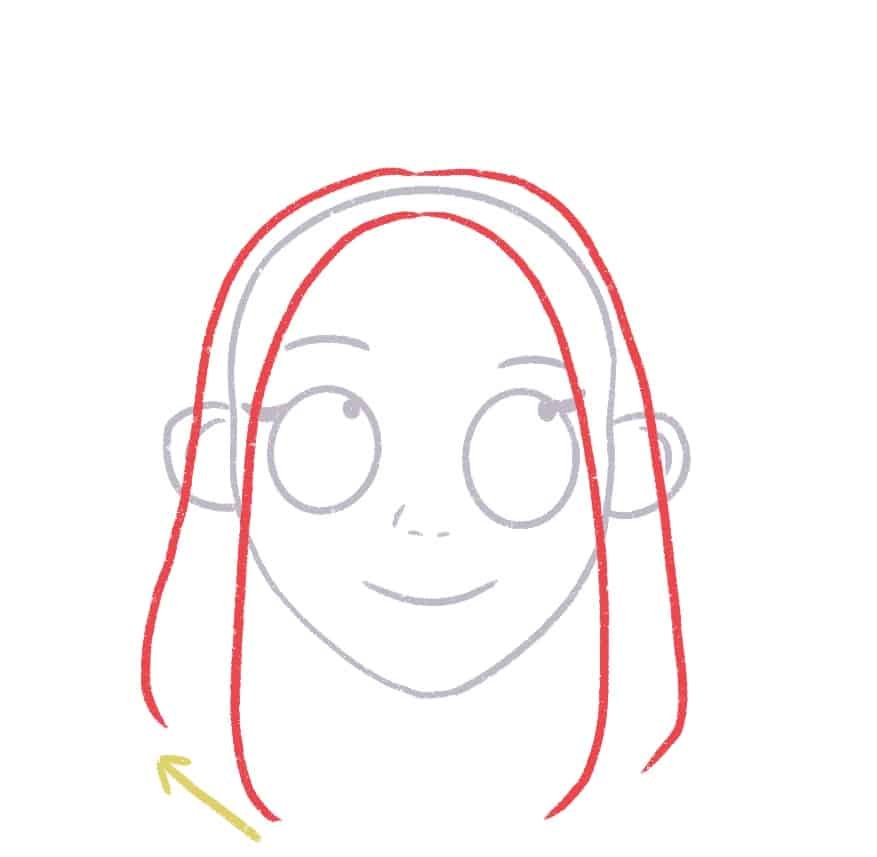
To add more detailing to the hair, start dividing the hair into sections at the bottom by drawing some strands upwards. You can vary the length and thickness of the strand lines to make them look more organic.
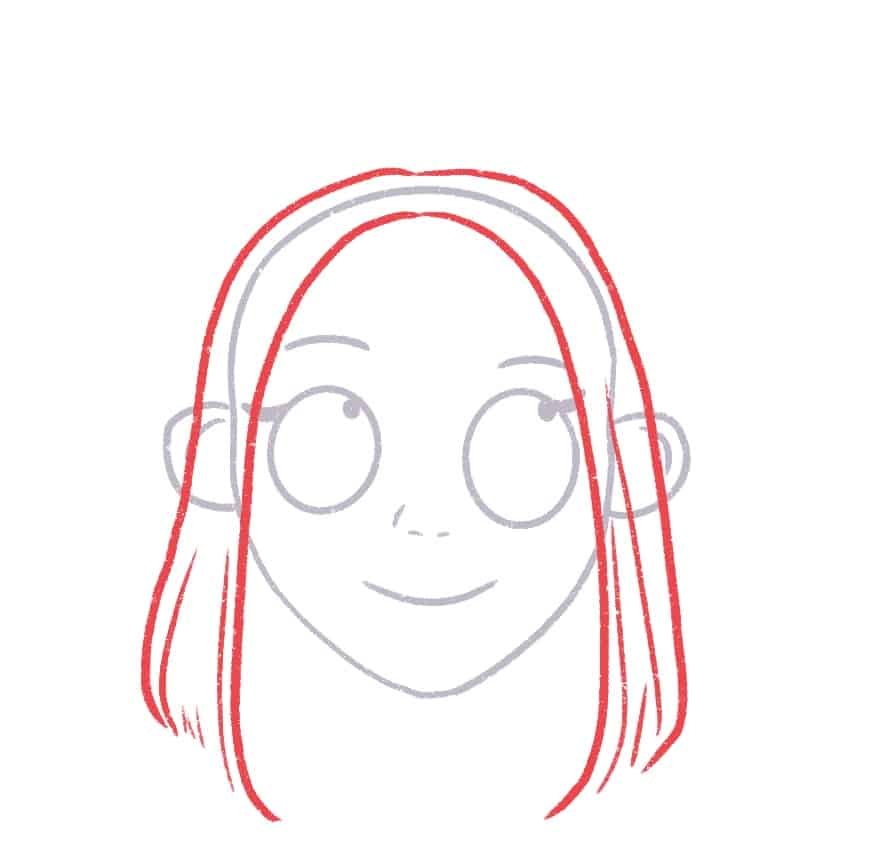
Next, draw some strands on top of the head to give it more detail.
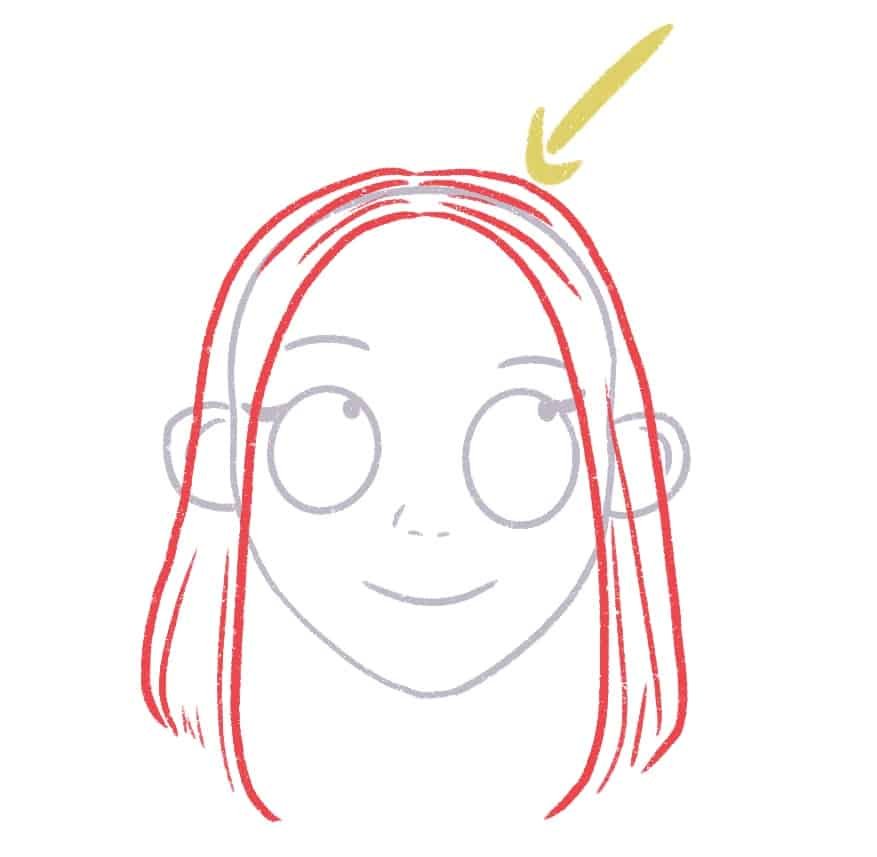
Take your time drawing this hair.
Next, we’ll draw some strands even on the inner portion of the bob haircut.
Remember to vary the length.

Once I’m done, I’m going to clean up the lines so I get a fresh, clean outline.
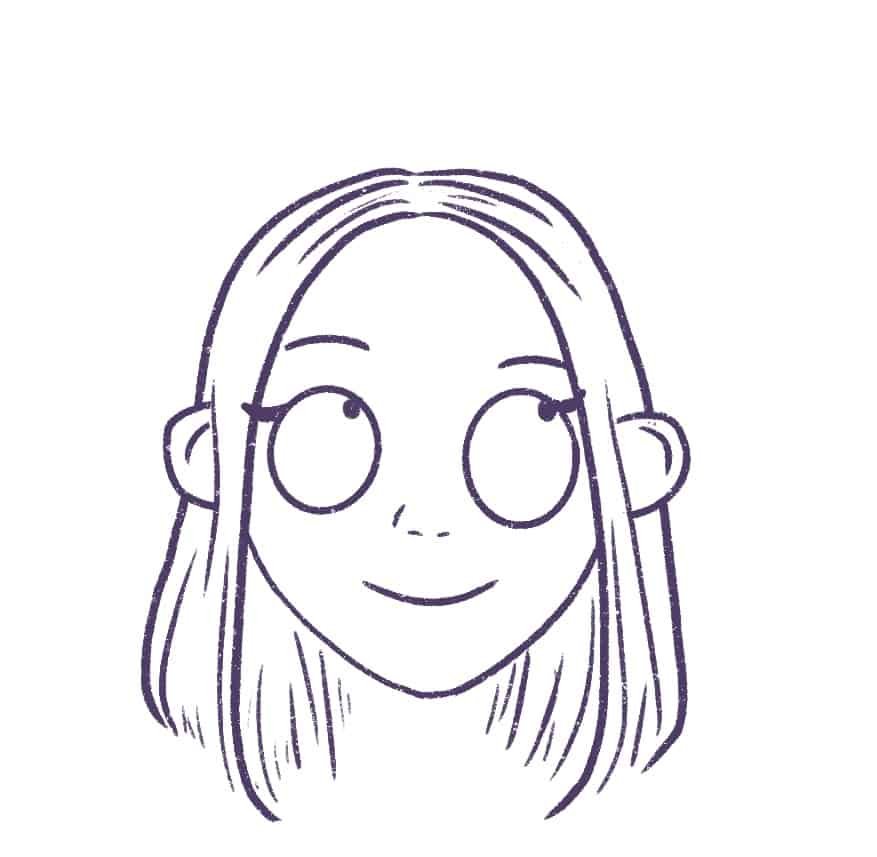
Next, I’ll color the skin and the hair blonde base color. Remember, you can use any color you like.
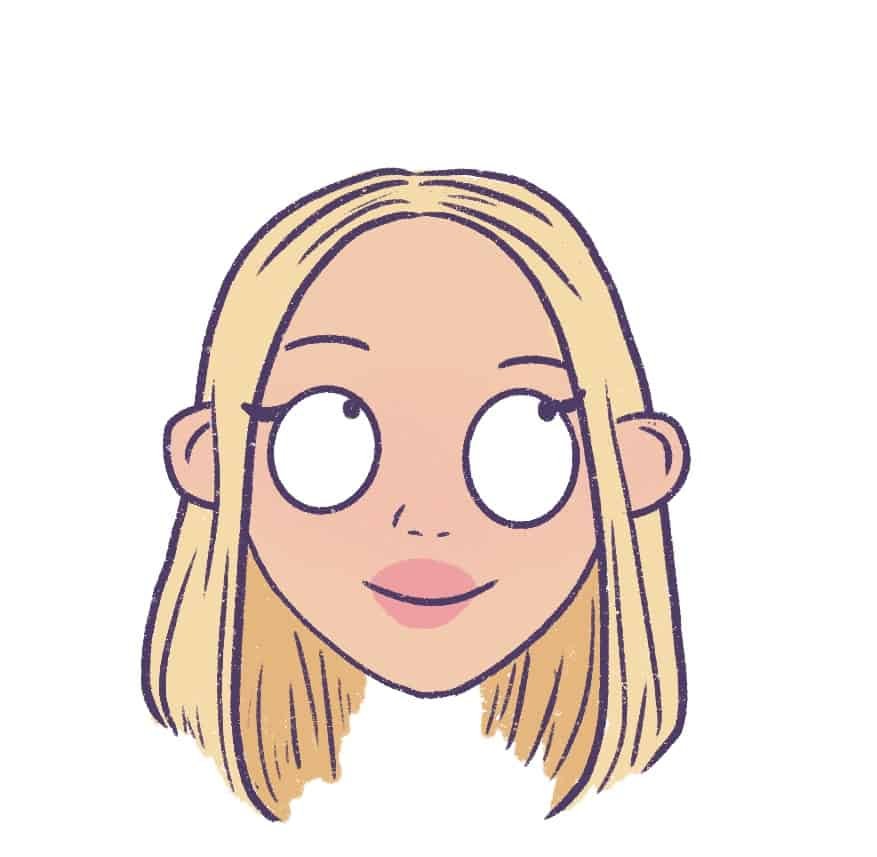
And please note that the hair color on the inside is darker than the outside.
Next, I’m going to add some highlights to her hair to make it look glossy and shiny.
So, with a lighter shade of blonde, I will add some zig-zag lines to the hair.
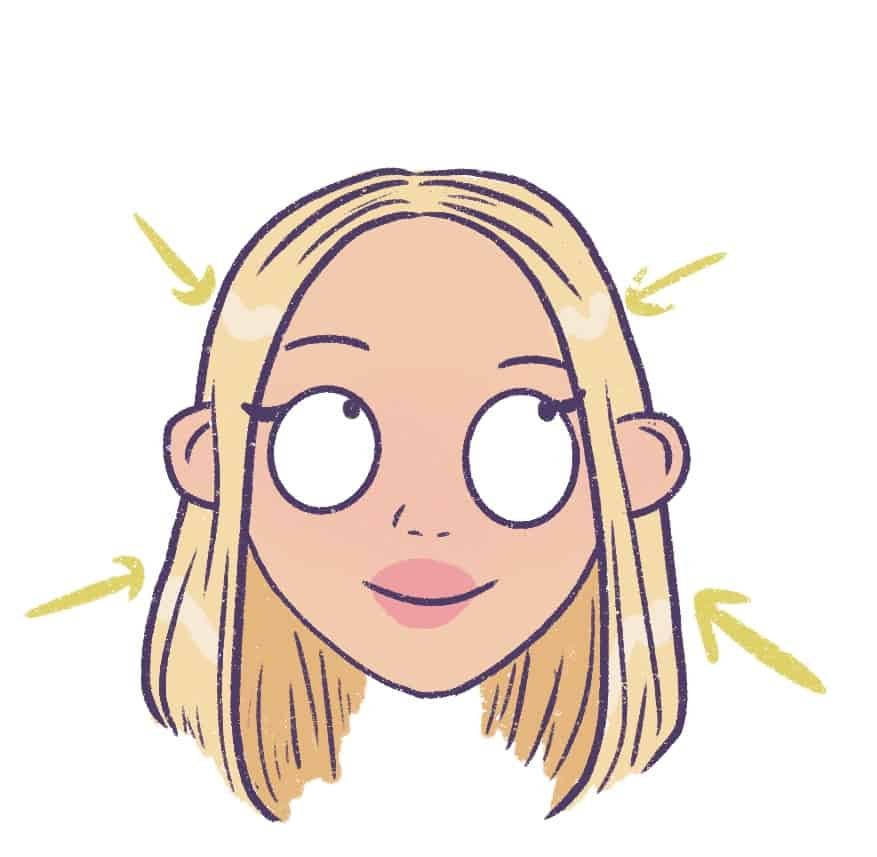
And we’re done!

It’s completed!
And we’ve just learned how to draw and color a shoulder-length bob haircut.
Doesn’t it look amazing?
Let’s move on to another type of bob haircut – it’s a popular bob cut and it’s one with bangs.
3. How to draw a bob haircut with bangs
A bob haircut with bangs is very popular in most cultures because it gives the character a very youthful look.
I already have a post on how to draw bangs, so check that out if you want to understand how to draw different types of bangs.
You can make your anime character or cartoon character look young and make them a teenager with this hairstyle.
Let’s begin with the bangs.
I’m just going to quickly draw some bangs. The idea is to vary the curves so that it looks more natural. Draw some long lines and some shorter lines – divide the bangs into sections – it makes drawing bangs easier.
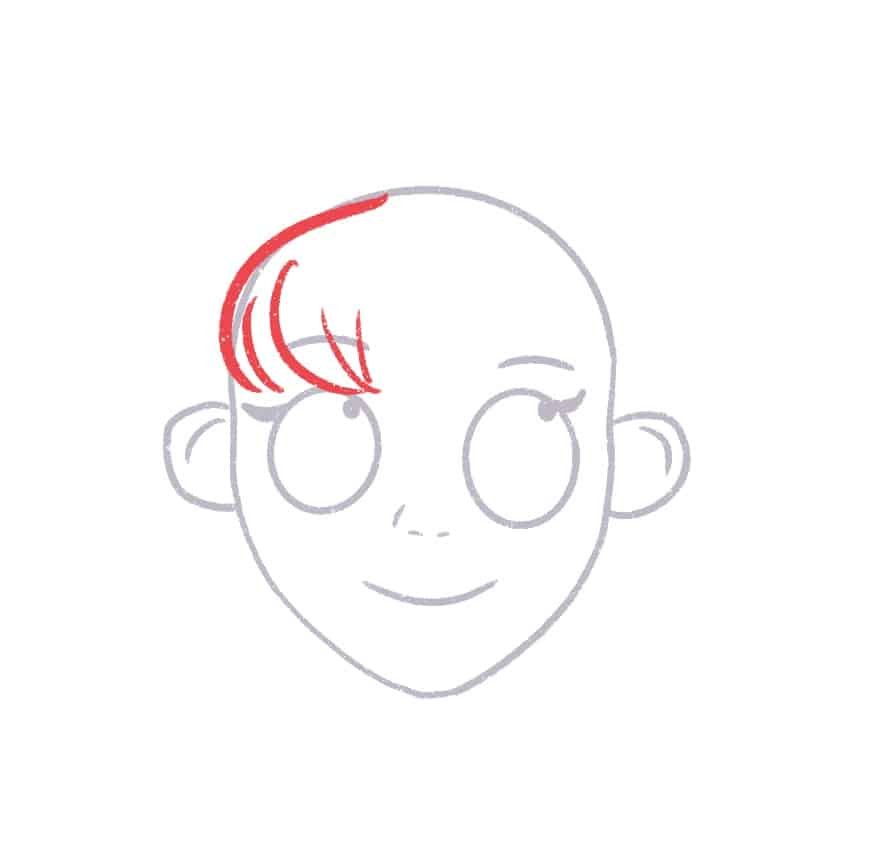
I am going to end the bangs right above the eyes but you can also end the bangs above the eyebrows!
We keep drawing the bangs till we’ve finished drawing them for the whole forehead.
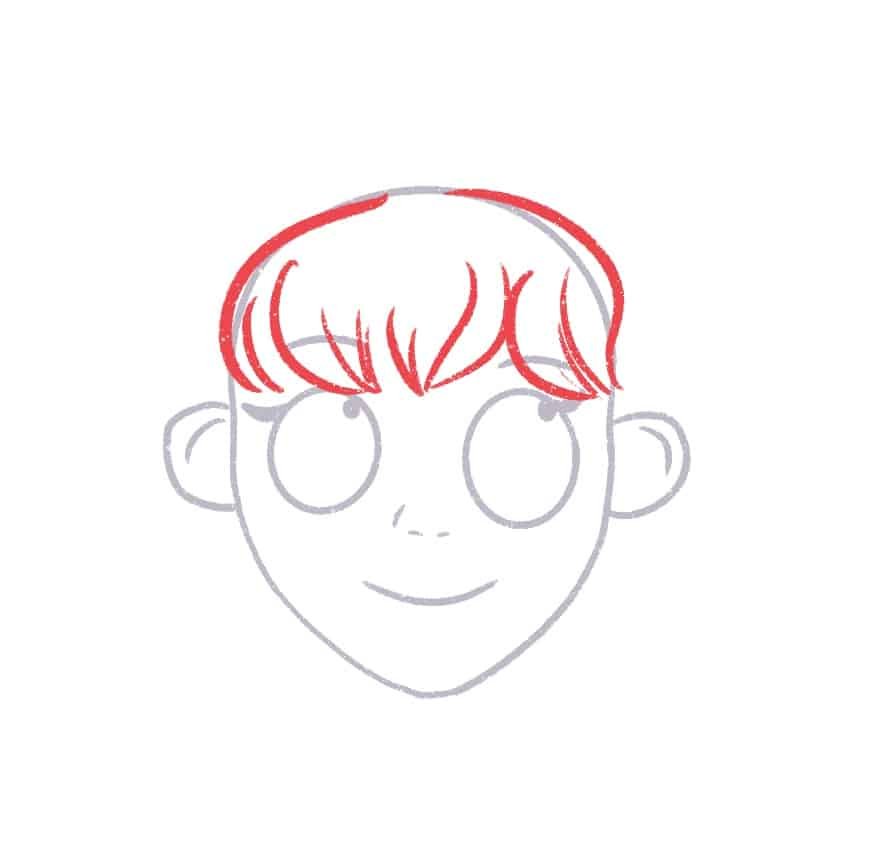
Next, we’ll start by drawing the bob haircut. I want to make the hair more voluminous and wavy so I’ll draw it like this:
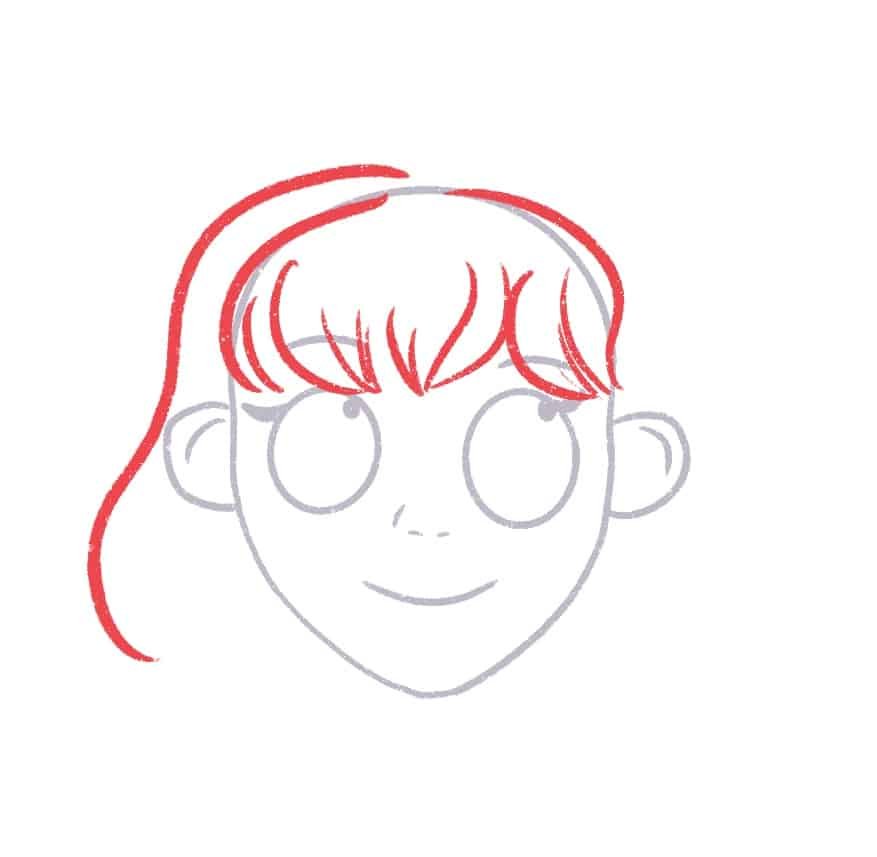
Once you’ve finished drawing the outline, draw the ends of the bob haircut by adding small jagged lines at the bottom.

Repeat this for the other side.
You can also make this hair more wavy or curly to give the character unique look.
Take your time with this.
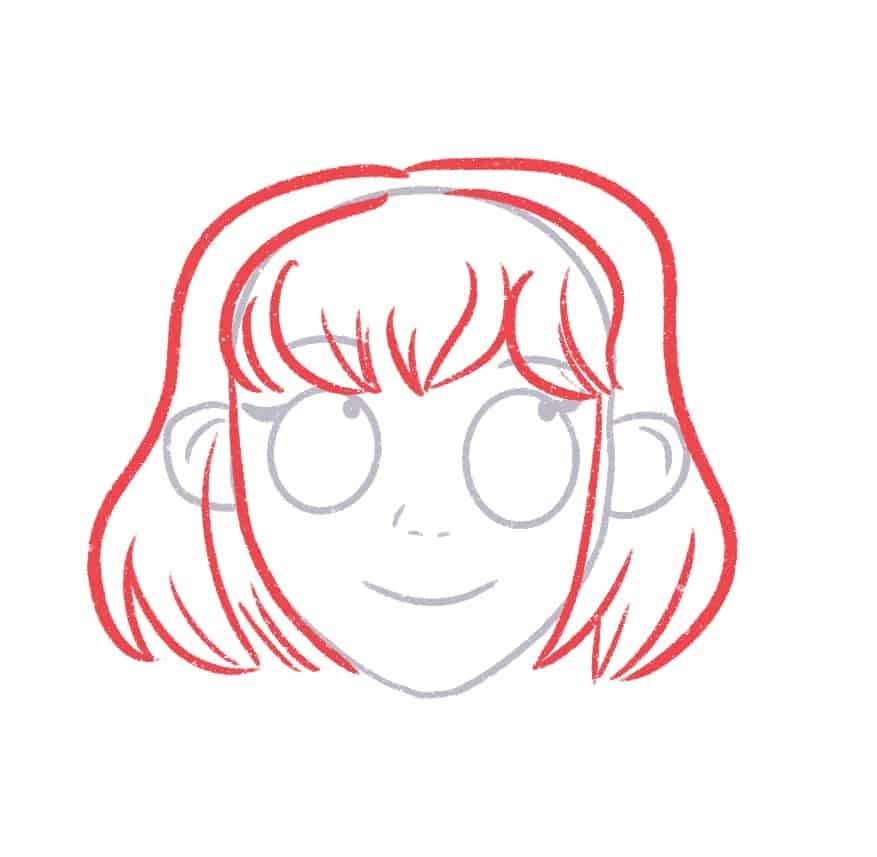
Next, clean up the lines and color the whole drawing in a uniform color.
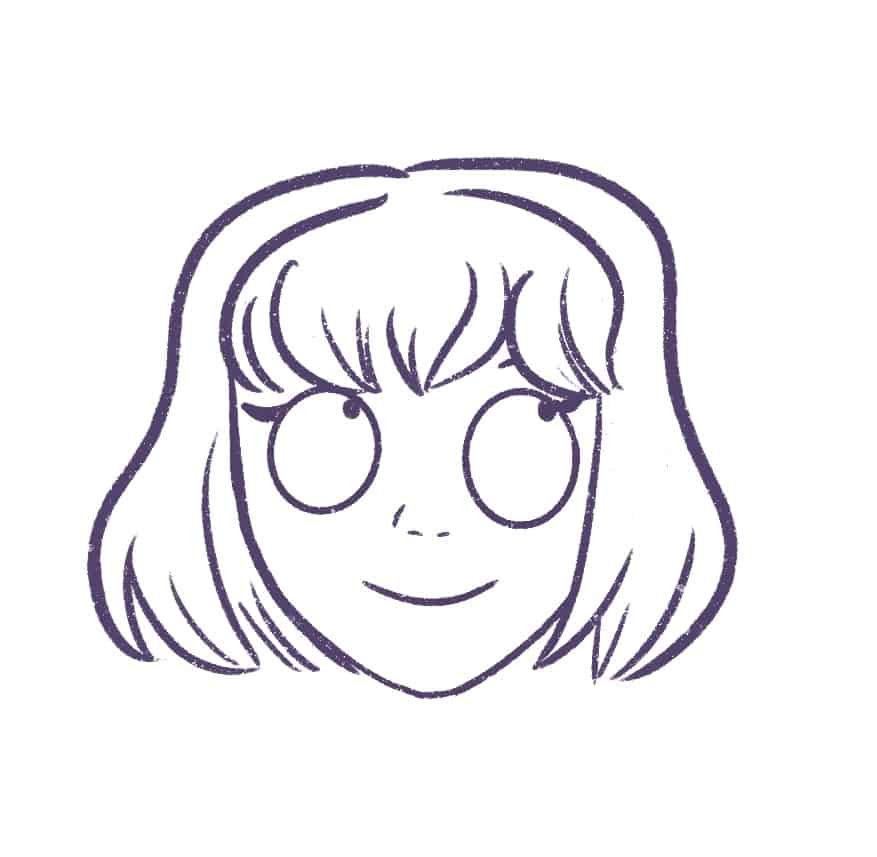
I won’t go into detail on coloring this digital art, because I have a post that teaches how to do this in detail.
But for this particular haircut, I will go in with a dull pink and contrast that with a nice Italian caramel skin tone just for fun.
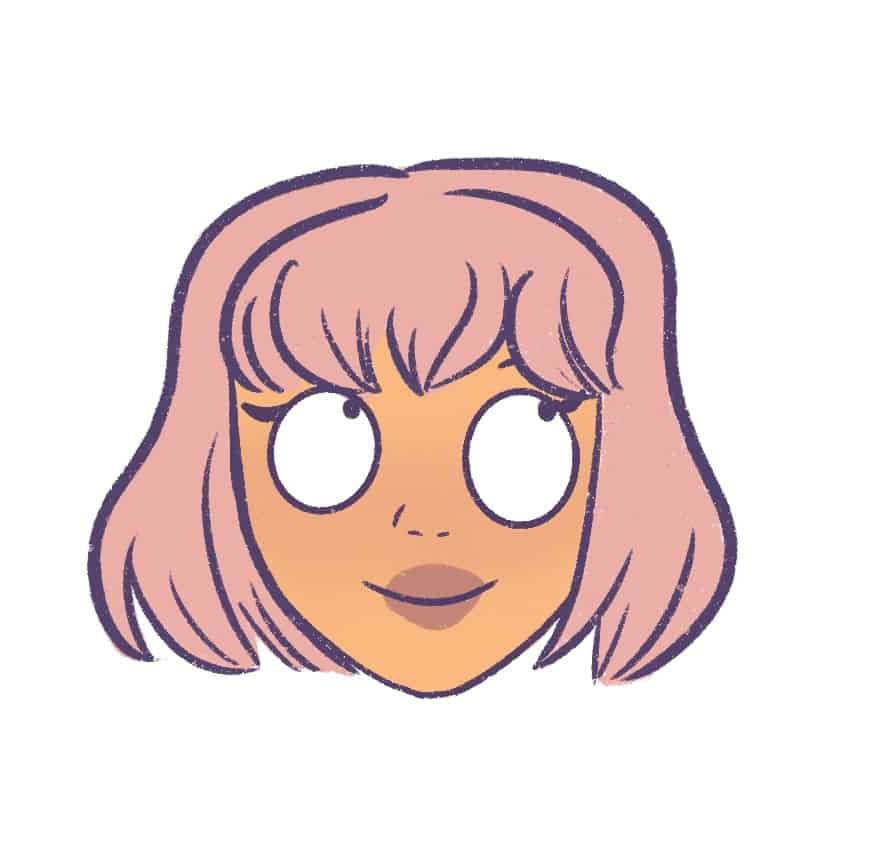
And the hair isn’t complete without drawing the strands.
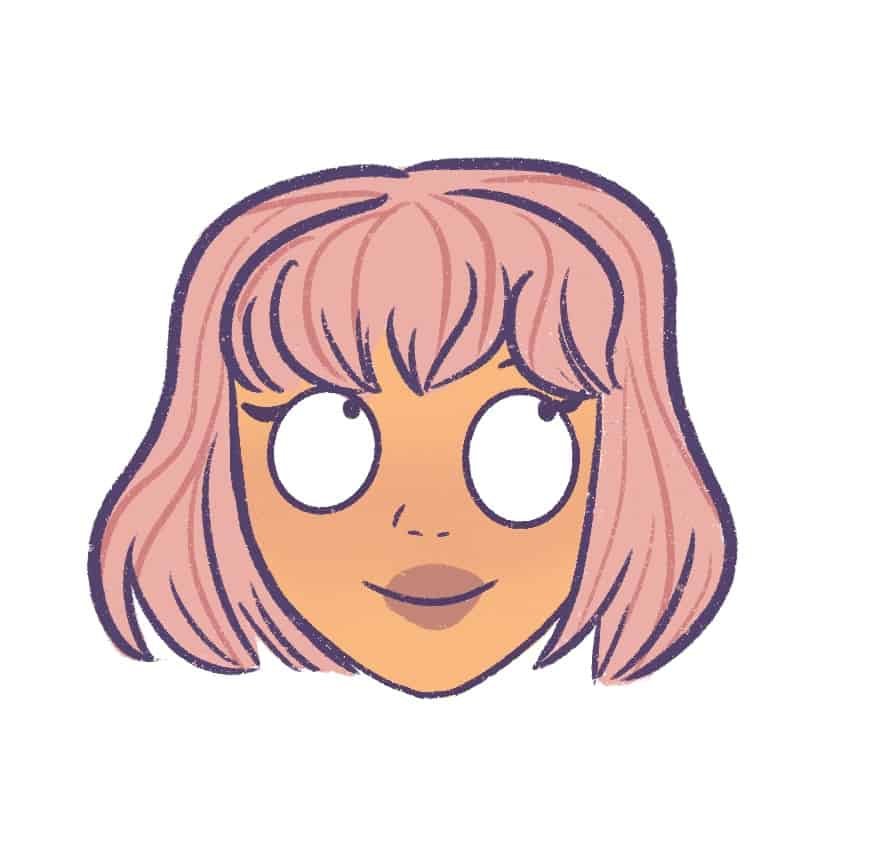
If you’re using color pencils, you can use darker shades to draw the strands or use a marker – either one works.
I am going to go in with a darker shade of pink and draw strands in the direction of hair growth.
I want to add that smooth shiny effect to the hair so I am going to add a new layer in Procreate and go in with a light blue to add these wavy thick lines.
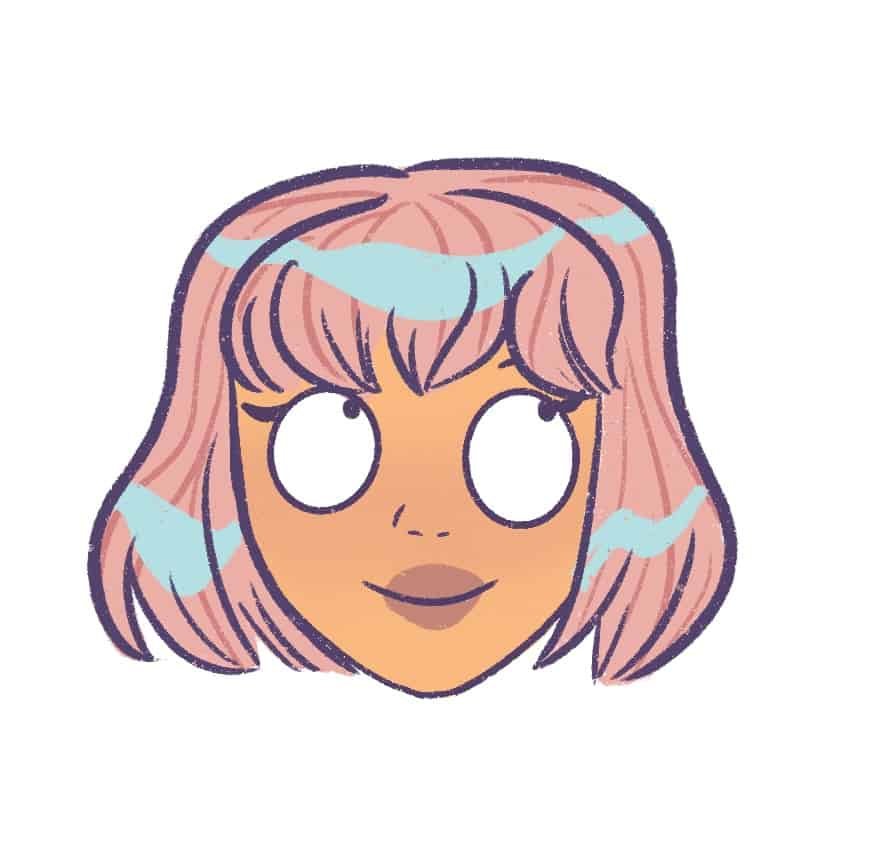
Now, to add the highlights, simply change the blending mode of this layer to Add and change the opacity to somewhere around 18%.
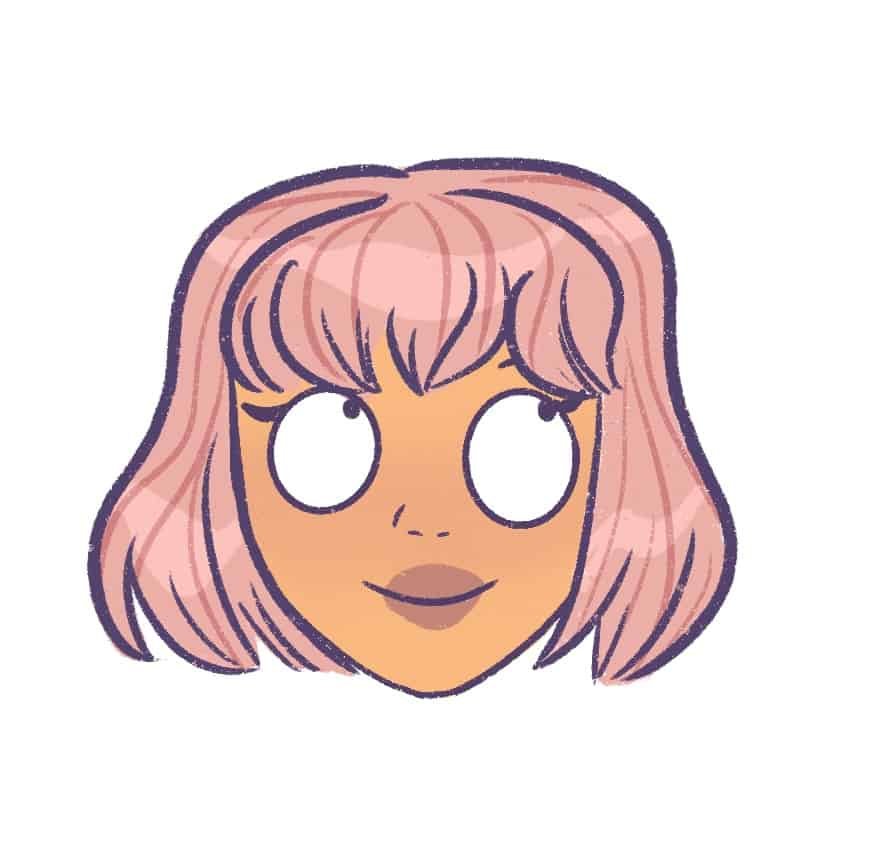
And yay!
We’ve learned how to draw a bob haircut with fringe or bangs.
Now, moving on to one of the most popular bob haircuts.
4. How to draw a Korean bob haircut
The Korean bob haircut is a very popular hairstyle in K-pop or Korean dramas and also a lot of anime series.
It’s basically a bobcut with bangs.
But for this tutorial, I am going to draw side-swept bangs that are parted in the middle.
You can draw any type of bangs.
So, first, let me divide the front of the hair like this into bangs.

I have a detailed post on drawing bangs here. And then I will give the bangs more volume and draw more strands.
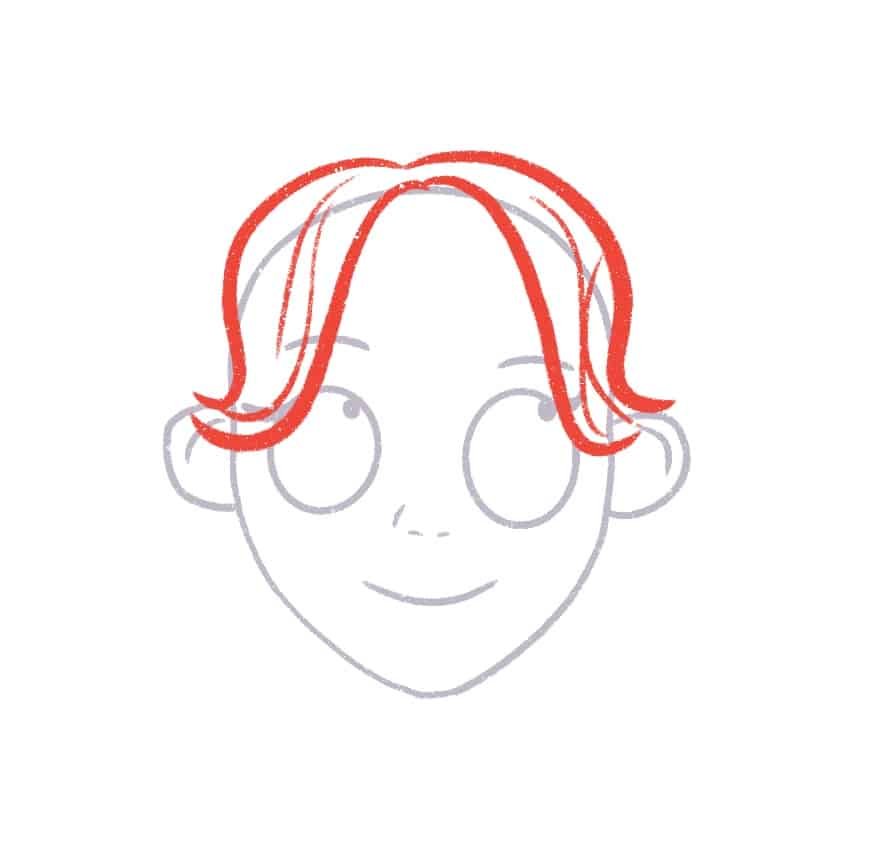
Now, it’s time to draw the bob haircut. I will draw a simple wavy bob haircut like this.

Next, I will draw the ends of the hair using the same methods I highlighted above.

Once you’re happy with the hairstyle, just clean up the lines. I will also color the skin.

And I will color the hair with a nice chocolatey brown. Remember to color the inner portion a darker color.
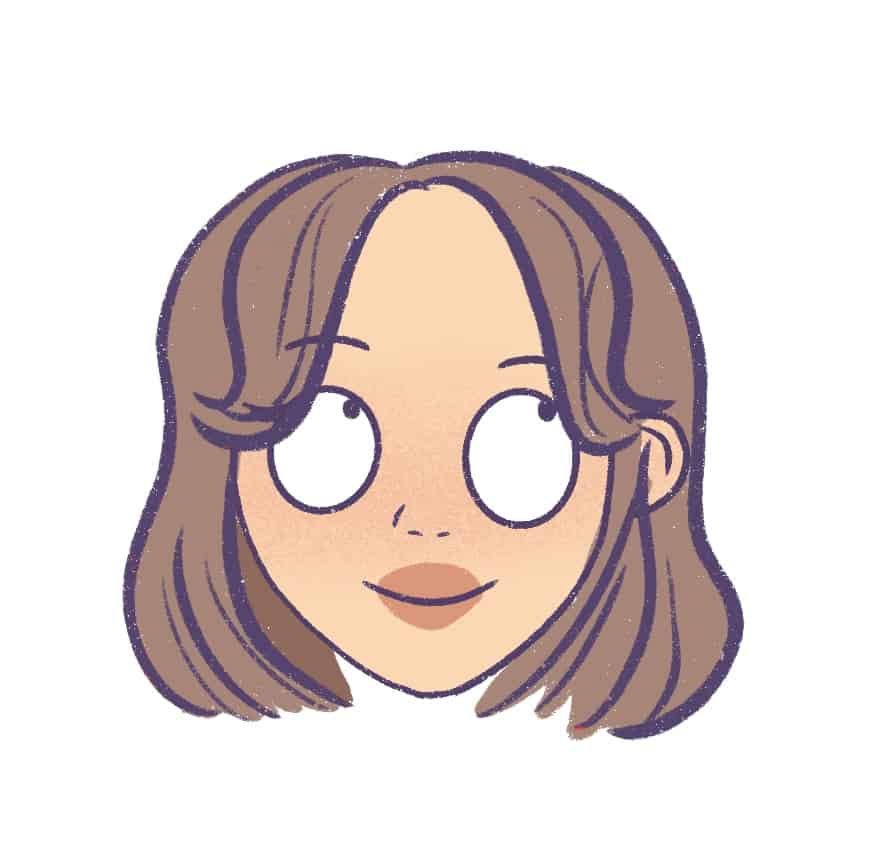
And finally, I will add highlights to the hair just to give the hair a nice shiny soft look.
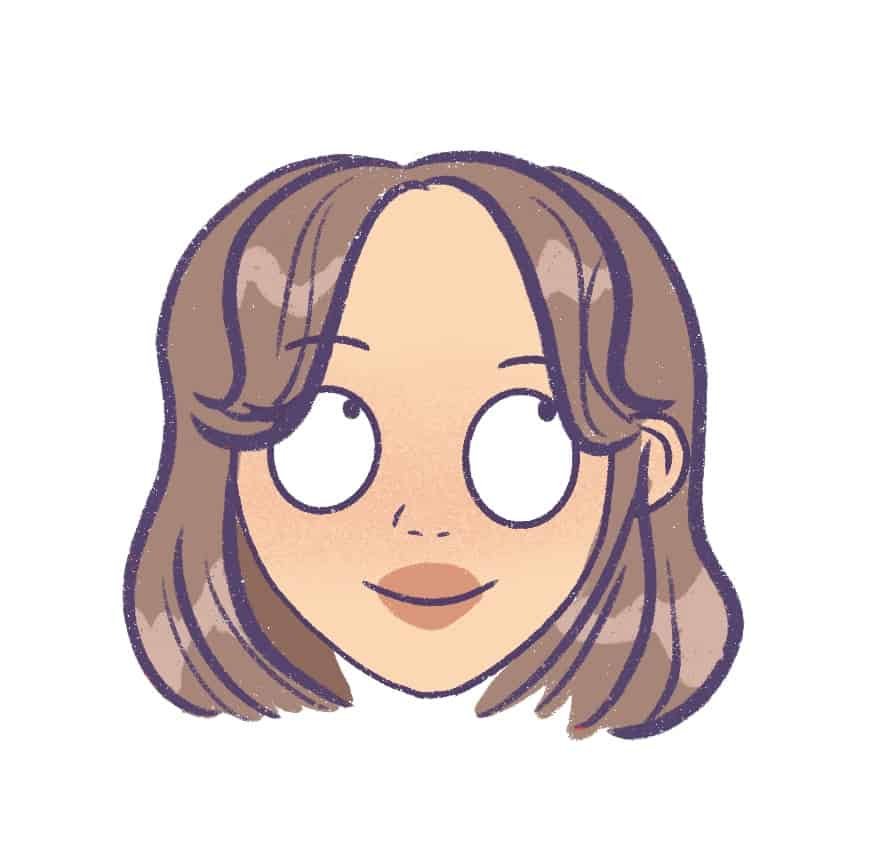
And we are officially done!
We’ve learned to draw a simple Korean bob haircut.
It’s very easy and you can see how changing just a few features in the bob cut changes the look of the character completely!
Keep playing with different lengths of bangs and the bob cut.
You can even change the parting to a side parting instead of a middle parting and doing this will give so many unique looks to your anime character!
Takeaway – How to draw a bob cut hairstyle + Resources
I hope this in-depth tutorial was helpful to you, and you were able to learn how to draw a bob haircut.
Drawing hair is a very creative process and to me it’s a lot of fun.
It gets easier as you keep drawing multiple hairstyles.
Trust me.
Also, drawing with references helps!
You can look at stock photos (I also use Google Images) to get inspired with different hairstyles. You can also use Pinterest and the more you draw hair, the easier it will become for you. You will even be able to draw without a reference at some point!
I have a post that you can read on how to find your art style.
You can make things easier by picking up this Character Drawing Toolkit.
If you want to see more tutorials on hair and people, just leave a comment down below. You can check out my other posts on drawing hair over here.
I will be adding more hair drawing tutorials to this blog, so keep a lookout!
If you are looking for books on how to draw anime faces or how to draw anime hairstyles, take a look at these books:
If you’re looking to improve your drawings faster and want to really draw as a hobby or even pick up drawing professionally, I highly recommend picking up this beautiful online course that teaches you how to draw appealing characters with personality.
Use code STRAYCURLS-10 to get a 10% discount!
This class will teach you how to draw a character from scratch and then color it.

If you are just getting started with ProCreate, I highly recommend this course: Procreate for Beginners: Digital Illustration 101
You may also enjoy:
- How to draw bangs
- How to draw space buns
- How to draw bantu knots
- How to draw curly hair
- How to draw blue curly hair
- How to draw wet hair
- The ultimate guide on drawing different types of ponytails
- How to draw mermaid hair (in different poses)
- How to draw cartoon hair on Procreate (easy tutorial for beginners)
- How to draw a mullet
- How to draw wet hair
- How to draw afro hair





Leave a Comment