
In an earlier post, I discussed how to draw afro hair. I’ve also done a post on drawing dreadlocks here. I’ve also covered how to draw twists.
You can also check out my other hair tutorials over here.
In general, hair is a little tricky to draw.
But when you consider black hairstyles, they can be even more complicated because there aren’t many tutorials online covering them.
And that’s why I will teach you how to draw bantu knots in this post.
They can seem challenging to draw, but if you do it step by step and draw a rough guide first, it actually is one of the easiest hairstyles to draw.
In this post, we’ll learn how to draw bantu knots.
Let’s begin!
This post includes affiliate links. If you do decide to purchase something, I will make a commission at no extra cost to you. For more information, please read my entire Privacy Policy here.
I’m currently using:
And I’m using the Procreate software (which costs $10 one-time-fee)
I highly recommend looking at this superb online course that teaches you how to use Procreate.
You can draw this using sketching pencils or a fine marker or draw it digitally like me.
Table of Contents
Step 1: Draw the rough sketch first
I’m going to use very simple shapes.
And it’s okay if it doesn’t come out perfect because everyone’s bantu knots look different. It varies based on the hair type and texture of the hair.
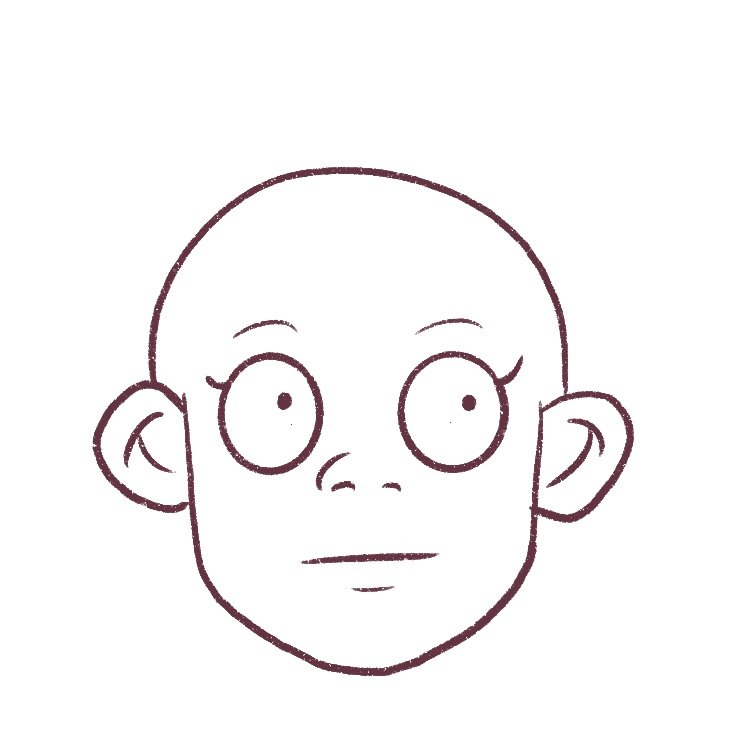
So, let’s start with a cartoon head first.
This will help you visualize how you want to draw the hair. I won’t go into detail about drawing cartoon heads, but you can pick up this book if interested.
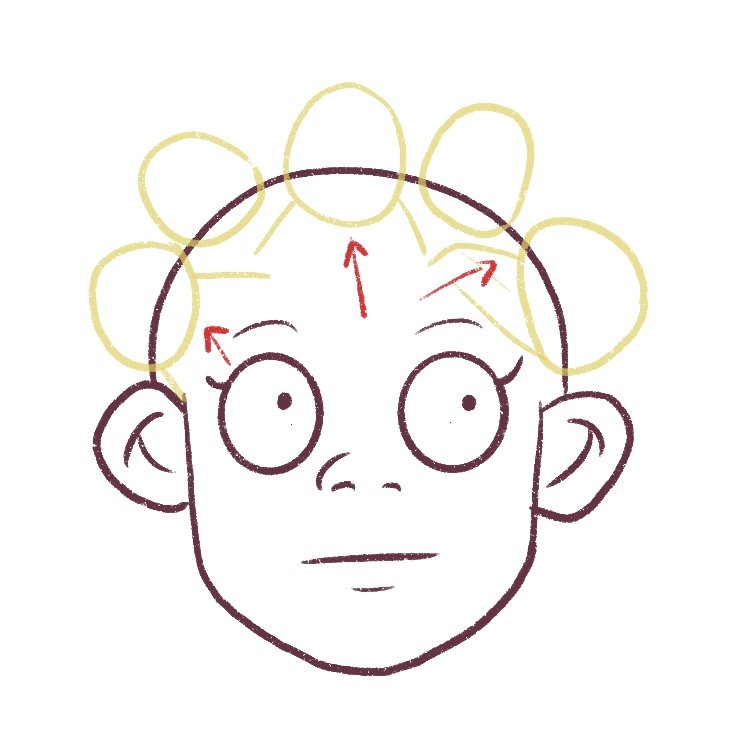
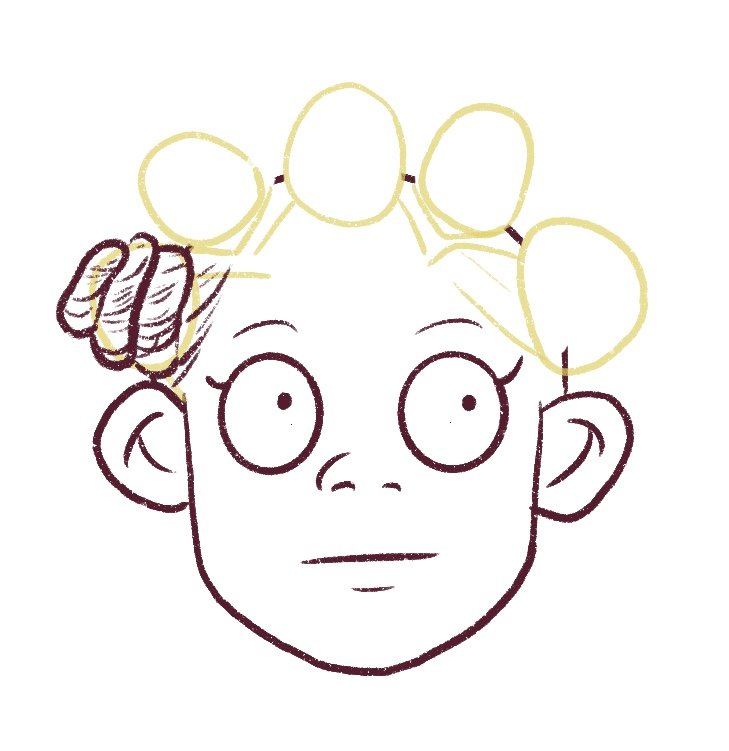
Next, on a new layer, I’m just going to roughly map out where the bantu knots are going to be.
The top Bantu knot will be in the front whereas the ones around it will be further back. The two on the sides will also be slightly on the front.

Remember to draw each step on a new layer, this way, if you want to correct mistakes, you can erase them easily without affecting the other parts of the drawing.
This is why we artists use layers.
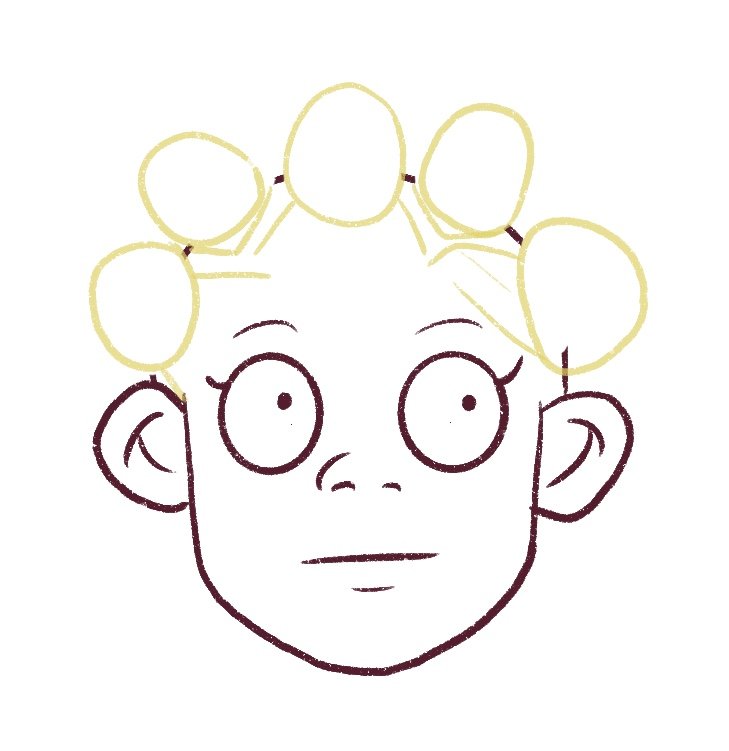
Next, I’m going to map out the partitions in the hair.
When we tie Bantu knots, we take a bit of hair and wind it or twirl it into a knot, so partitions happen and you’re able to see a bit of the scalp.
So, I’m going to draw partitions like this leading to the bantu knots.
Next, I’m going to draw the partitions of the two Bantu Knots in the back of the head. These will be triangles because they’re using the hair in the back.
And we’re pretty much done with the rough sketch.
We understand where everything goes and all that’s left is to draw the bantu knots.
Step 2: Draw the Bantu Knots
Okay, now that we are done with the rough sketch, let’s move on to drawing the bantu knots.
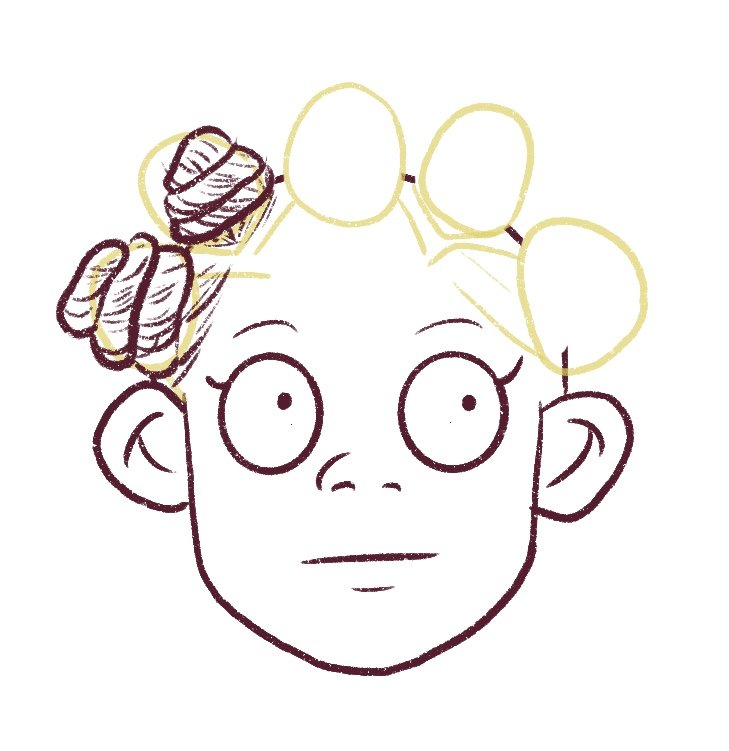
We are going to draw the first bantu knot.
So, draw 3 tire shapes like this – they needn’t be perfect and they’ll look good if they aren’t uniform or symmetrical.
They’ll look more natural.
I’m using the Dry Ink brush to draw this – it’s free in Procreate.

Next, I’m going to draw some gentle strokes of hair inside each level of the bantu knot. I’ll also draw some strokes in the partition.
Think about how the hair is going into the bantu knot and draw the hair in that direction. In this case, it’s going to be dragged downwards towards the bantu knot so I’m keeping that in mind when drawing the hair.
Next, we’ll draw the second bantu knot – similar to the previous, I’m going to draw 3 levels like this. And I’ll make the top level very small and curved.

And just like the previous knot, we’ll draw the hair strokes.
In this case, the hair is in a small triangle leading up to the bantu knot so keep that in mind when drawing the hair.
Once I’m done and happy with how the bantu knot looks, I’ll move to the next one.
This is the frontmost bantu knot so it will be the biggest since it is front and center.
So, take your time with this one and if possible, draw 4 tires or 4 levels.

When drawing the hair strokes, make sure you vary the length and weight of each hair stroke – this will make the hair look more natural.
Avoid making the drawing look perfect. The more rules you break, the better your drawing will look.
Next, we’ll draw the last 2 bantu knots and similarly draw the little hairs leading up to the bantu knots.
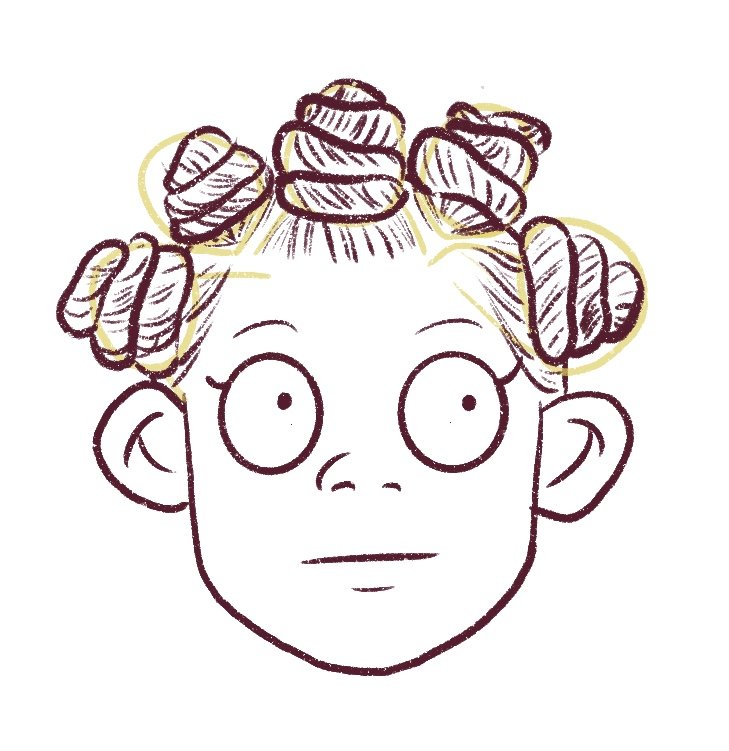
And now, I’ll color the drawing.
If you want more help learning how to draw and color in Procreate, just watch my coloring tutorial here.
And we’re done with the outline – now we need to color!
Step 3: Color the bantu knots
Now that we are done with the outline, we can start coloring!
I’m going to color the face first on a new layer underneath the hair layer of course.

Next, I’m going to color the hair, I’m using the Bonobo chalk brush to do this. It also comes free in Procreate.
Just be very free when doing this step. Everything needn’t stay inside the lines – especially when you are coloring the hair.

Next, I’ll add a highlight to this hair.
I’m going to choose a teal color (almost light blue) and using the bonobo brush draw some highlights like this. Make sure you do this on a new layer over the hair color but underneath the hair outline layer.

Change the opacity to 15% and change the blending mode of the highlight layer to “Add.” and you’ll get something like this.
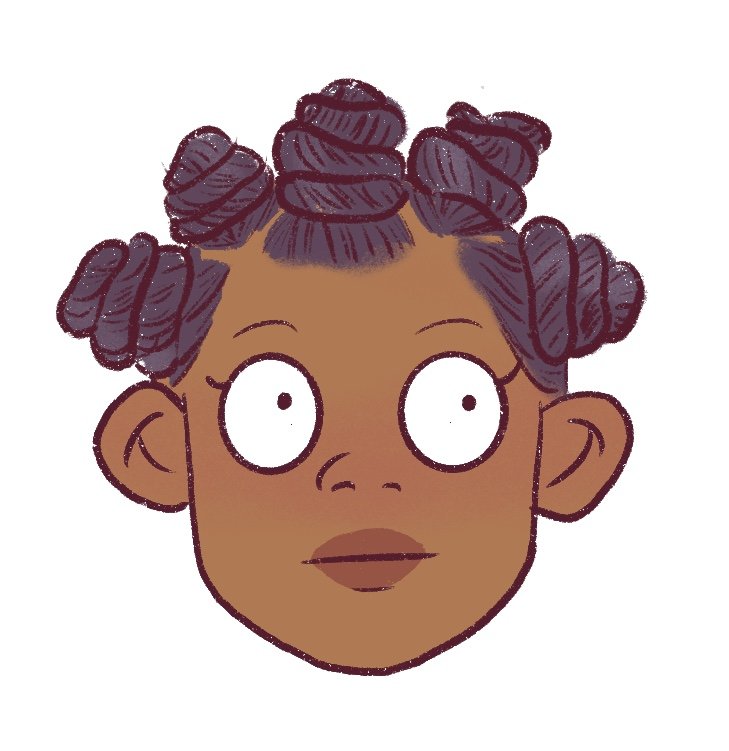
And there you have it!
You’ve just learned how to draw bantu knots step by step!
Conclusion + Resources
I hope this in-depth tutorial was helpful to you and you were able to learn how to draw bantu knots.
I know drawing hair can be a little tricky.
But drawing hair does get much easier with practice. Trust me.
Also, drawing with references helps! You can look at stock photos to understand how hair works and practice daily drawing hair.
One of the best parts about drawing in cartoon style is that you don’t need to complicate things by adding too much texture. You must get the shape right and draw a few lines toward hair growth.
I have a post that you can read on how to find your art style.
You can make things easier by picking up this Character Drawing Toolkit.
If you want to see more tutorials on hair and people, just leave a comment down below. You can check out my other posts on drawing hair over here.
I will add more hair drawing tutorials to this blog, so keep a lookout!
- How to draw afro hair
- How to draw dreadlocks (male)
- How to draw twists
- How to draw straight hair
- How to draw bangs
- How to draw chibi hair
- The ultimate guide on drawing different types of ponytails
- How to draw mermaid hair (in different poses)
- How to draw cartoon hair on Procreate (easy tutorial for beginners)
- How to draw wet hair
- How to draw a mullet
- How to draw space buns
- How to find your art style


Leave a Comment