
Drawing curly hair can be a serious challenge.
There are so many types of curl patterns and textures to draw, that it can get complicated when you’re starting on a blank slate.
I’ve already covered how to draw kinky hair, afro hair, twists, and dreads.
In this post, I want to talk about how to draw a girl with curly hair in Procreate.
I will only use free brushes that come in Procreate so you don’t have to buy anything extra. But I will mention drawing resources you can use to enhance your learning.
I also have a few hair tutorials here if you want to check them out.
I will be breaking it down into easy steps so you can follow them no matter how old you are.
Here’s what you will learn to draw:
Let’s begin.
If you like this tutorial, please sign up for my weekly newsletter where I send multiple drawing tutorials once a week:
This post includes affiliate links. If you do decide to purchase something, I will make a commission at no extra cost to you. For more information, please read my entire Privacy Policy here.
I am currently using an iPad Pro and an Apple Pencil to create all my illustrations. But you can use any tool – a pen and paper or Photoshop because the drawing method remains the same.
Let’s begin.
Table of Contents
How to Draw a Girl Curly Hair for Beginners using Procreate
I’ll begin with drawing the head first, and then draw the curly hair over it.
Remember to create new layers and keep your artwork separate.
Meaning, that your outline will be on one layer, your hair color will be on another, your skin color will be on another layer, and so on.
This is because if you want to change the skin color later (to complement your hair color), you don’t have to redo the whole illustration.
So, I prefer keeping different items on different layers.
This will make it very easy to manipulate layers and change colors. If you’re just getting started with digital art, please read these posts to understand what I mean:
- How to get started with digital art
- How to color digital art step by step (adding shadows and highlights)
- How to draw cartoon hair for beginners
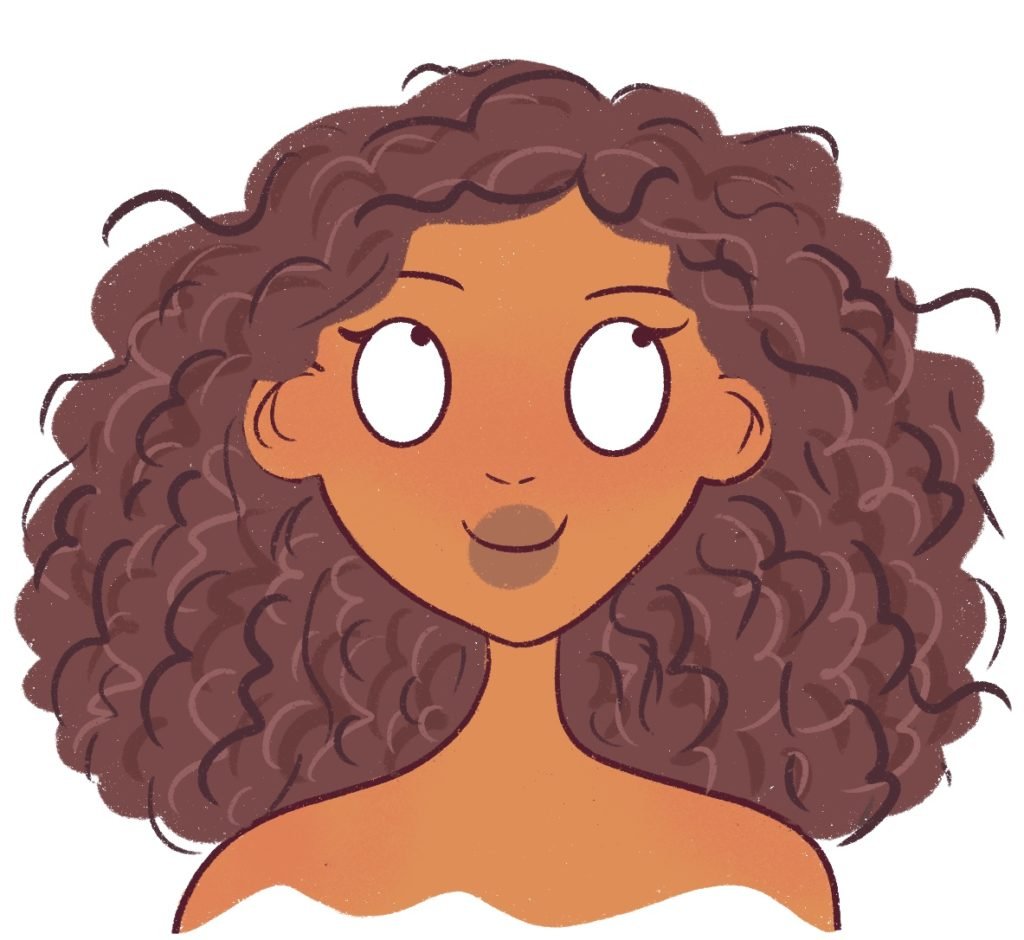
Step 1: Draw the character
I’m going to start with a simple cartoon face first.
I won’t go into detail with drawing the head because this post is on curly hair. I’ll start with the outline.
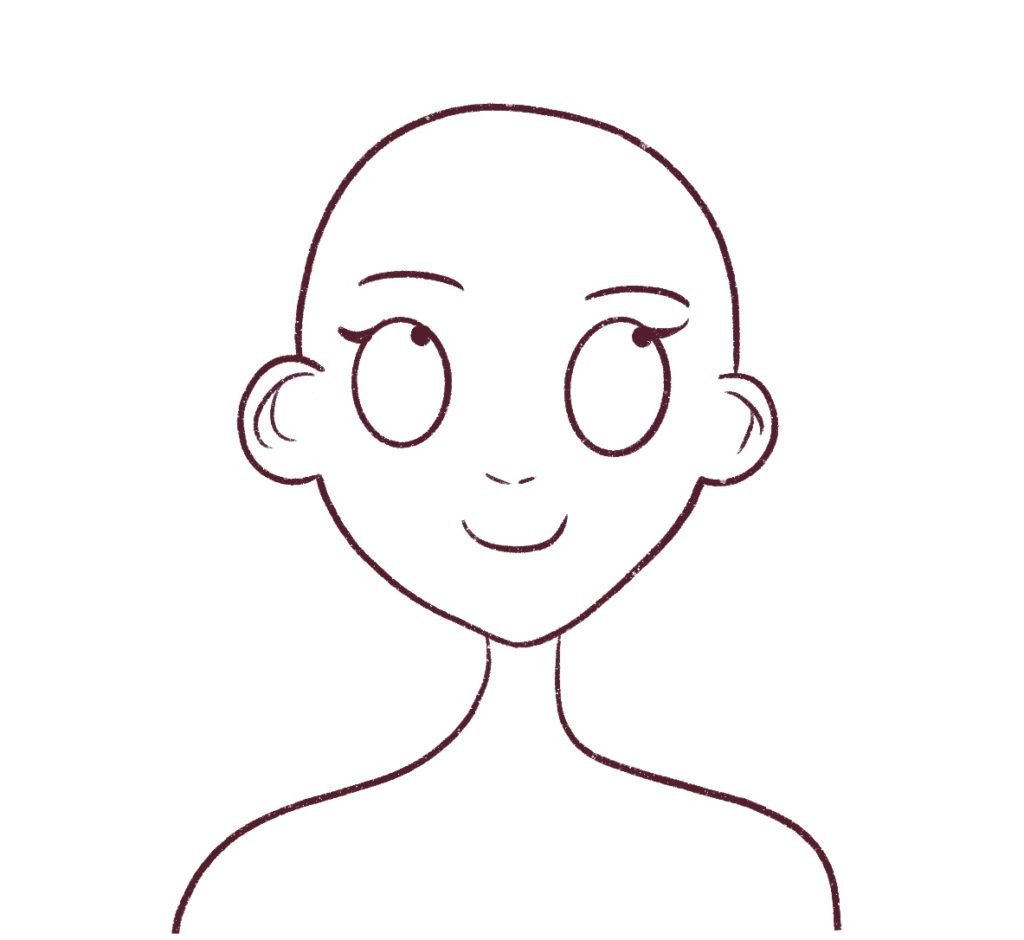
I’m only drawing her to the shoulders because this article is mainly about getting the curly hair right.
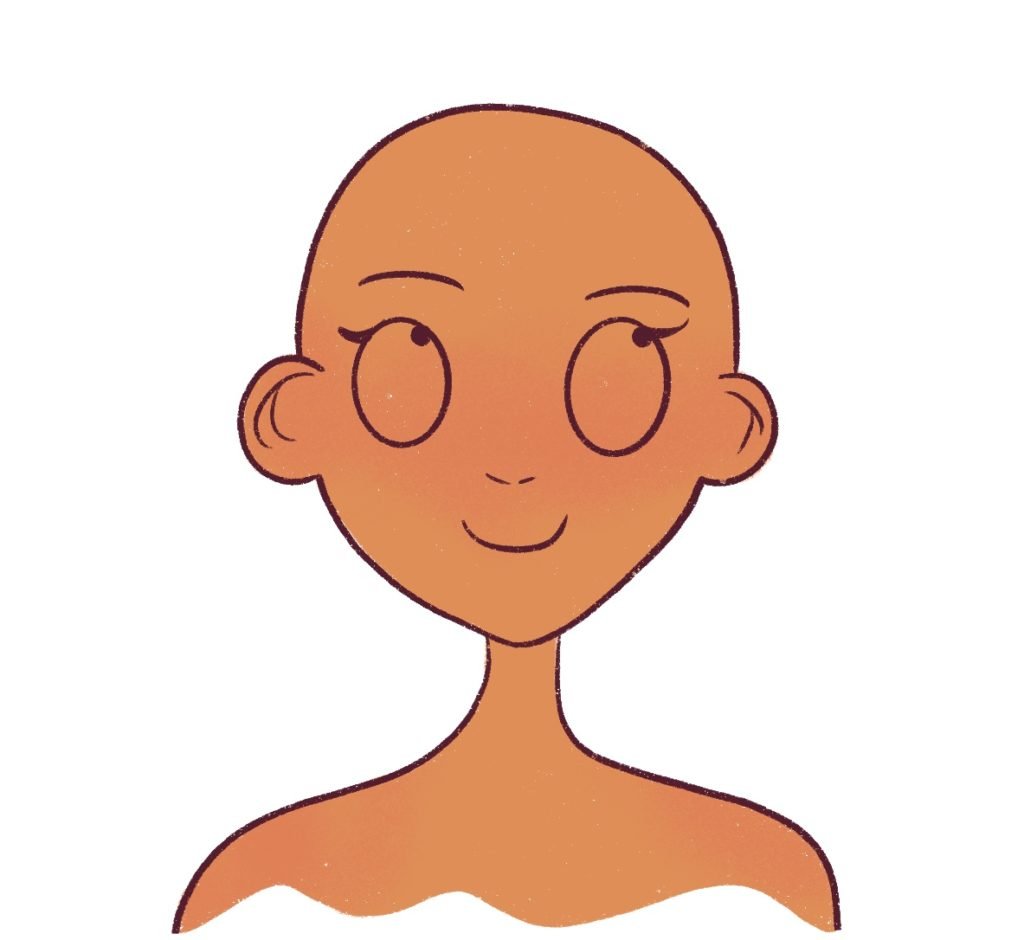
Let’s move on to coloring.
Next, I’ll just color her skin a nice medium brown color and add some blush to her cheeks, nose, and shoulders to give her skin some warmth.
I’m drawing this on 2 new layers underneath the outline layer.
I’m using the Bonobo brush in Procreate (it’s free in the app) to do this.
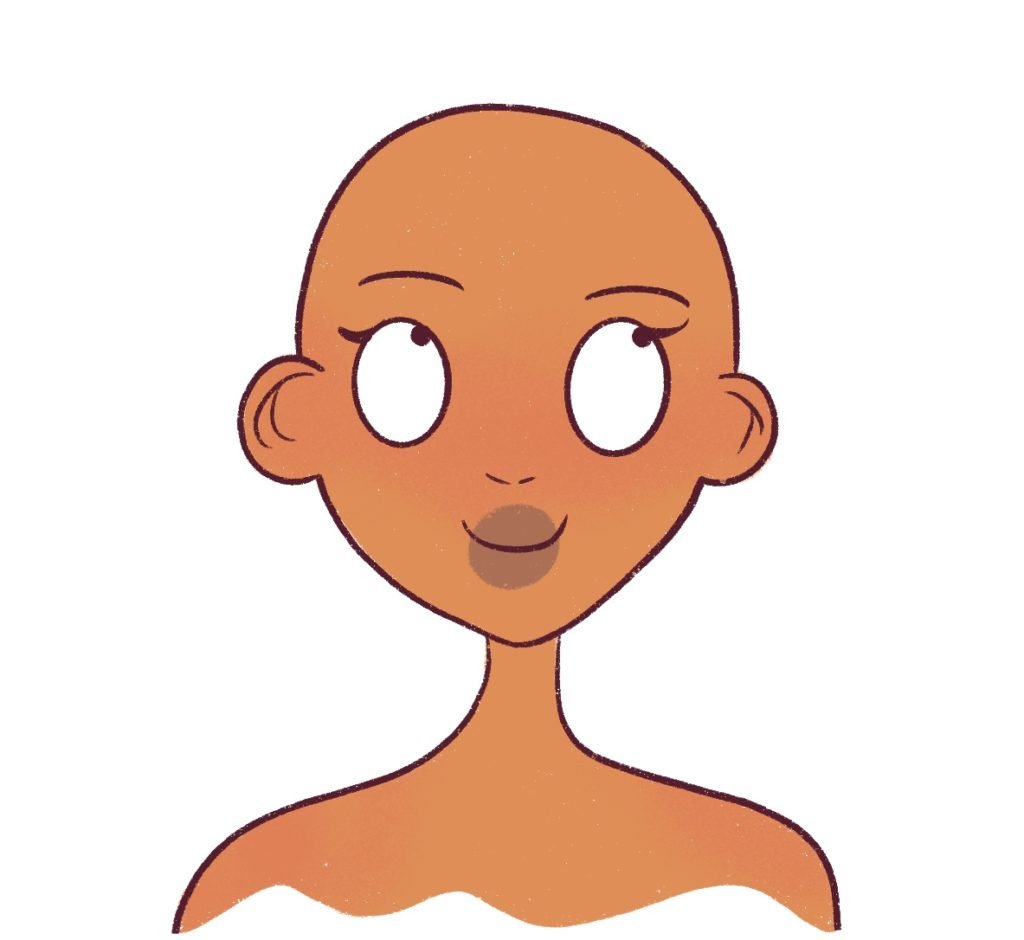
Next, I’ll color her eyes white and add brown lipstick to her lips using the Dry Ink brush in Procreate (also free in the app).
I mainly use the Dry Ink and Bonobo brush to draw my characters and hair in Procreate. These are very beautiful and versatile brushes.
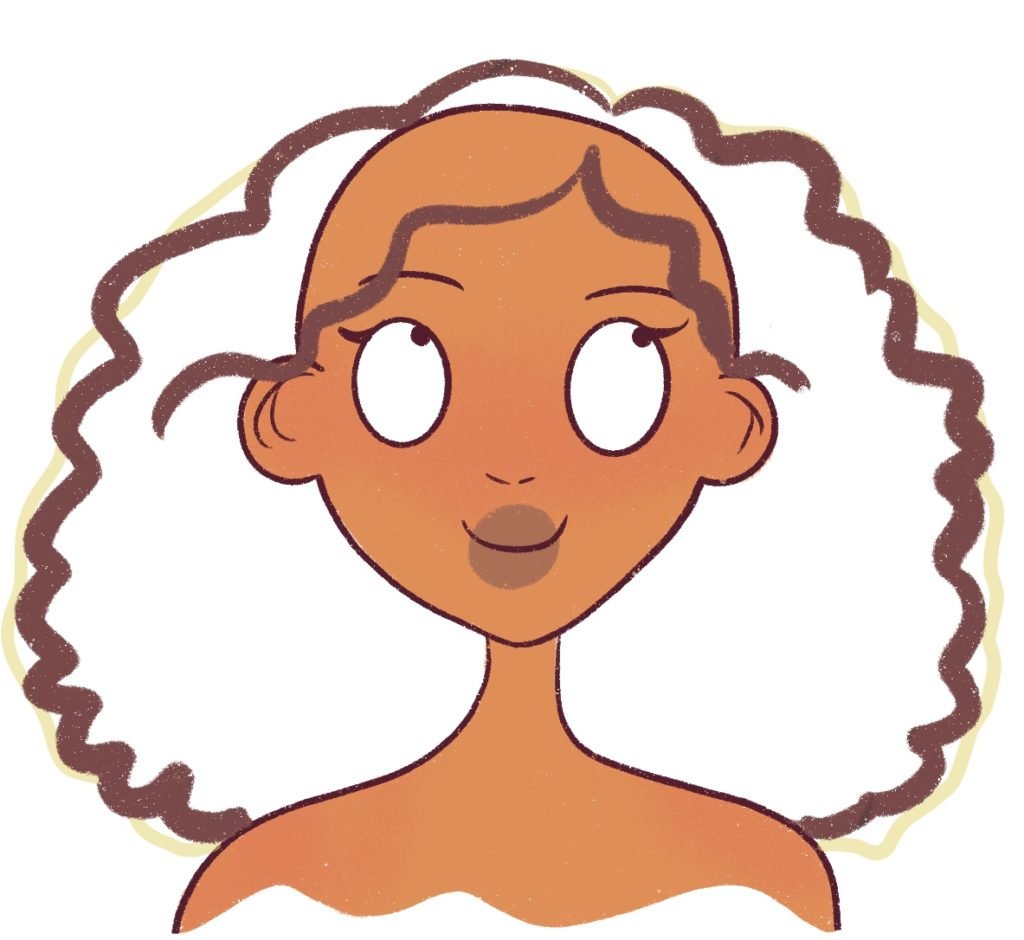
Step 2: Draw the curly hair base
Before you draw any hair on a character, always take a moment to think about the shape of the curly hair.
If you can just sketch a rough outline, it will help you visualize how you want to draw your curly hair and what shape it must take.
So, on a new layer over the outline layer, I’m going to go in with a bright color and just roughly draw the shape of the curly hair like this:

Next, I’m going to change the opacity of the sketch layer to 50% or lesser so that I can start drawing the curly hair on the character.
Now on a new layer, I will use the Dry Ink brush in chocolate color and draw the curly hair base.
You can use any color to draw the curly hair – for this drawing tutorial I’m using brown.
Pretend you’re drawing a cloud when you’re drawing the curls – only increase the tightness of the curves so you get something like this:
Once you’re happy with the shape of the curly hair, go ahead and fill it in completely with the same color you’ve just used.
You should get something like this:
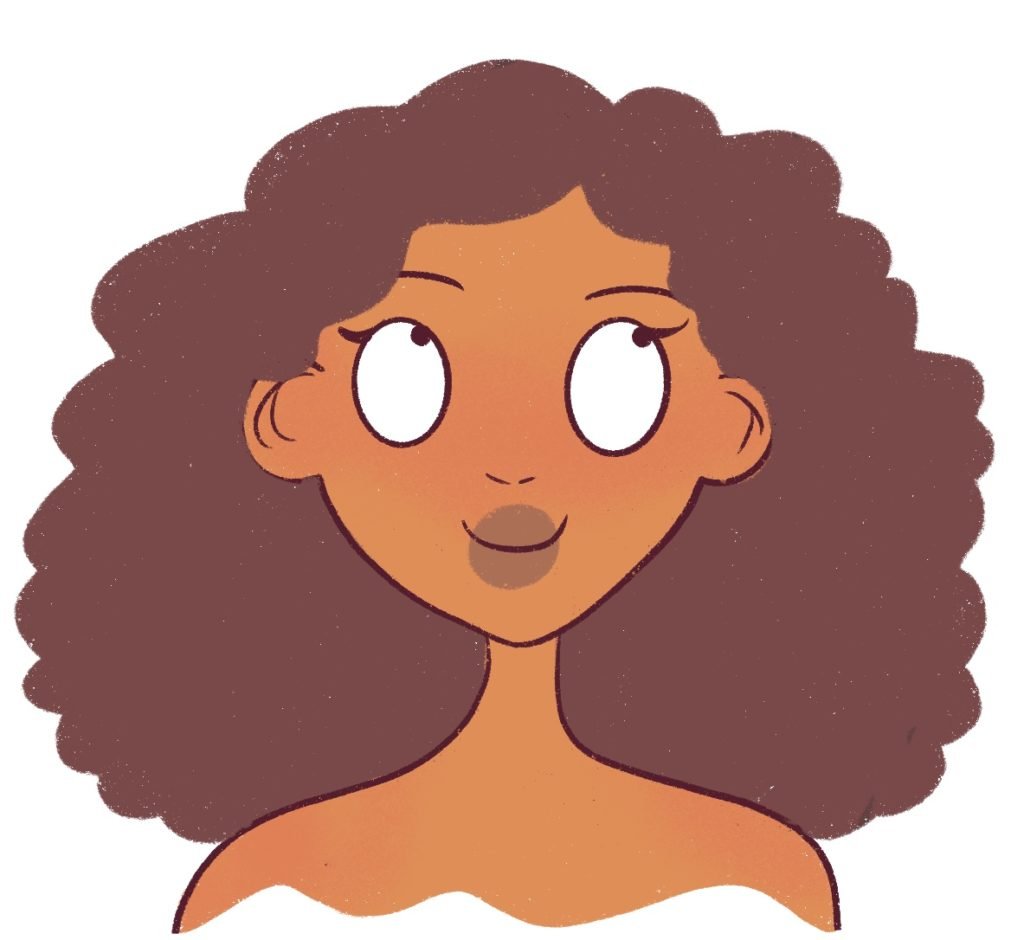
Don’t worry if your hair layer overlaps a little of the face, or the outline – it’s alright – we will make it look better later.
Step 3: Add curls and definition to the curly hair
Now, it’s time to add more definition and details to the curly hair.
I’m now going to take a darker color than the color I previously used for the curly hair (dark chocolate brown) and increase the thickness of the Dry Ink brush.
Then in the hair, I will add springy curls and waves like this:

The idea is to make the curls look more voluminous.
Once you’re done, decrease the thickness of the brush and use a light chocolate brown color to draw springy curls on top of the previous layer.
Remember to draw the curls in the direction of the hair growth like this.
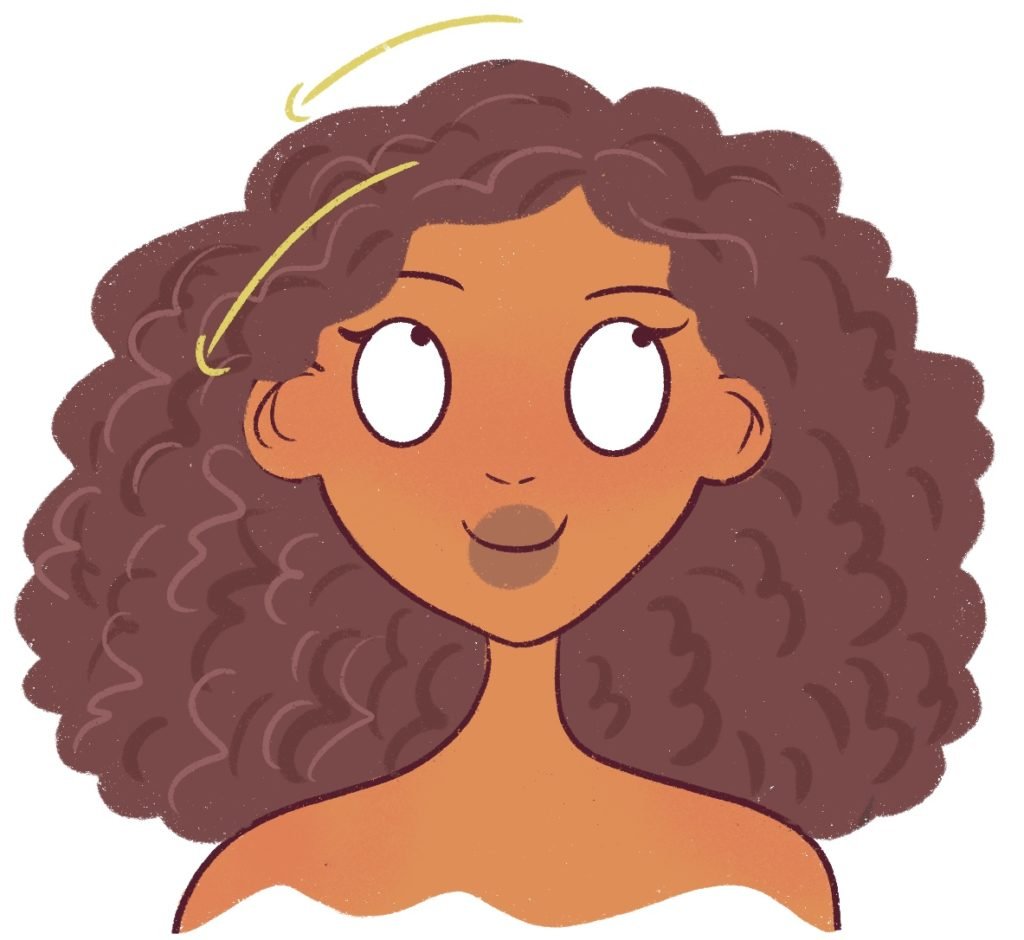
Take your time with this.
You want to vary the length of the curls as well as the type of curl – this will give your curly hair a more organic and fresh look.
Once you’re done with 1 side, do the other.
The green arrows represent the direction of the hair growth – this will help your hair look more real.
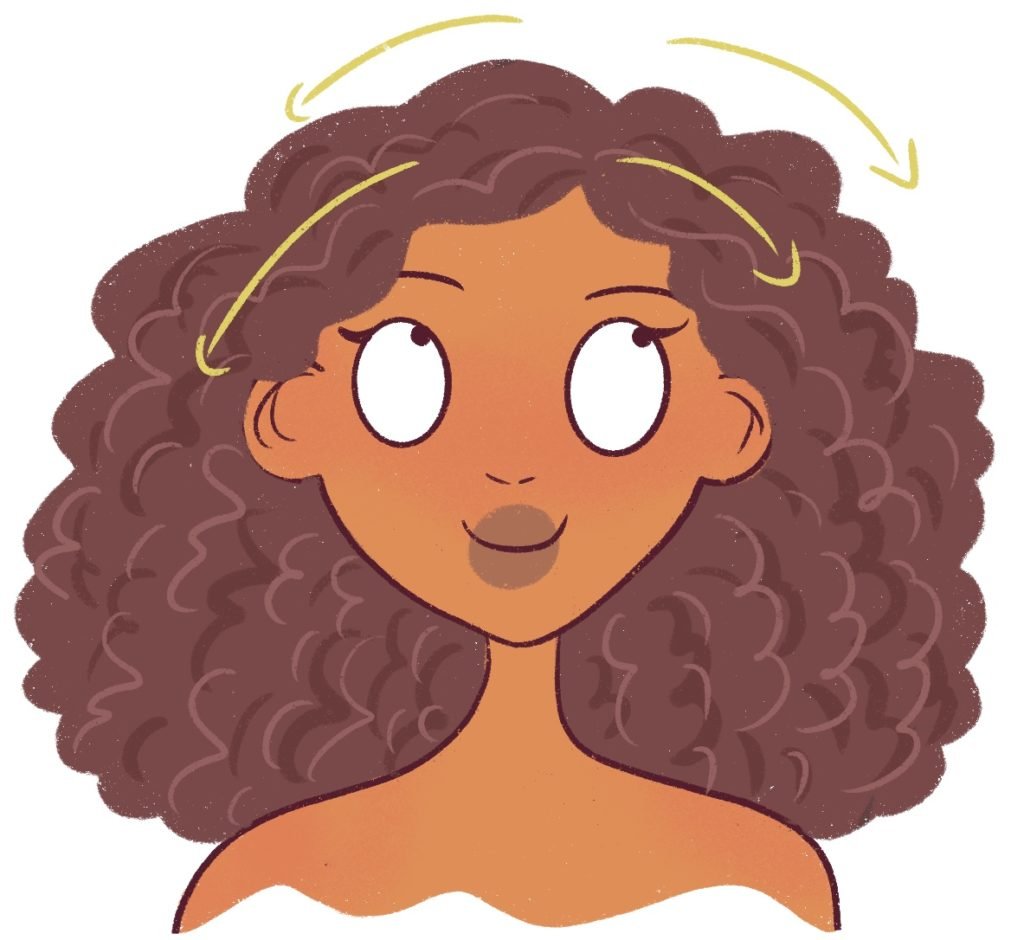
Now, we’re nearly done.
We can definitely leave it like this.
But if you want your hair to look more voluminous, you can add stray hairs.
So far, we were sticking to drawing all the curls inside the curly hair base.
Now, it’s time to break the rules.
So, I’ll go in with a very dark chocolate brown (close to black) and draw thick curls like this:

At this stage, don’t be afraid to draw stray curls that come out of the base – this will look like curly hair frizz that every single curly girl has!
It will give the hair a very natural look. So, be generous with these curls.
We’re done drawing the curls.
But we can add some shadows to make the hair look more 3D.
Step 4: Add shadows and highlights to the curly hair
So, on a new layer, I’m going to go in with a medium purple and draw shadows gently under the head.
This is going to be the curly hair shadow. Here, the hair is more dense and light doesn’t hit this part. We want it to look heavier.
Remember to use the bonobo brush for this.
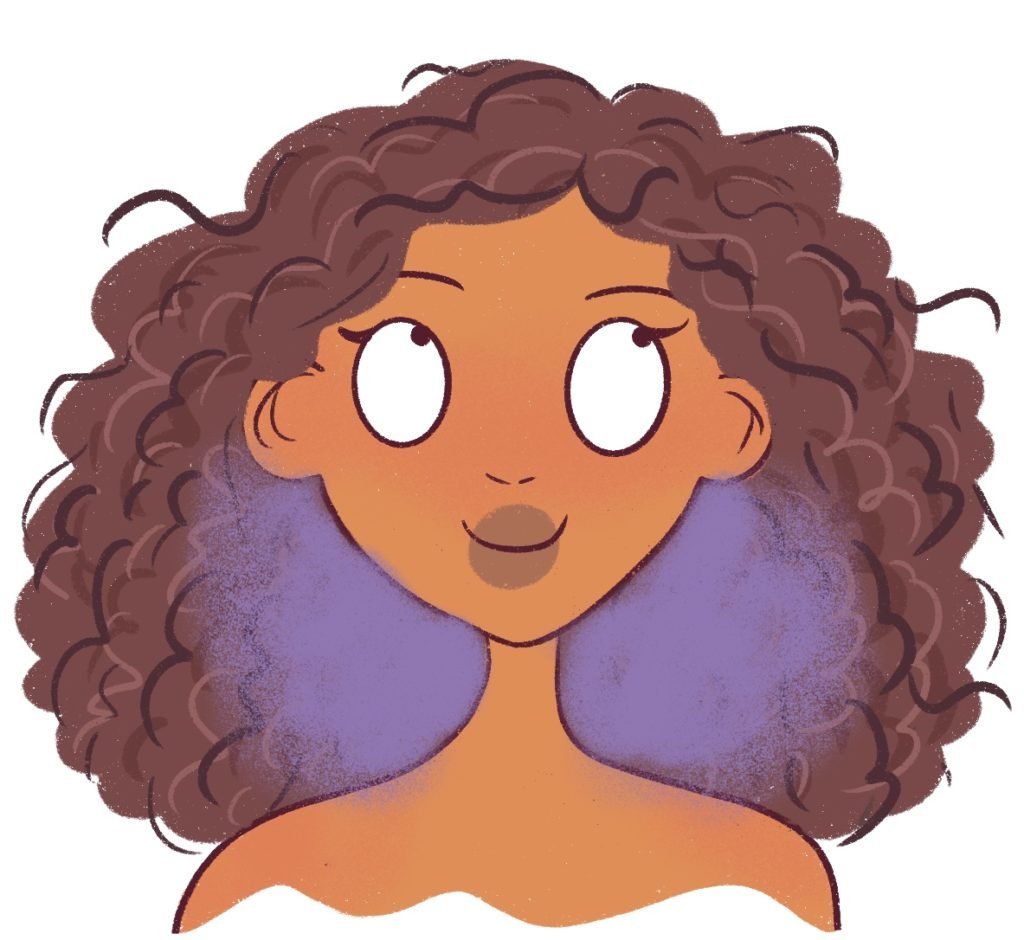
Once you’re happy with how the shadow looks, change the blending mode to “Multiply” and change the opacity to 45% or less.
You’ll get something like this:

Now, I will add some highlights to the face, especially the nose and cheeks. You can read this post to learn more about how I add highlights and shadows to my drawings.
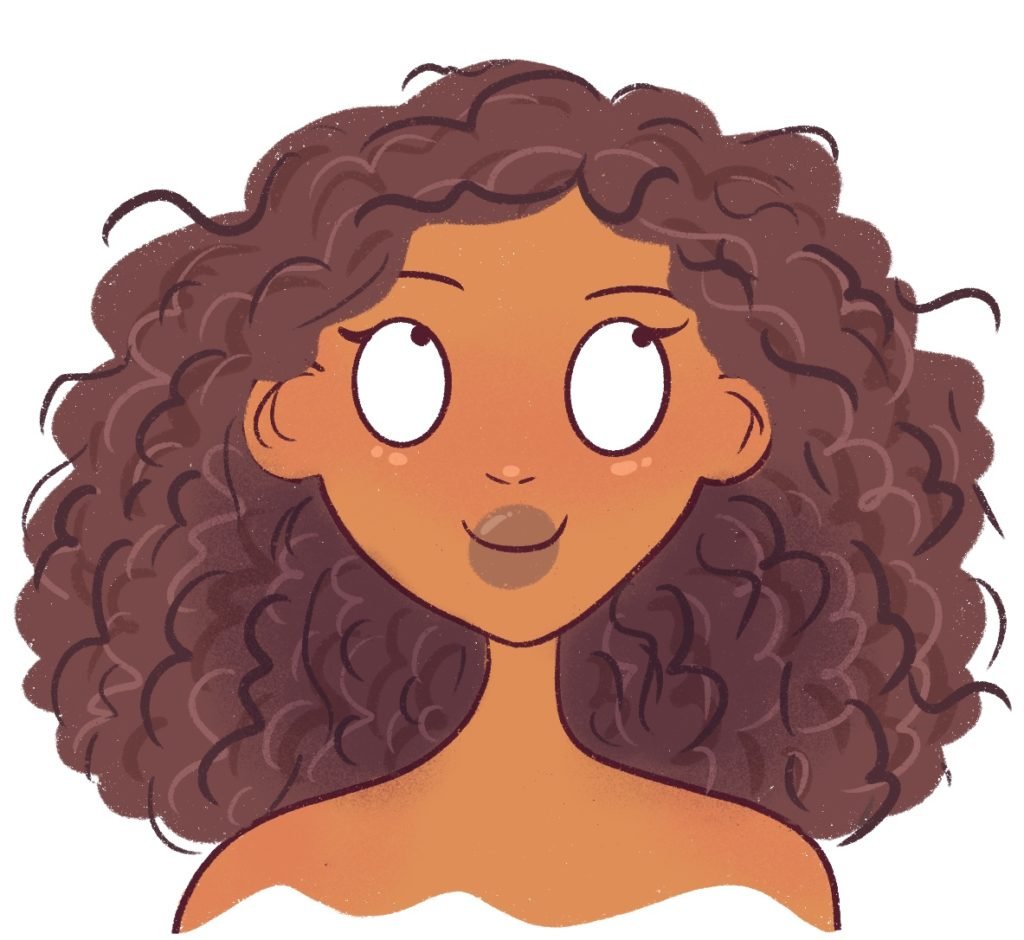
And voila!
We’ve learned how to draw curly hair on Procreate!
Takeaway – How to draw curly hair + Resources
I hope this in-depth tutorial was helpful to you, and that you were able to learn how to draw curly hair on Procreate.
Drawing hair does get much easier with practice.
You can also get these beautiful curly hair brushes on Procreate if you’re finding it difficult to draw curls and want a shortcut:

Trust me. Also, drawing with references helps! You can look at stock photos to see what shape of hair you want before you start drawing curls.
One of the best parts about drawing in cartoon style is that you don’t need to complicate things by adding too much texture. You just have to get the shape right and draw a few lines in the direction of hair growth.
I have a post that you can read on how to find your art style
If you’re looking to improve your drawings faster and want to really draw as a hobby or even pick up drawing professionally, I highly recommend picking up this beautiful online course that teaches you how to draw female cartoon characters.
Use code STRAYCURLS-10 to get a 10% discount!
This class will teach you how to draw a female character from scratch!
If you are just getting started with ProCreate, I highly recommend this course: Procreate for Beginners: Digital Illustration 101
It will help you learn Procreate within a day or a week at most. I found it super helpful!
You may also enjoy:
- How to draw bangs
- The ultimate guide on drawing different types of ponytails
- How to draw mermaid hair (in different poses)
- How to draw cartoon hair on Procreate (easy tutorial for beginners)
- How to draw wet hair
- How to draw afro hair
- How to draw twists
- How to draw kinky hair
- How to draw a mullet
- How to draw space buns
- How to find your art style

Leave a Comment