Drawing hair is a little tricky if you’re not used to it.
And drawing anime hair is even more complicated because it’s so much more detailed than drawing real hair.
But once you start drawing a lot of anime and chibi hair, it gets easier – it all depends on how much you practice.
I’ve been drawing a lot of chibi portraits recently, and I thought I’d share a tutorial on how to draw chibi hair for beginners.
So, it doesn’t matter if you’re a complete beginner or you’ve had some practice drawing anime and chibi characters.
I’ll break it down step by step so that it’s very easy to understand.
I already have a few hair tutorials here if you want to check them out.
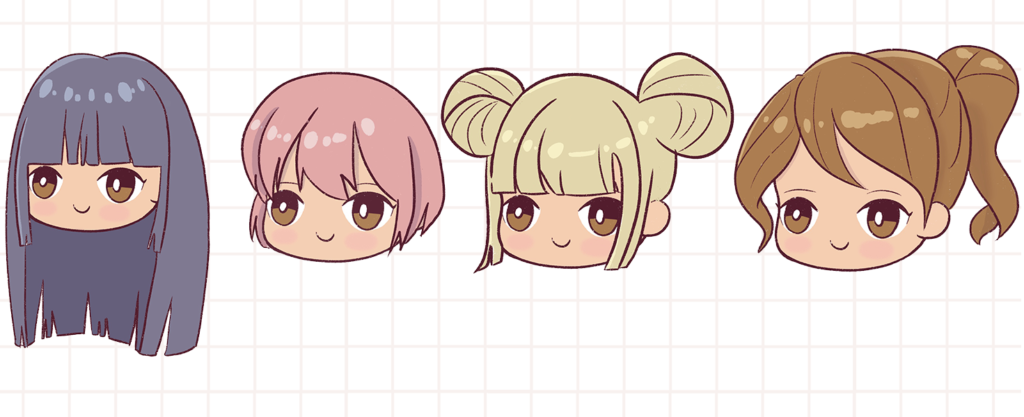
There are many types of chibi hairstyles we can draw- We will learn to draw:
- Long hairstyles on a chibi character
- Short hair on a chibi character
- Buns on a chibi character
- Ponytail on a chibi character
And we will also learn how to color chibi and anime hair so that you can draw this digitally effortlessly.
This post includes affiliate links. If you do decide to purchase something, I will make a commission at no extra cost to you. For more information, please read my entire Privacy Policy here.
Please note that I am currently using an iPad Pro and an Apple Pencil to create all my illustrations. But you can use any tool – a pen and paper or Photoshop because the drawing method remains the same.
If you have Procreate but don’t know how to use it, please look at this beginner online course as it’s bloody amazing.
Let’s begin.
[convertkit form=3469776]
Table of Contents
How to draw chibi hair – step by step for beginners
I will first draw a chibi face and head, and then show you one hairstyle in detail and move on to the remaining hairstyles.
You can even use these drawings as references. Once you learn how to draw these 4 hairstyles, you can draw any type of chibi hair easily.
Ready? Let’s start.
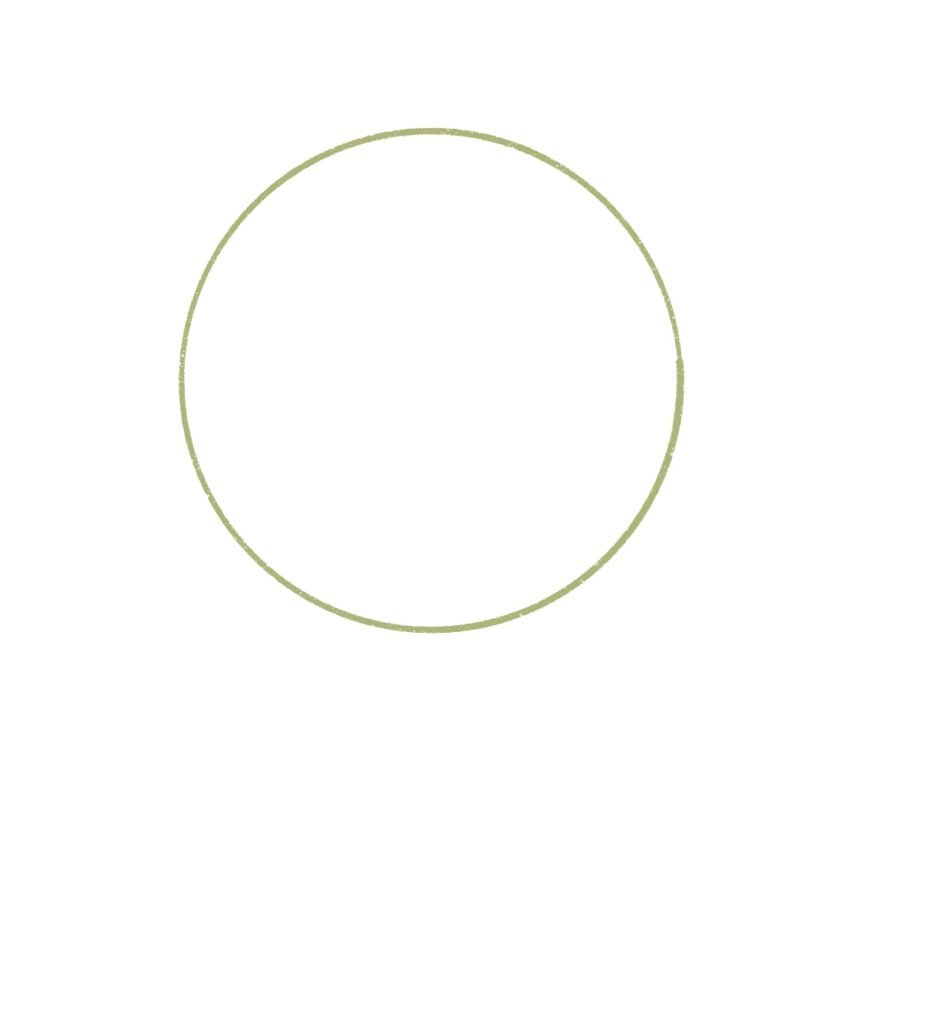
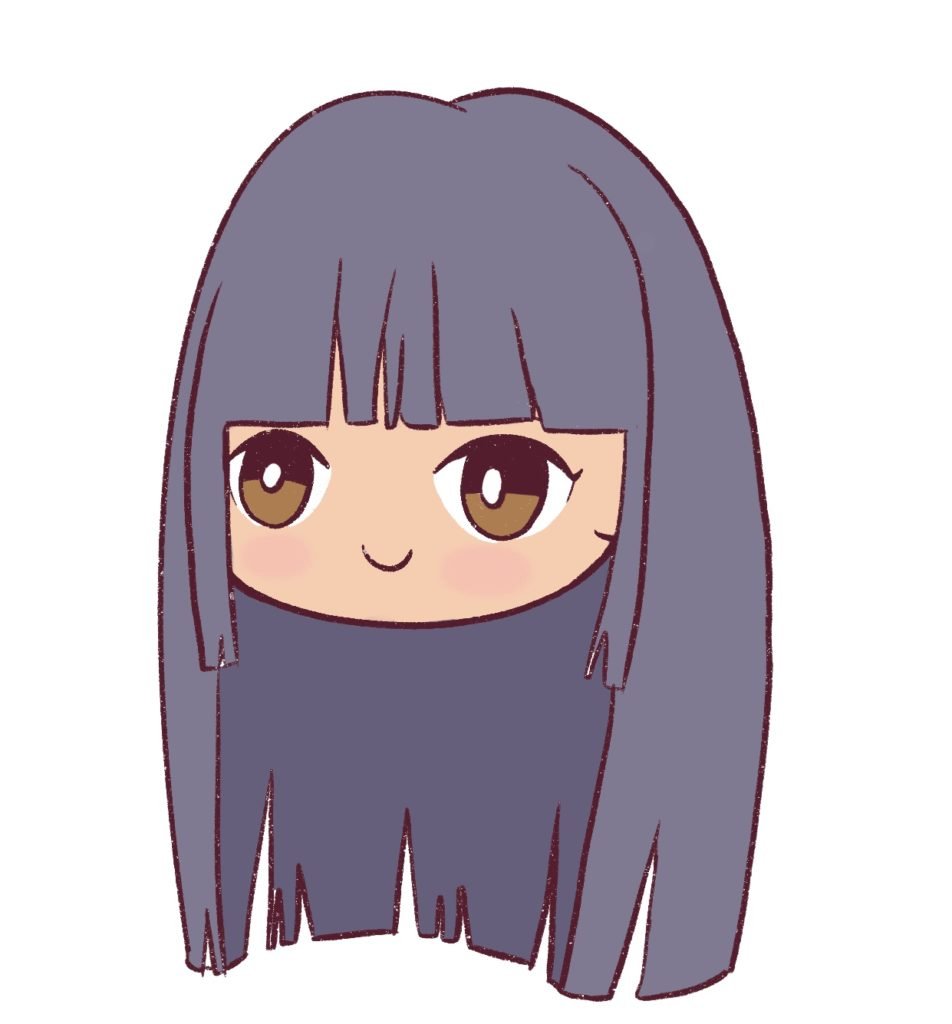
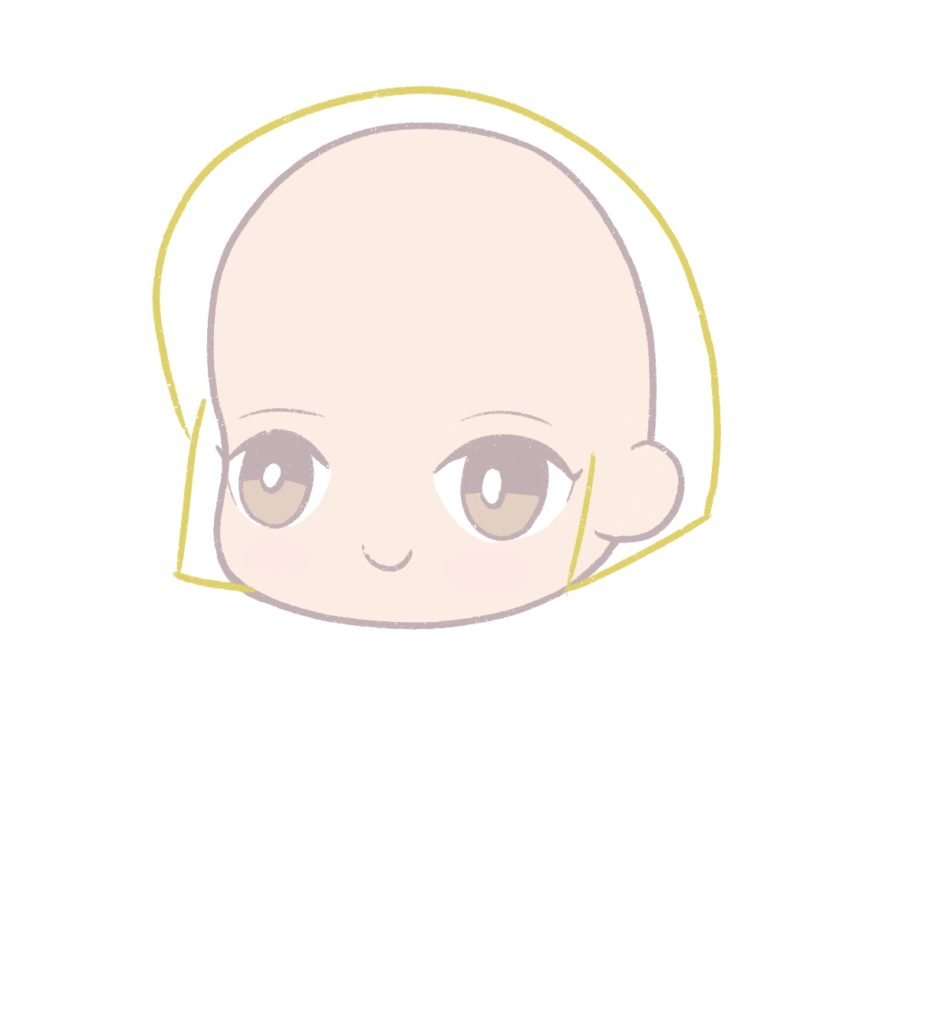
Step 1: Drawing the head and face of a chibi character
Let’s start by drawing the head and the face first.
This will make it easier for us to draw the hair.
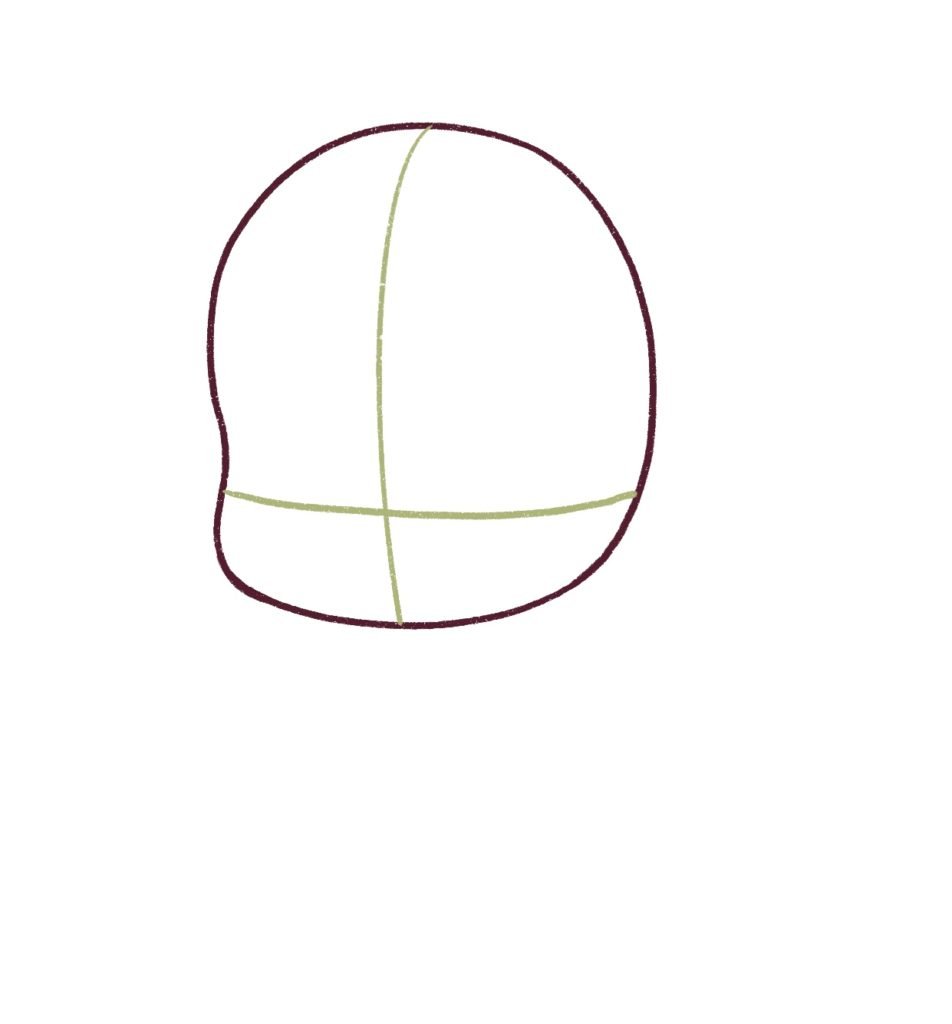
I’m going to start with a simple circle first.
Next, I’ll draw the head of the chibi girl.
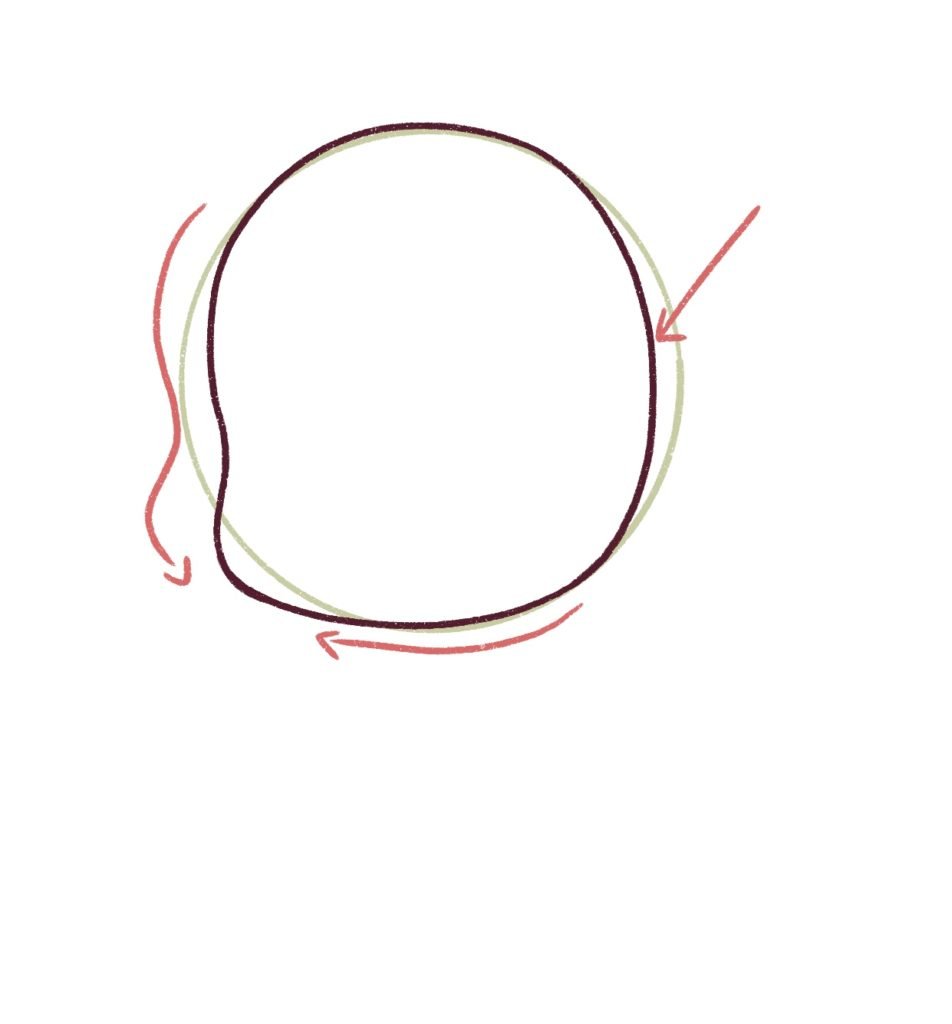
Note the shape above.
The bottom part of the face is squished and flattened – this will give your chibi character a very cute and young look. And the side of the face has a curve where the cheeks are right at the bottom.
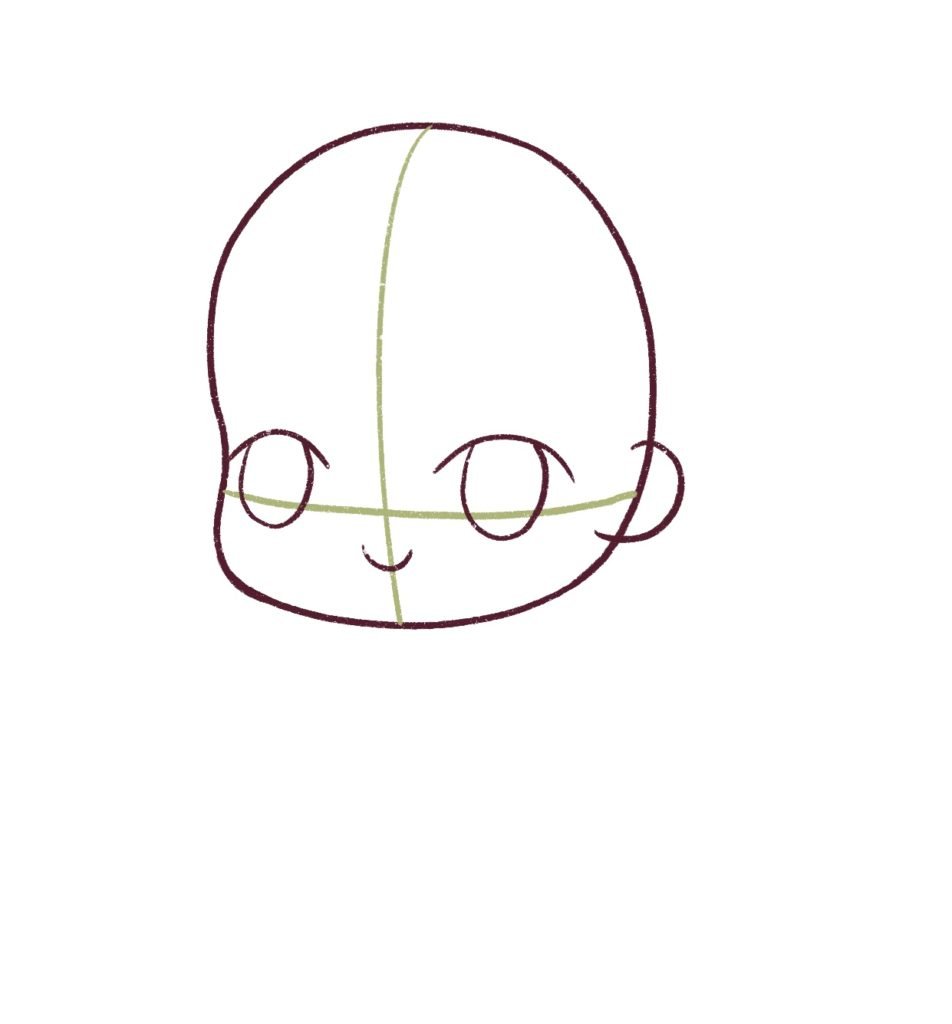
Next, I’ll draw a simple rough guideline so that I can draw the facial features.
And now, I’ll draw the eyes, mouth, and ears.
I’m not going to go into detail about drawing the face since this post is mainly about drawing chibi hair.
But if you’re looking for books to help you draw chibi characters, get this book. It’s what I used to learn how to draw chibi characters.

Next, I’ll add some more details and color the face.
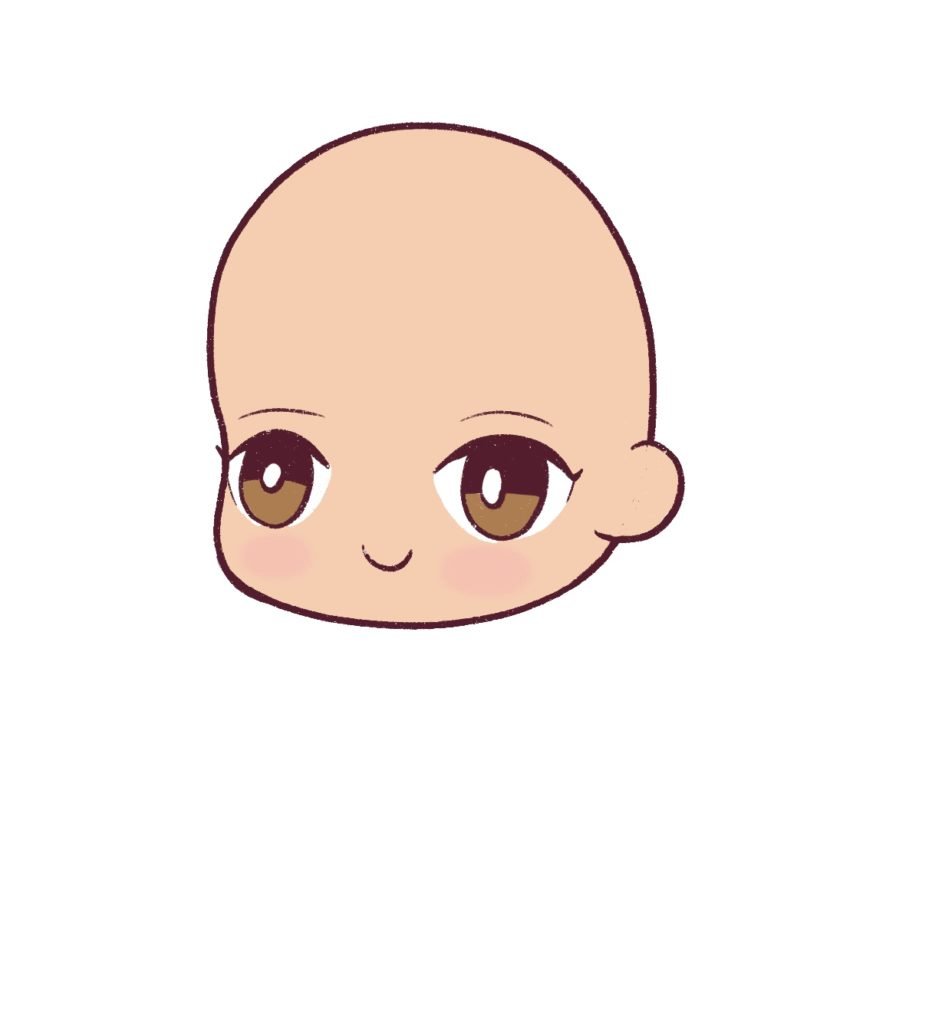
We’ve finished drawing the chibi face, so let’s move on to learning how to draw chibi hair.
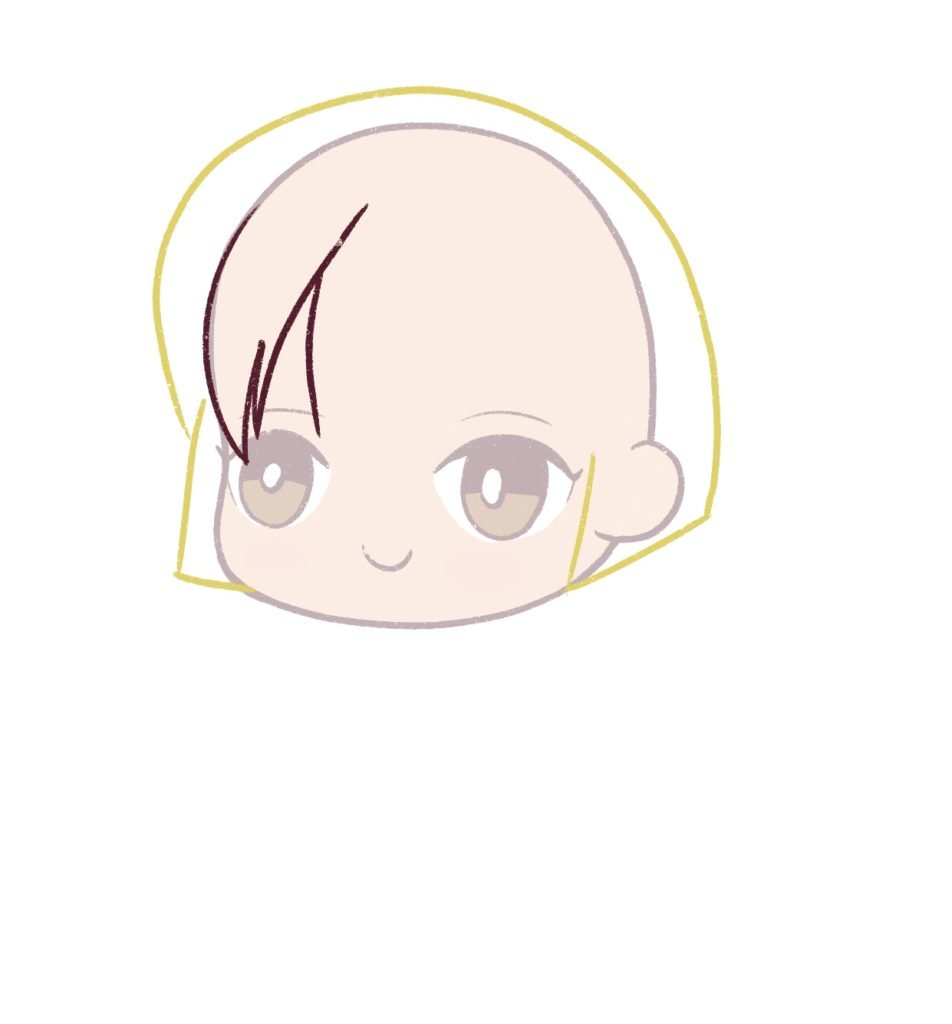
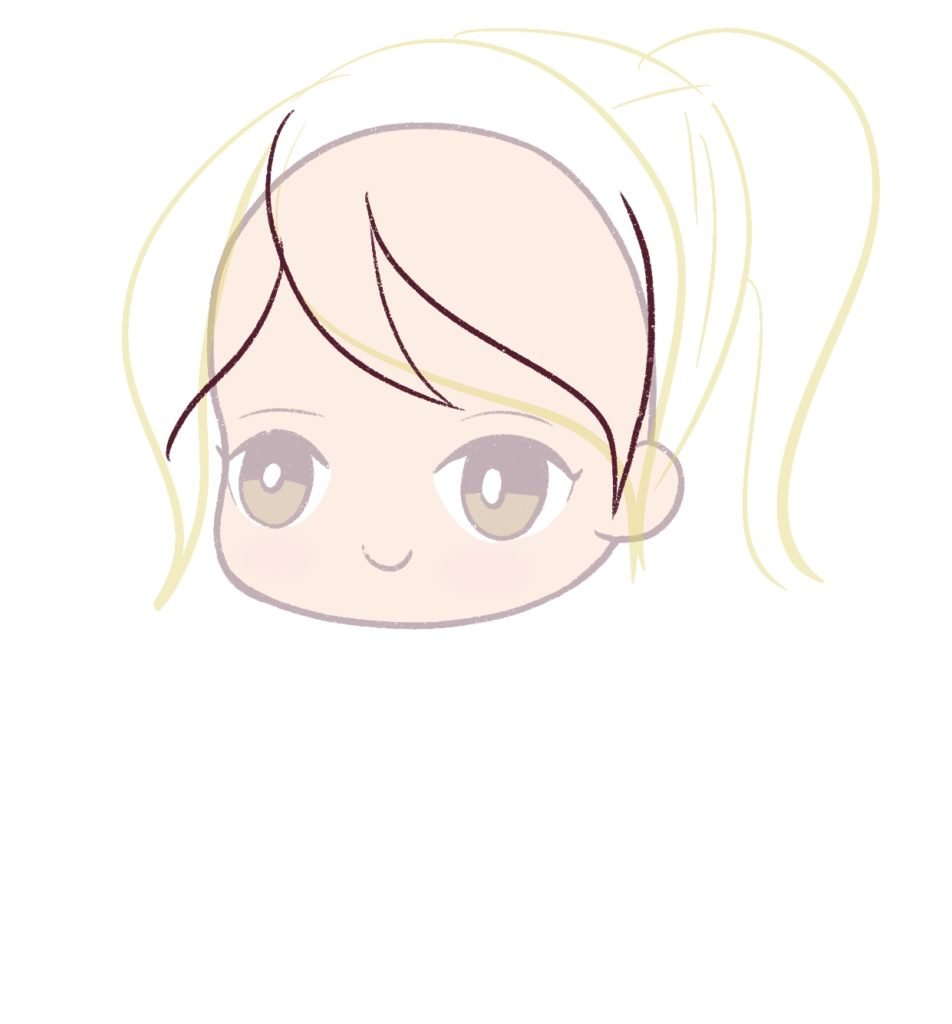
Step 2: Learning to draw chibi hair (long hair)
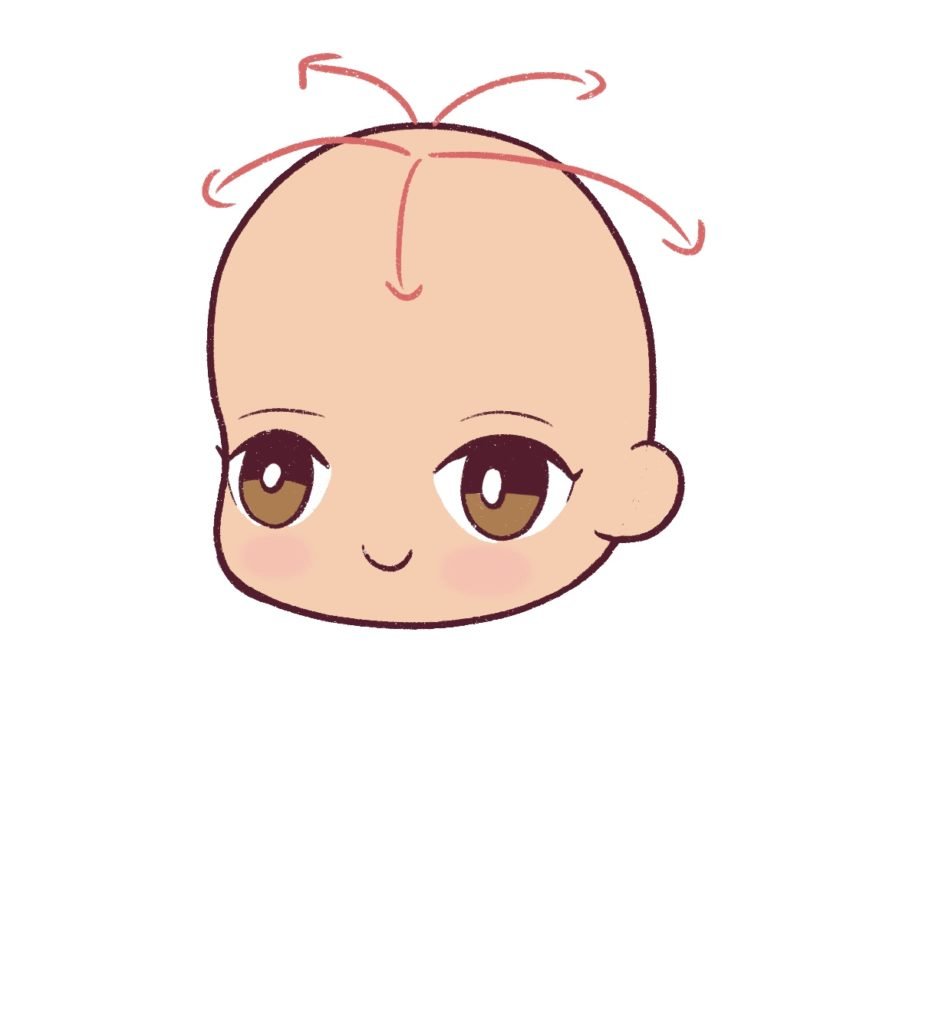
Before I begin drawing the hair, let’s get one thing straight.
You have to always consider the direction of the hair growth when drawing hair. This will help you draw the hair more easily.
Just think about where the hair originates, and how it’s growing downwards.
Alright?
Let’s begin!
I’m going to start drawing the bangs first because they are super easy to draw. You can even check out my tutorial on drawing different types of bangs here.
You can draw any type of bangs but for this piece, I’m going to draw straight bangs that cut the eyebrows. To make the chibi bangs look more realistic, I’m going to add some spaces between the sections of hair like this:
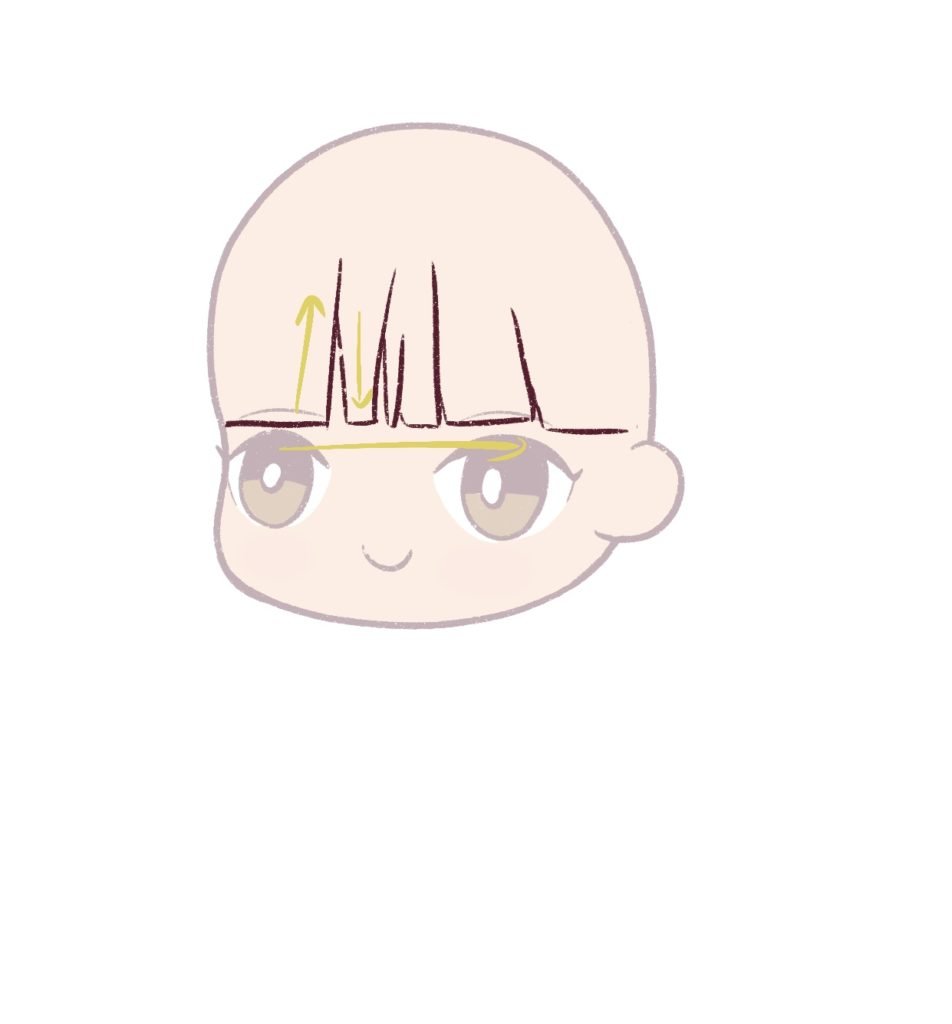
Next, we can add some side bangs to give the character a more youthful look.

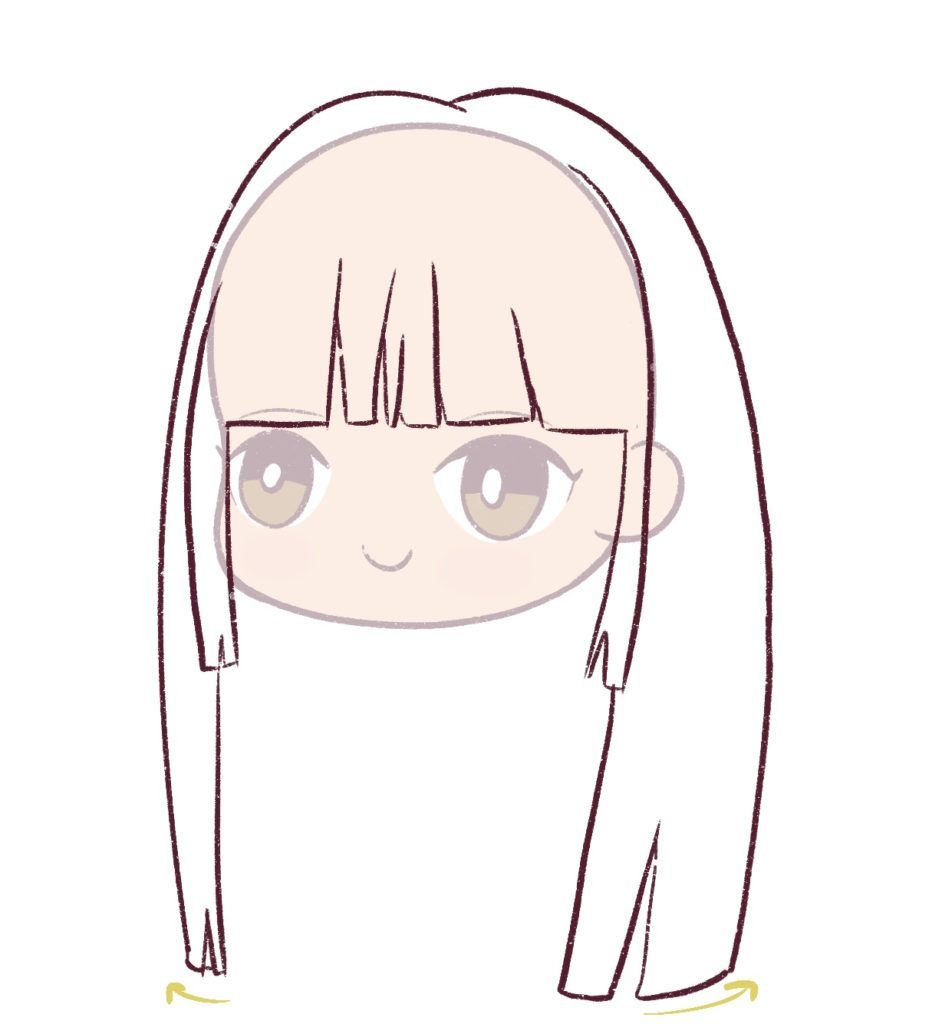
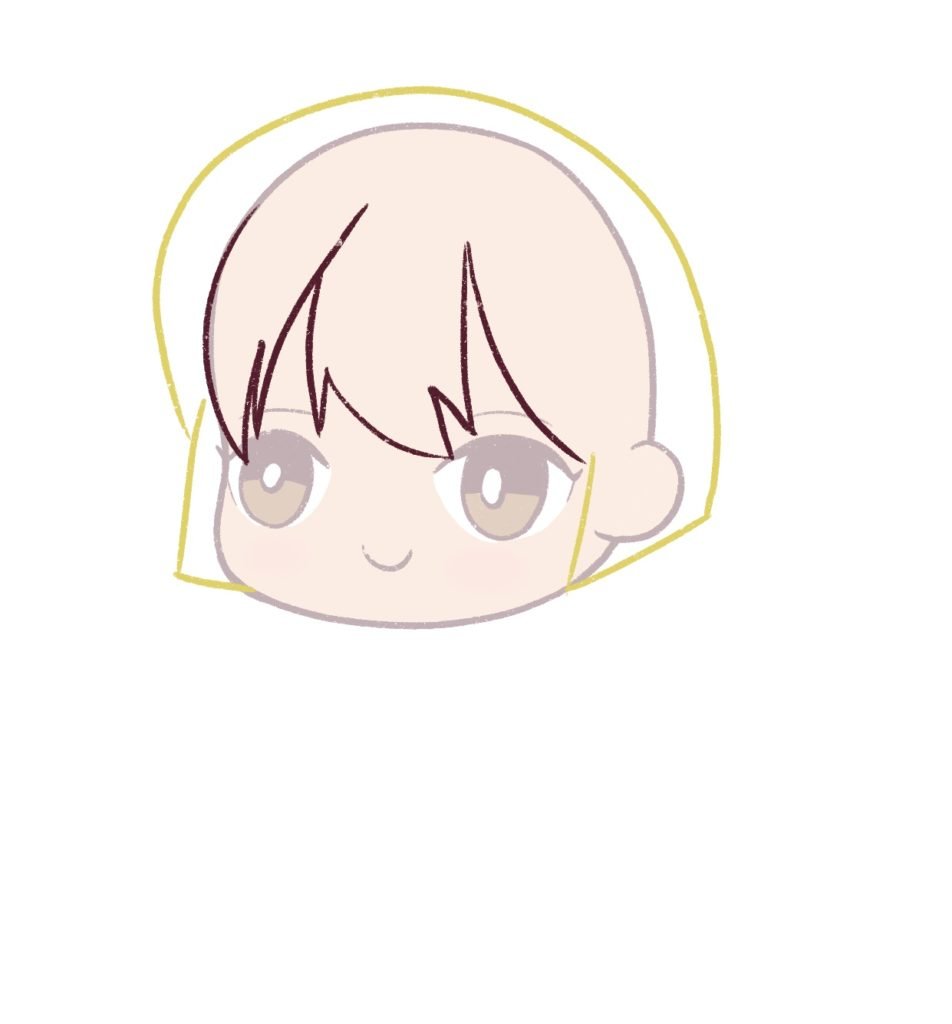
And now I’ll draw the sides of the hair.
Remember to make the ends curved (look at the arrows), to make the hair look more realistic.
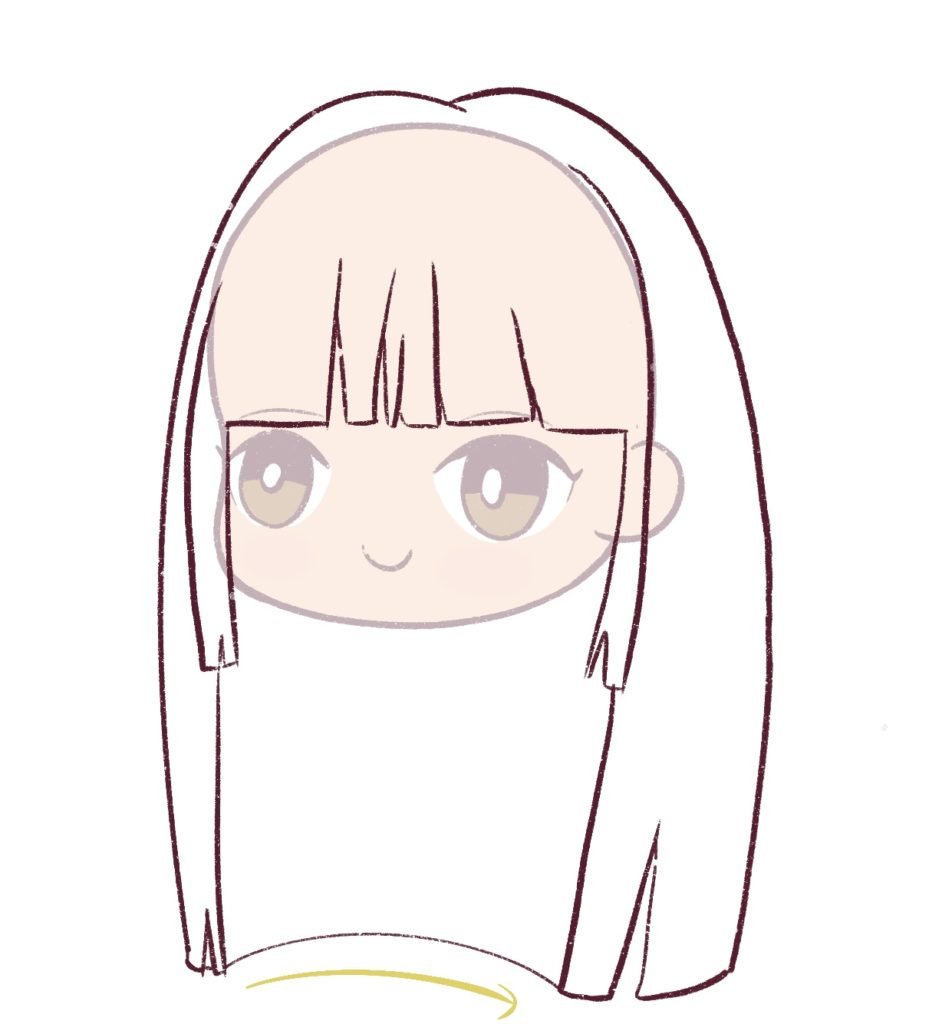
Remember to add some volume to the top to make the hair look more fluffy and thick.
Take your time with these sections.
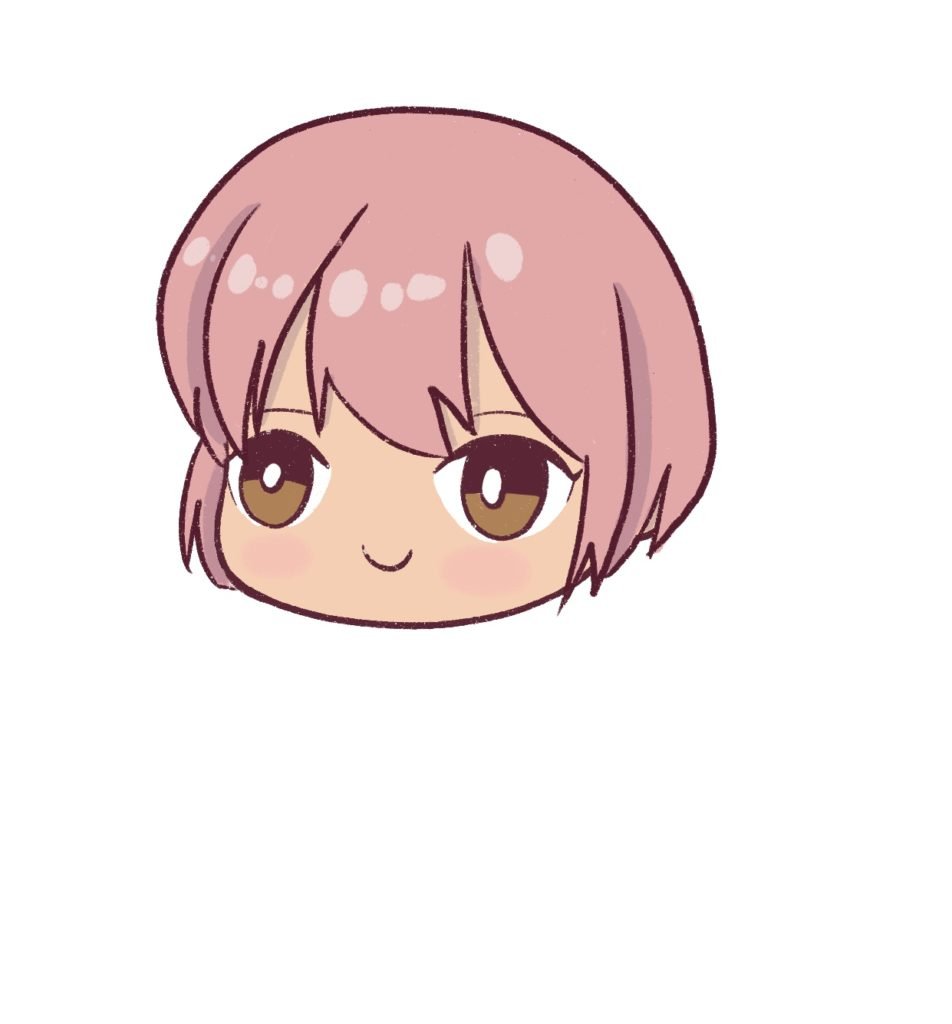
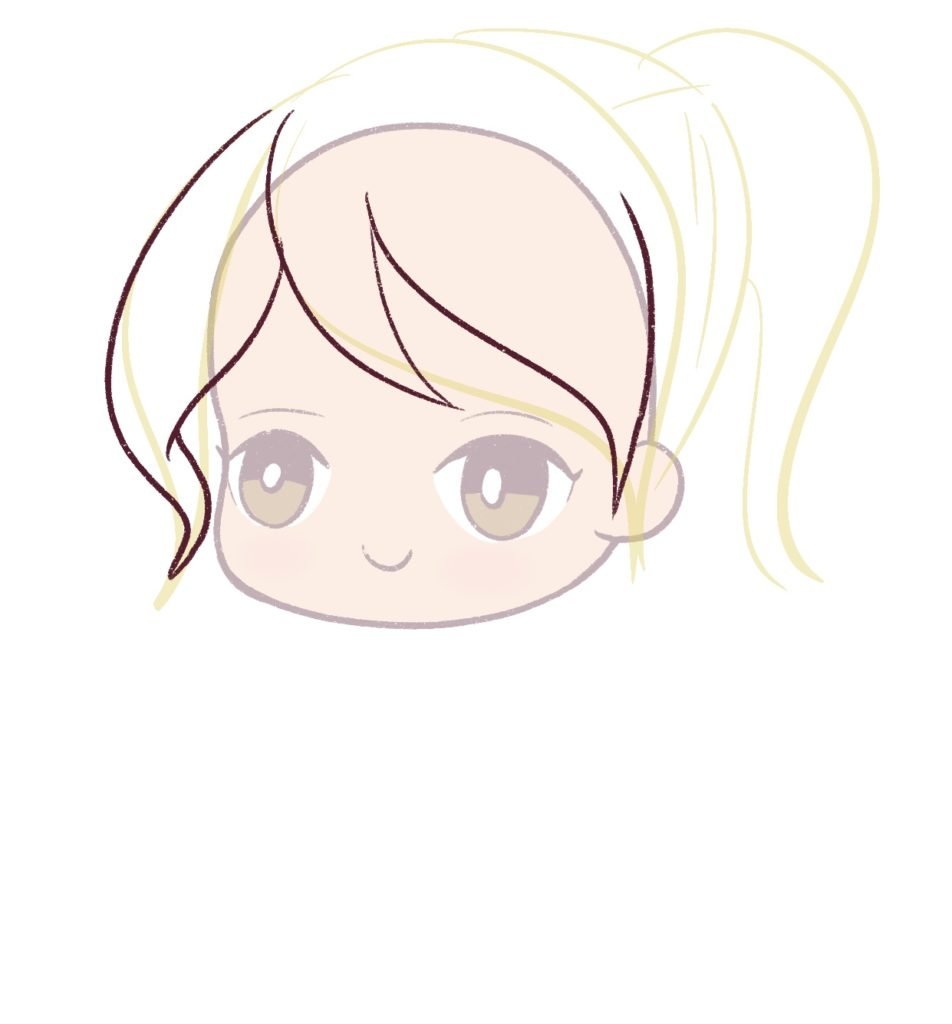
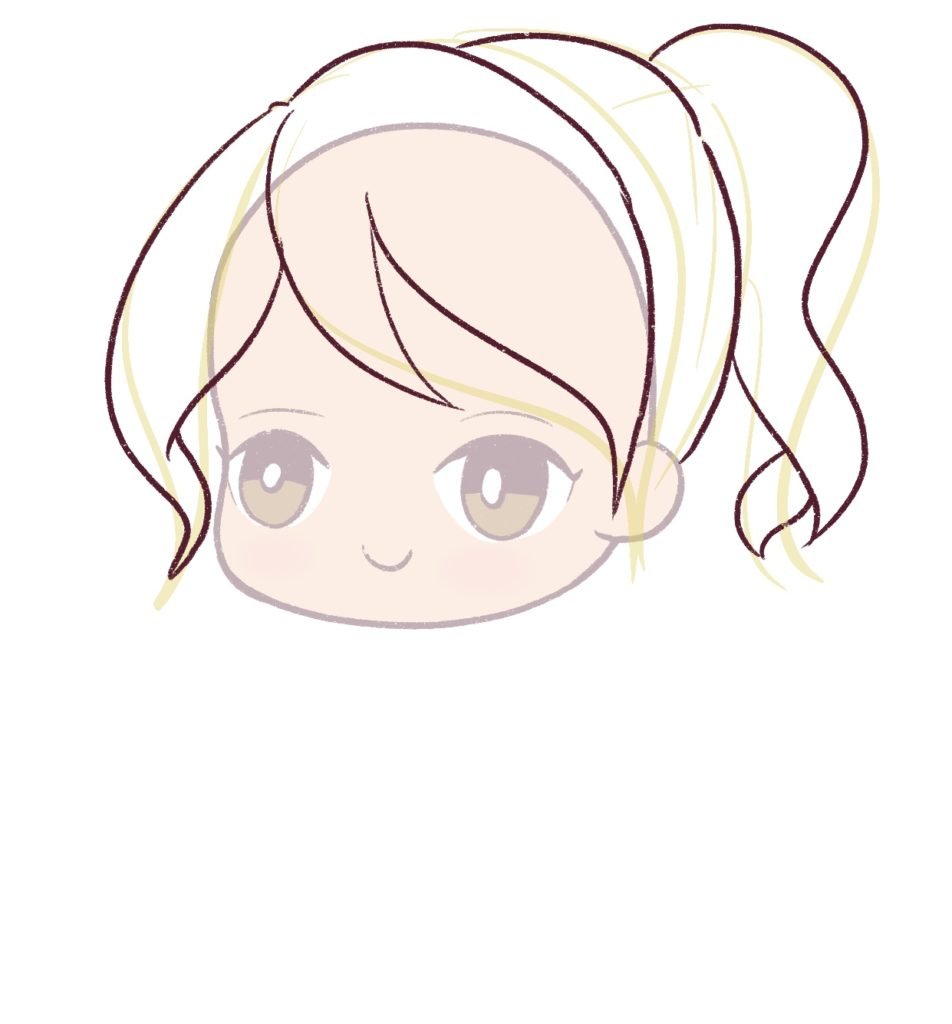
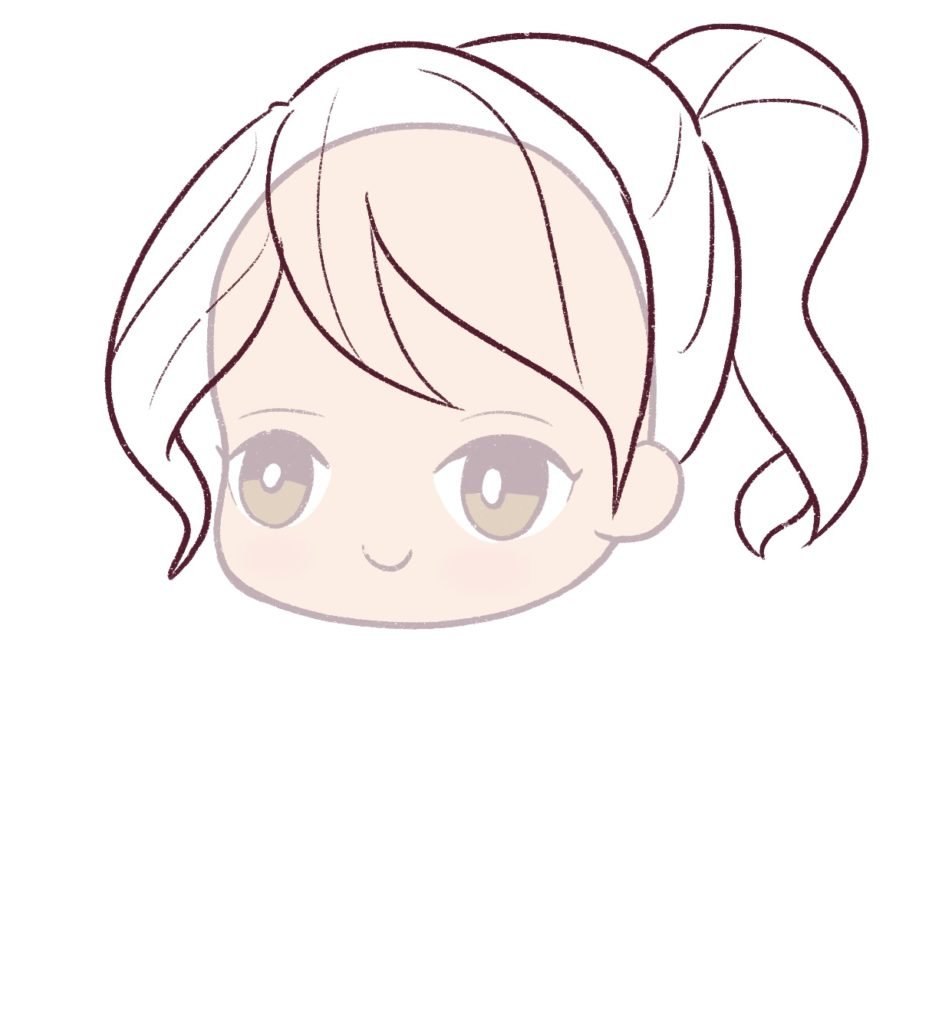
I’m now going to draw the outline of the behind portion of the chibi hair. Make it curved like this to make it look more natural and organic.
And using that outline as a guide, I’ll continue to draw the behind portion of her hair.
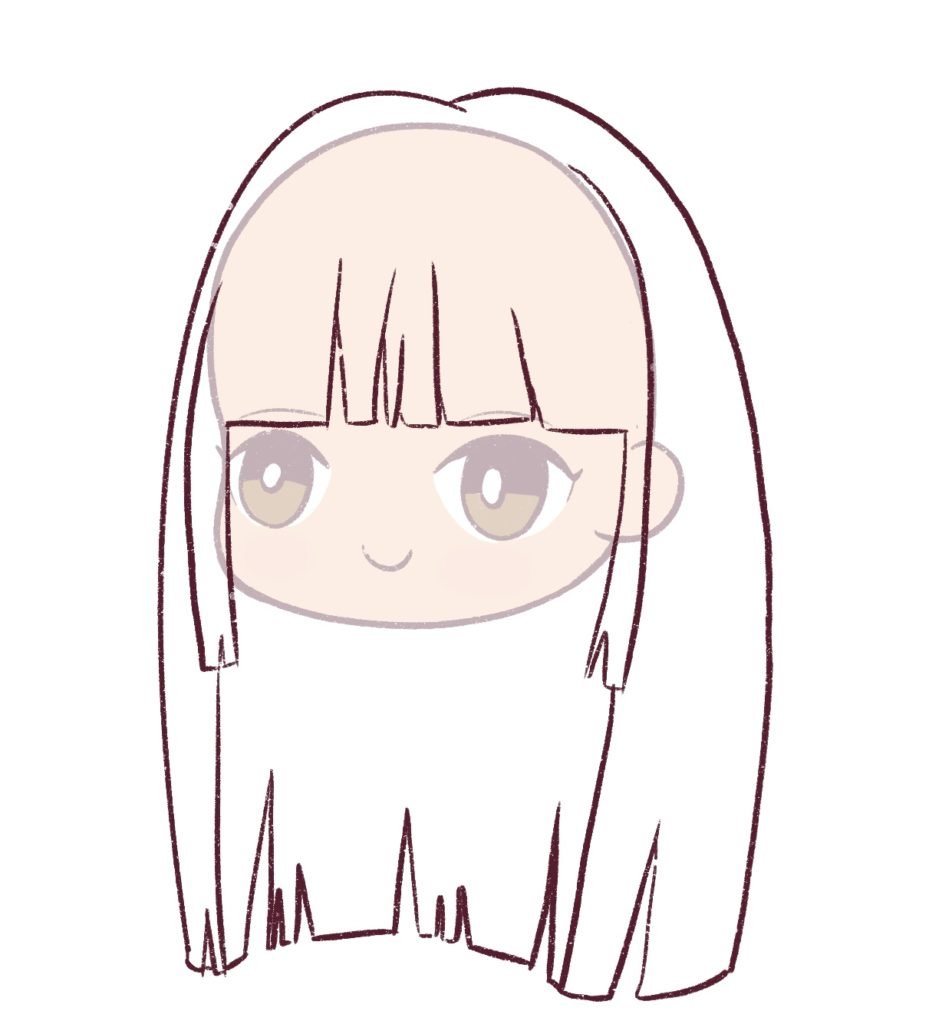
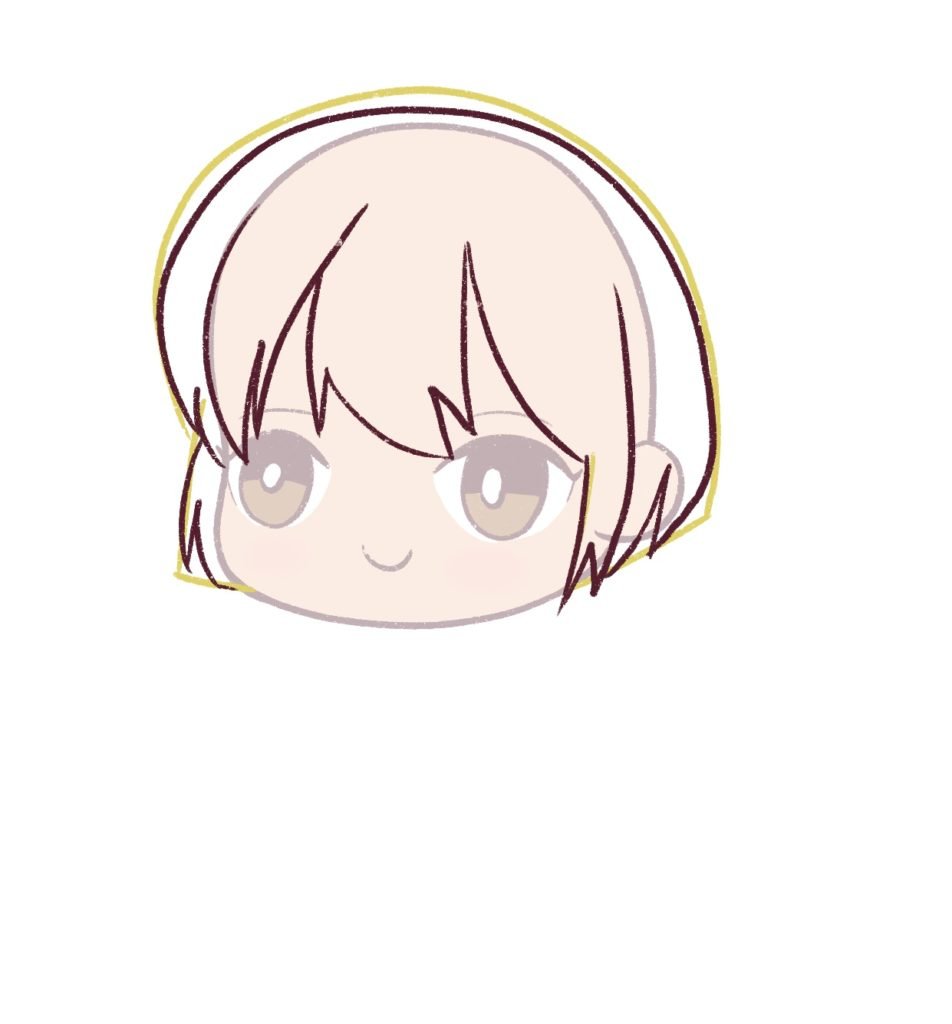
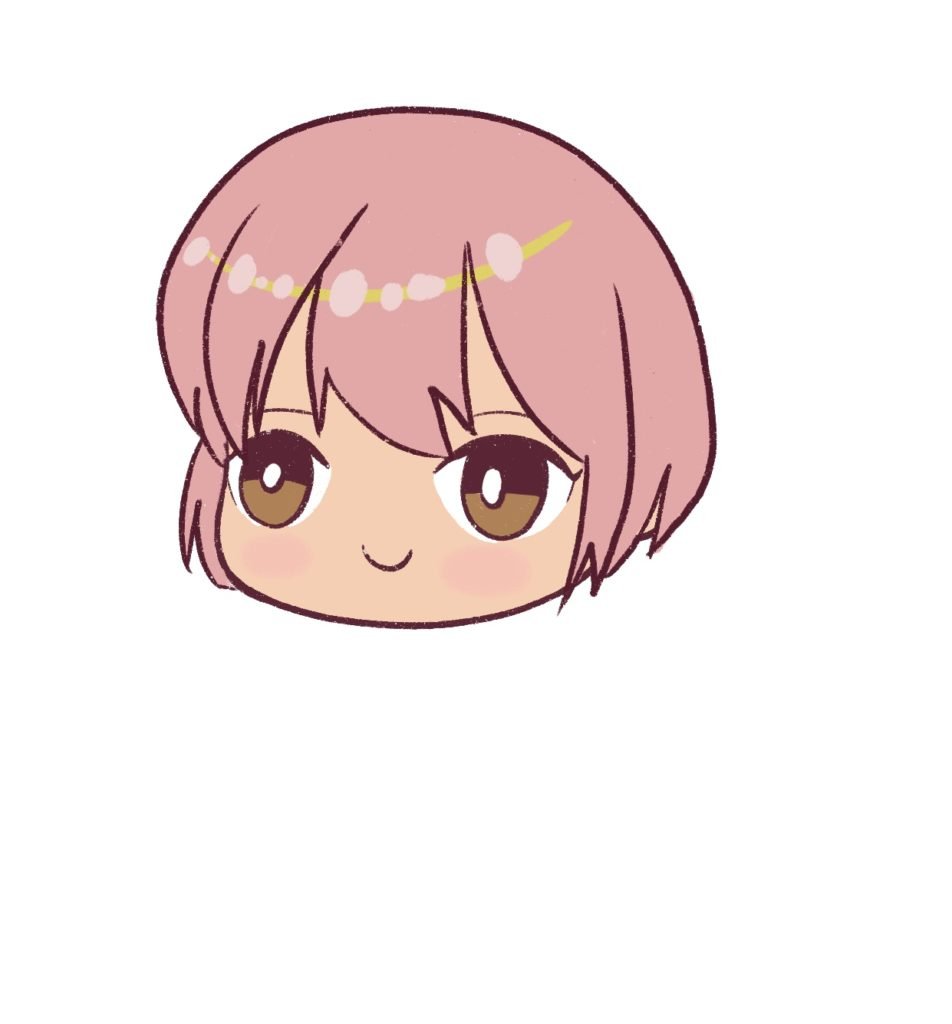
I’m really happy with how the long hair looks on this chibi girl so I can start coloring it now.
You can color your chibi’s hair any color! But for this hairstyle, I’ll go with black.
Step 3: Coloring your chibi hair
Remember, when coloring your hair black, you want to choose a dark shade of purple or blue. This will make your chibi hair look more natural.
It’s a very important lesson in color theory – we never use pure black because it looks off. You have to use dark shades of blue or purple.
So, I’m going to use a dark purplish-blue.
And remember to color the inner portion of the hair a darker color. This is how we add shadows to the chibi hair.
Now, it’s time to add the highlights.
Before you start adding highlights think of where the light is going to hit your chibi character’s hair.
The highlights will also be curved because heads are round and not flat. Refer the arrow below to understand this better.
I always add a small line to help me picture where the highlights will be.
Now on a new layer and using the Syrup paintbrush tool (free in Procreate), I will add small circles like this:
Next, change the opacity of the layer to 15% and change the blending mode to “Add.” This will result in the highlights looking like this:
I’ve also gone ahead and added some highlights to the edge of her hair and the side bangs.
You can add more detail to your chibi hair if you want, but I prefer ending it here.
I’m happy with how this looks!
And we’ve officially learned how to draw chibi hair.
But I’m going to show you how to draw more chibi hairstyles so that there’s no confusion.
Let’s move on.
Step 4: Drawing short chibi hair
Okay, we’ve learned how to draw long chibi hair, now let’s see how we can draw short hair.
We’ll start with the same face and then just draw a simple outline of how we want the hair to look first.
I do want to add bangs and make the hair short like a bob cut. I already have a tutorial that teaches how to draw bob cuts here.
Take your time with the outline. You want to take your time when you’re drawing hair on your chibi character. You can even use references of real people and draw their hairstyles on your chibi character.
I’m going to start with the bangs since they’re easy to draw.
Instead of drawing straight or blunt bangs, I’ll go with pointy bangs.
I’m going to divide it into more sections and just continue drawing pointy bangs till I reach the ear.
Now, I’ll start drawing the rest of her hair.


I’ll maintain the same pointy edges when drawing the rest of her bob cut. This will make the character look more cute and adorable.
I’m actually happy with how the outline looks so I am going to now color her hair. I’ll go with a nice custard pink color this time.

Now, it’s time to draw the highlights. Remember what I said earlier about drawing a rough line to remember where to draw the highlights? I’ll just draw it quickly.

And now, I’ll add the highlights one by one onto her bangs.
Because the bangs are protruding, shadows will be formed on the skin and even behind the bangs. Take note of how the light falls on the hair when drawing light and shadows.
And we’re done!
It’s completed!
And we’ve just learned how to draw and color a bob cut on our chibi character.
Doesn’t it look adorable?
Let’s move on to another type of hairstyle. This time let’s do space buns.
Step 5: Drawing space buns on your chibi character
I have a detailed post on different types of space buns you can draw on your cartoon or anime character here if you’re looking for some cool references.
But in this post, I’ll draw space buns along with some nice bangs and side bangs.
Let’s begin.
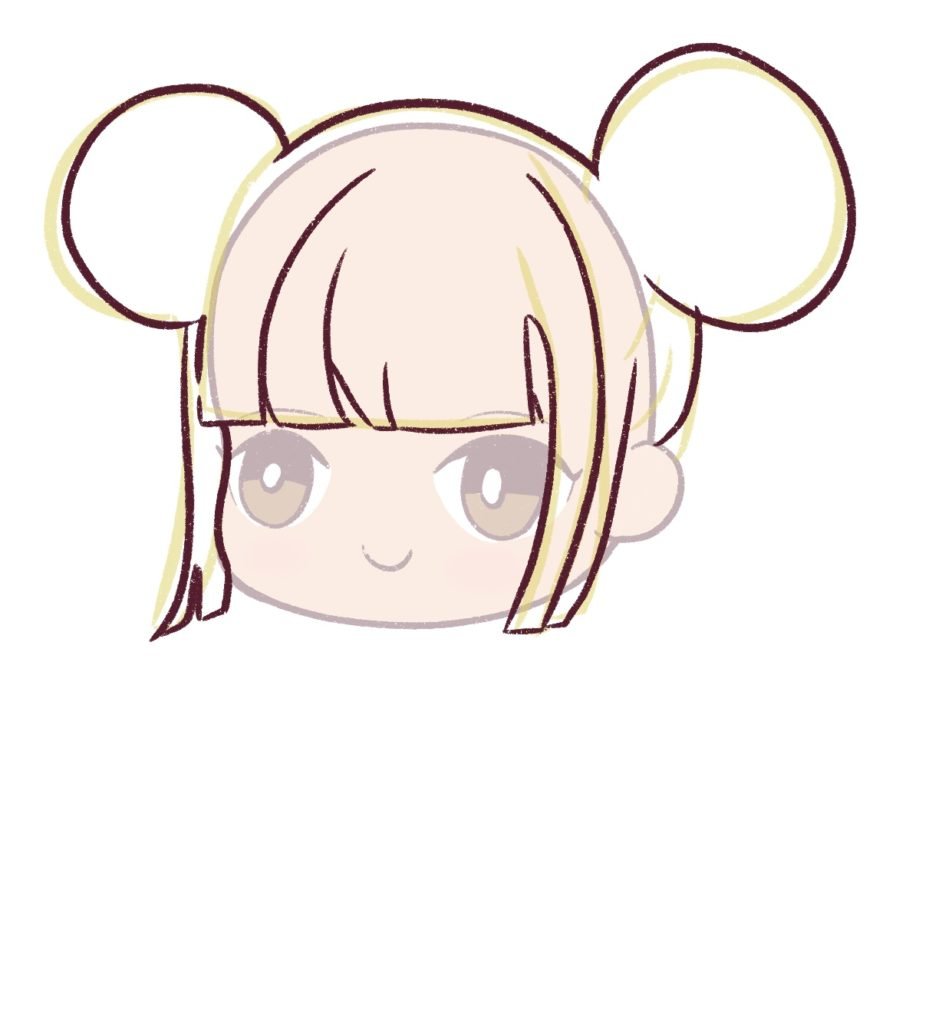
First, I’ll draw an outline just to make things easier and understand where I am going to place the buns and how I want the side bangs to look.
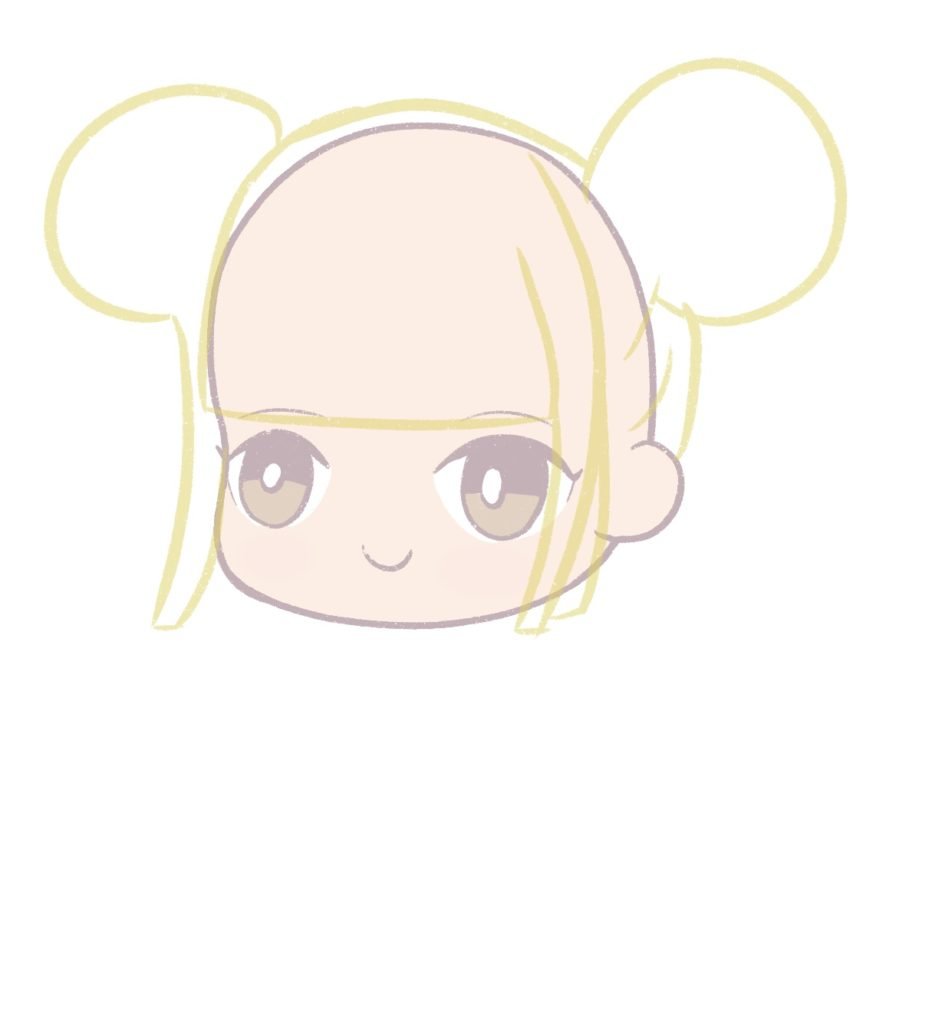
Now, on a new layer, I’m going to start drawing the bangs (straight this time) and draw the side bangs.
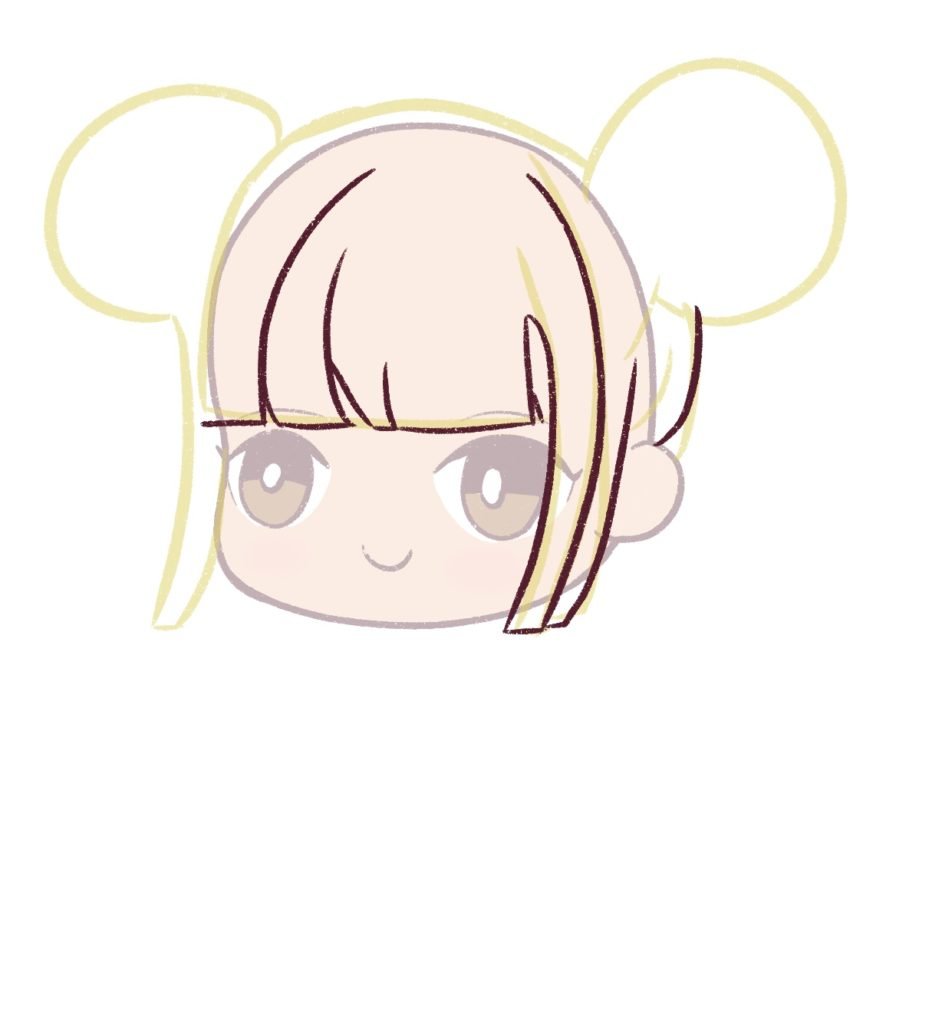
Using the same method as above, I’ll complete the outline of the chibi hair and once I’m done, I’m just going to erase all the rough lines and make sure there are no mistakes.
I’m really happy with how the buns look on this chibi character and I’m going to add some lines to add some definition to her hair.
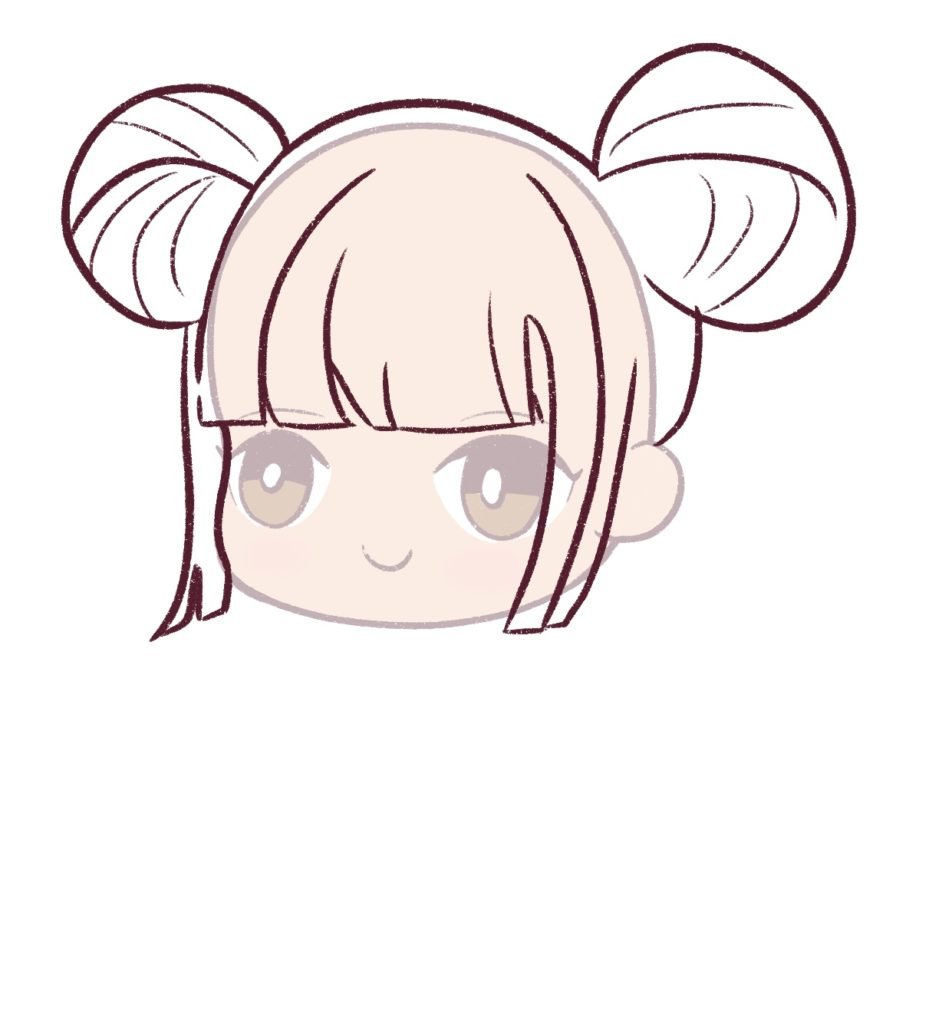
Note, how I’ve added a few lines and it really makes the hair buns look so adorable.
Now, I’ll color the hair with a simple base color – for this drawing, I am going to go with a light blonde just for fun!
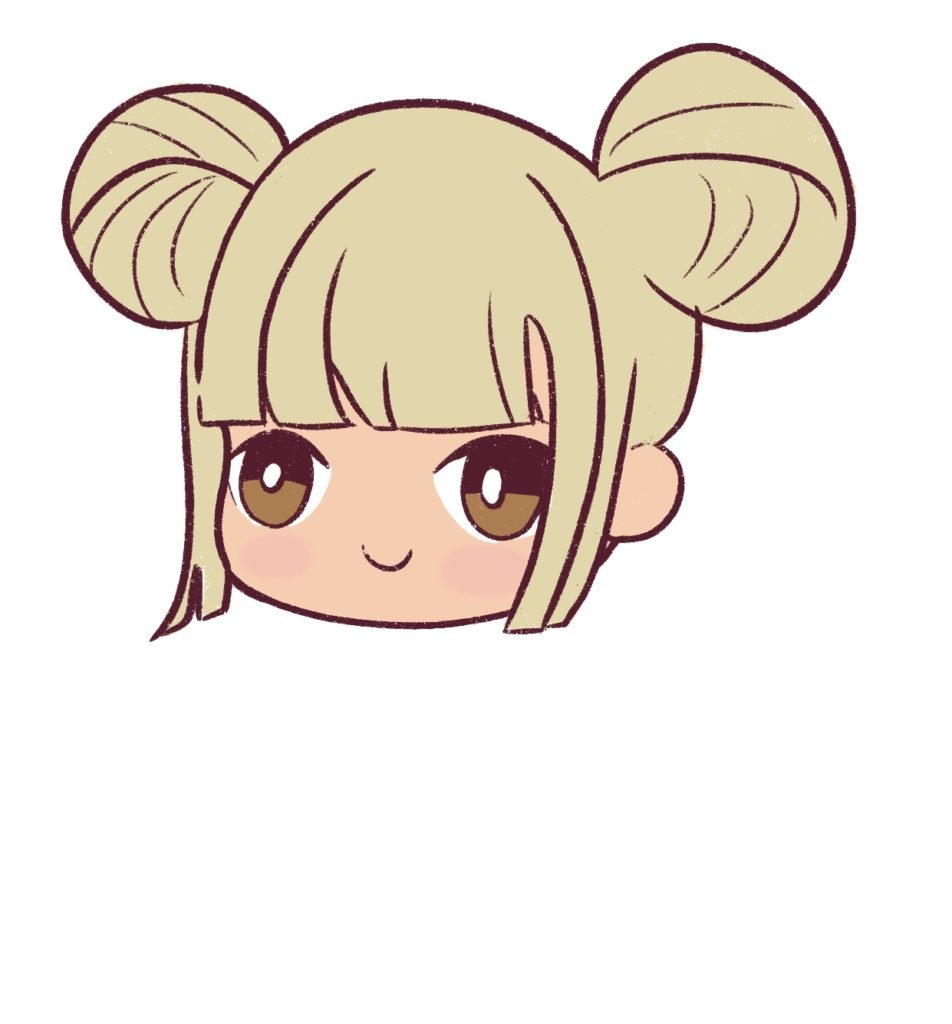
And just like before, I will add some highlights to make the hair look more beautiful.

And we’re done!
We’ve learned how to draw chibi hair buns in this tutorial!
Let’s move on to a very popular anime and chibi hairstyle – drawing ponytails
Step 6: How to draw a ponytail on your chibi character
Ponytails are super popular when drawing anime and chibi hair.
So first, I’ll start with a simple guideline. I’m going to make the ponytail super poofy and voluminous just to give her that extra zing. I also have a post on drawing ponytails here if you’re interested in drawing more types of ponytails.
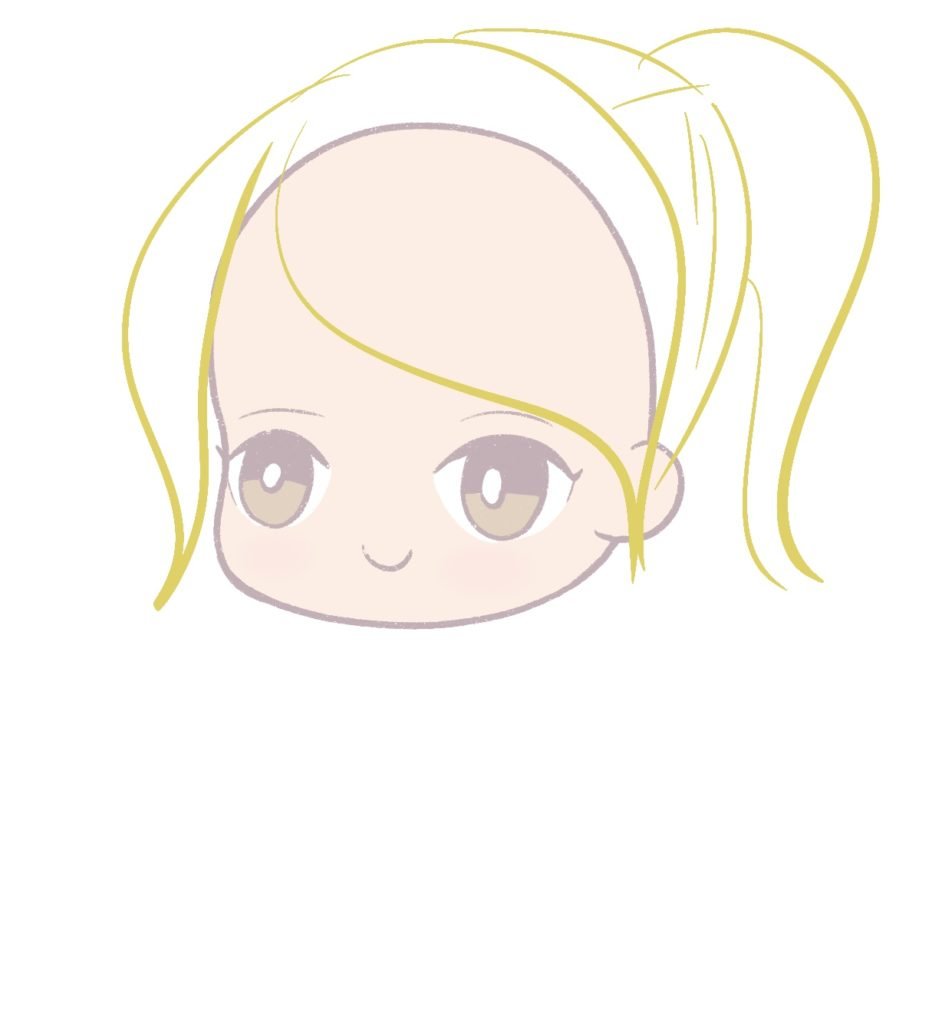
Once I’m done with the outline, I’ll start drawing the bangs.
Although the bangs are pointy, I’m going to drag it sidewards just to give her that edgy look.
You can even curl some locks of her hair like how I’m doing below:
And I’ll add a slight curl to her ponytail as well just to make this chibi girl look more chic and cute.
Once you’re happy with the outline, you can go ahead and add more detail to her hair.
For this piece, I will color her hair a nice chestnut brown.
And finally, I will add the highlights and shadows to this chibi hair to complete the look.

And we are officially done!
We’ve learned to draw a simple ponytail on our chibi character! Please pick up this free template so you can practice more chibi hairstyles!
[convertkit form=3469776]
Takeaway – How to draw chibi hair + resources
Drawing Anime and Chibi hair take some time but I am going to attach a few resources below that will really help you.
If you want to see more tutorials on hair and people, just leave a comment down below. You can check out my other posts on drawing hair over here.
I will be adding more hair drawing tutorials to this blog, so keep a lookout!
If you are looking for books on how to draw anime and chibi faces or how to draw anime hairstyles, take a look at these books:
I have found an in-depth course on Udemy that teaches how to draw chibi characters. It’s really beautiful and helpful, please check it out.

What I love about this course is that you will learn how to draw chibis from scratch. This course starts with the basics and includes 11 hours of video content that will teach you:
- The basics of Photoshop so you learn how to draw (you can use any digital tool or even pencil and markers)
- How to draw chibi bodies and a variety of heads using simple shapes
- How to draw male and female clothes and even draw folds on the clothes
- How to draw different types of hair and even color the hair
- How to color the characters skin, hair and clothes
You will have lifetime access to the course and you can ask the course creator any questions and she will help you out along the way!
I loved this course because it’s so beautifully detailed. She teaches how to draw different lengths and different types of hair:

And the coloring section is even more detailed.
If you are just getting started with ProCreate, I highly recommend this course: Procreate for Beginners: Digital Illustration 101
You may also enjoy:
- How to draw bangs
- How to draw space buns
- The ultimate guide on drawing different types of ponytails
- How to draw mermaid hair (in different poses)
- How to draw cartoon hair on Procreate (easy tutorial for beginners)
- How to draw a mullet
- How to draw wet hair
- How to draw afro hair
- How to draw a bob cut
- How to draw a 90s anime style girl
- How to draw Anime dreads


Leave a Comment